How to import Snowflake datasets into CARTO
Import Snowflake datasets into your CARTO account.
This tutorial demonstrates how to import Snowflake datasets into CARTO.
Introduction
The CARTO Snowflake connector allows you to import datasets from the Snowflake cloud data platform into CARTO. You can then use CARTO to create easy-to-share map dashboards, perform spatial data science analysis or create spatial applications.
Registering a connection to Snowflake
The first thing you need to do is to register a connection to your Snowflake account. Please read the corresponding section from the Working with Connections tutorial to setup a connection.
Importing your Snowflake dataset
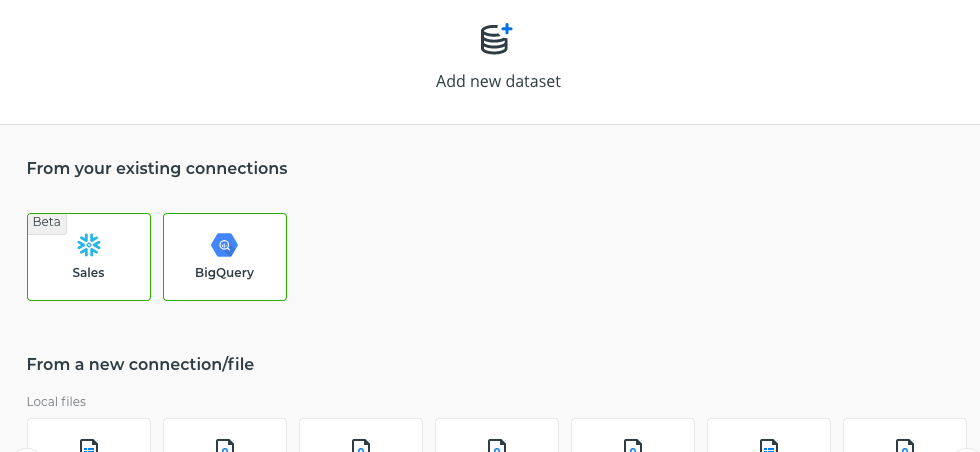
Once you have registered a connection to Snowflake, you have two different ways to import a dataset:
- Clicking on the Snowflake connection in the “Your connections” tab (Data page)

- Clicking on the “New dataset” button and selecting the Snowflake connection from the “From your existing connections” section
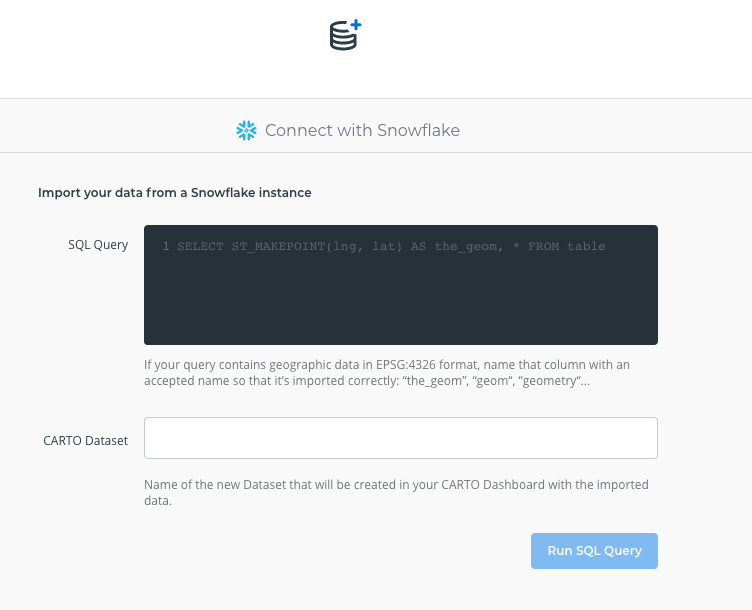
In both cases, you will be redirected to a page where you need to specify the SQL query that will be run. The results of this query will be imported to a CARTO dataset. This dataset is titled according to the name specified in the CARTO dataset input field.
- If your Snowflake table contains a column with GEOGRAPHY data type, you can import the data by renaming (aliasing) it to
the_geom:
SELECT geography_field AS the_geom, field2, field3 FROM table
- If your Snowflake table contains two separate columns with longitude and latitude information, you can import the data by creating a Point GEOGRAPHY and renaming it to
the_geom:
SELECT ST_MAKEPOINT(lng, lat) AS the_geom, field2, field3 FROM table
- When you have specified your SQL query and the name for your new dataset, the “Run SQL Query” button becomes enabled. When you click this button, CARTO will verify the query syntax. If everything is OK, the next screen lets you specify the frequency for updating your CARTO dataset if you’d like to keep it in sync with the Snowflake table.
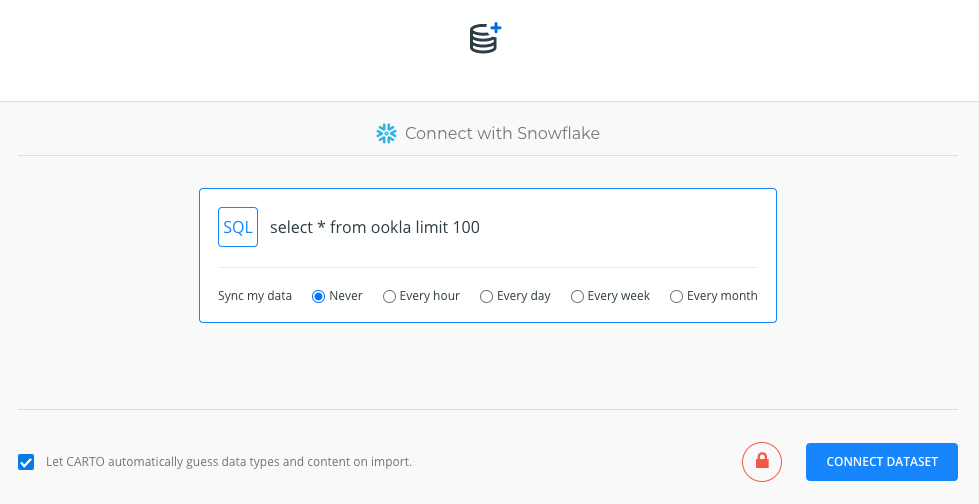
- Finally, you must click the “CONNECT DATASET” button to begin the import operation. When the operation finishes, you will be presented with a preview of the dataset. From this screen you can directly create a map with your imported dataset.

This project has received funding from the European Union’s Horizon 2020 research and innovation programme under grant agreement No 960401.