How to connect to CARTO from external applications using ODBC
Connecting to CARTO from external applications using ODBC.
This tutorial demonstrates how to connect with your CARTO database using an ODBC connection. We strongly recommend reading the Direct SQL Connection article to learn more about that feature before reading this one.
Introduction
Some apps like Tableau Desktop require you to specify the database name; others like Power BI require that database name is left blank. When using ODBC connections you should always use the RSA PEM file, with “.key” extension.
This tutorial will demonstrate how you can create a DSN using the ODBC Data Sources application included with the Windows operating system.
Warning for macOS and Linux users
If you are using macOS or Linux, you can create ODBC DSNs using ini files or GUI applications like ODBC Manager.
Create a DSN using ODBC Data Sources on Windows
Launch ODBC Data Sources application
-
If it has not been previously installed, download and install the PostgreSQL ODBC driver (MSI) from the this URL.
-
Create the following folder on your computer:
C:\Users\<username>\AppData\Roaming\postgresql -
Copy the “server_ca.pem” file to the folder created in step 2 and rename the file to root.crt.
-
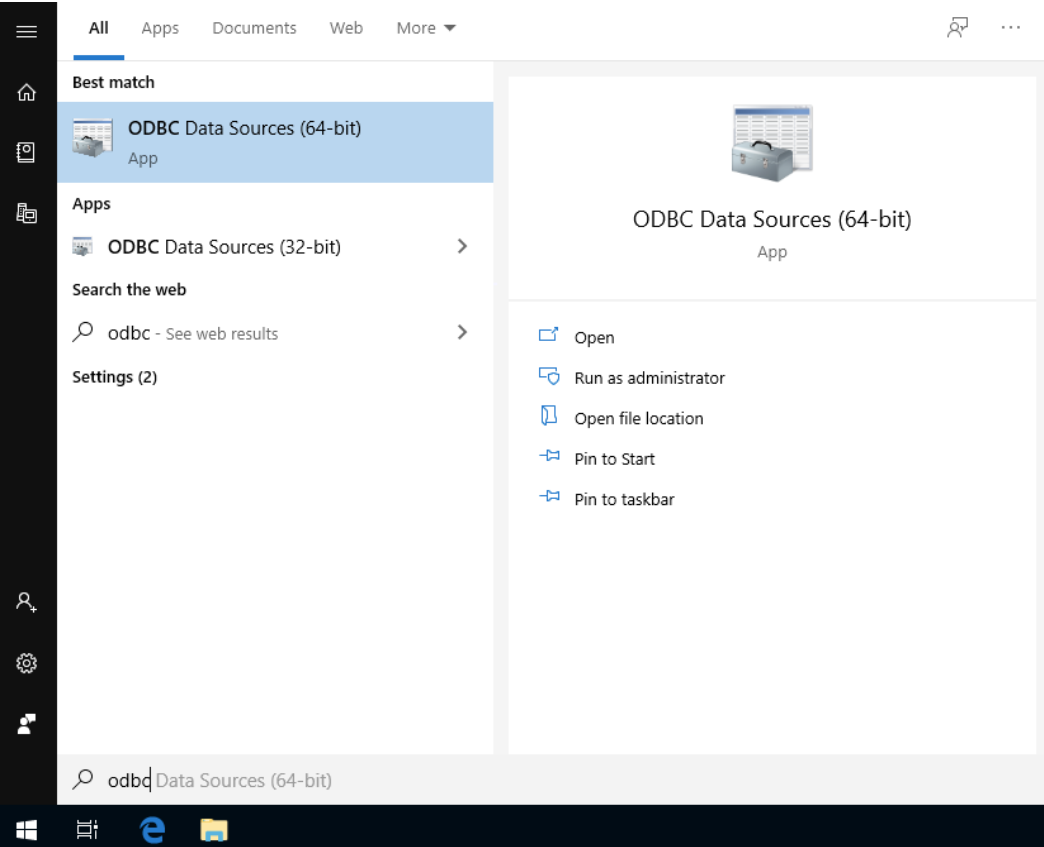
Launch the ODBC Data Sources (64 bits) application
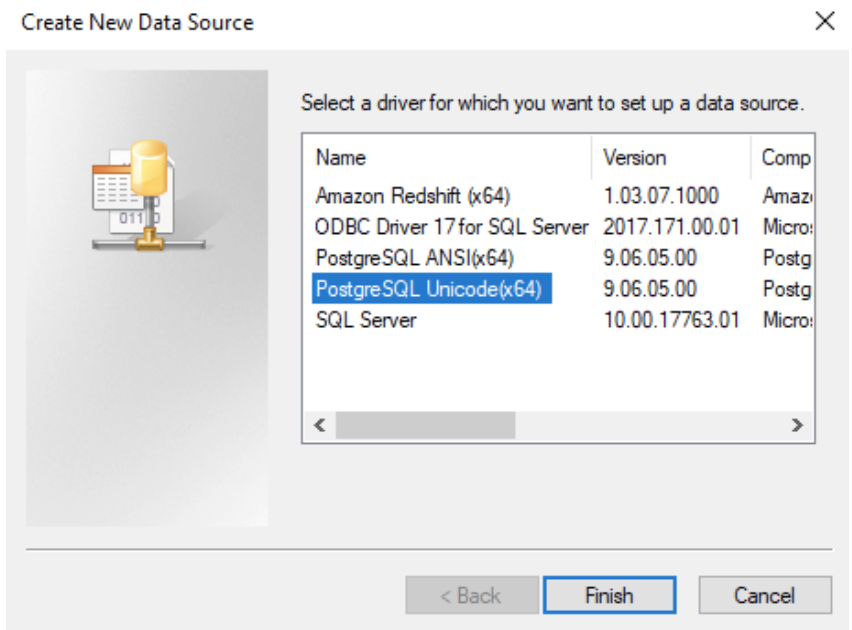
Add System DSN specifying the PostgreSQL Unicode (x64) driver
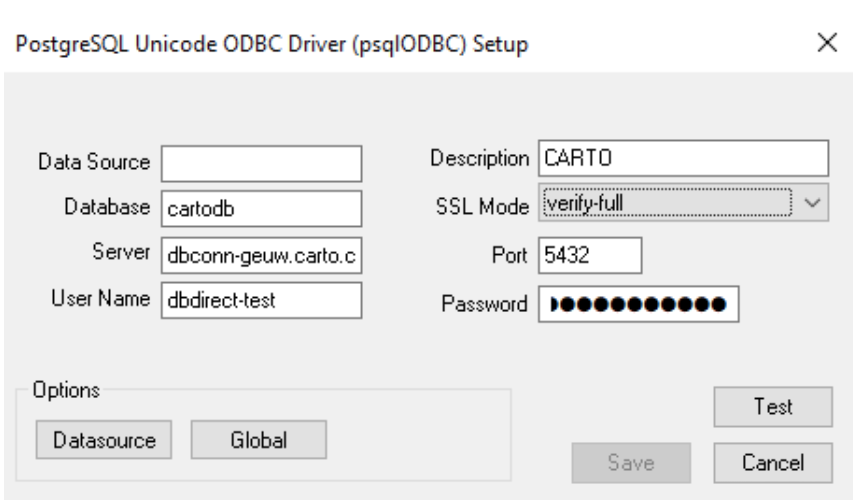
Add the following connect options:
- Data Source:
CARTO - Database:
blankorcartodb(depending on application) - Server:
dbconn-geuw.carto.comordbconn-gusc.carto.com - User Name:
<your CARTO username> - SSL Mode:
verify-fullif you want to use TLS certificates for client authentication orverify-caif you don’t want to use it - Port:
5432 - Password:
<your API key>
Setting libpq parameters
This step assumes that you have already copied the files to the C:\Certs directory. If you haven’t, we strongly recommend doing that before continuing this configuration step.
Once you added the system DSN parameters and copied the files to C:\Certs directory, you would need to configure the libpq parameters.
In order to do that, click on the option Options -> Datasource. Within this menu, go to Page 3 and enter the next libpq parameters.
sslcert=C:\\Certs\\client.crt sslkey=C:\\Certs\\client.keysslrootcert=C:\\Certs\\server_ca.pemapplication_name=[Tableau|PowerBI|Qlik|...]
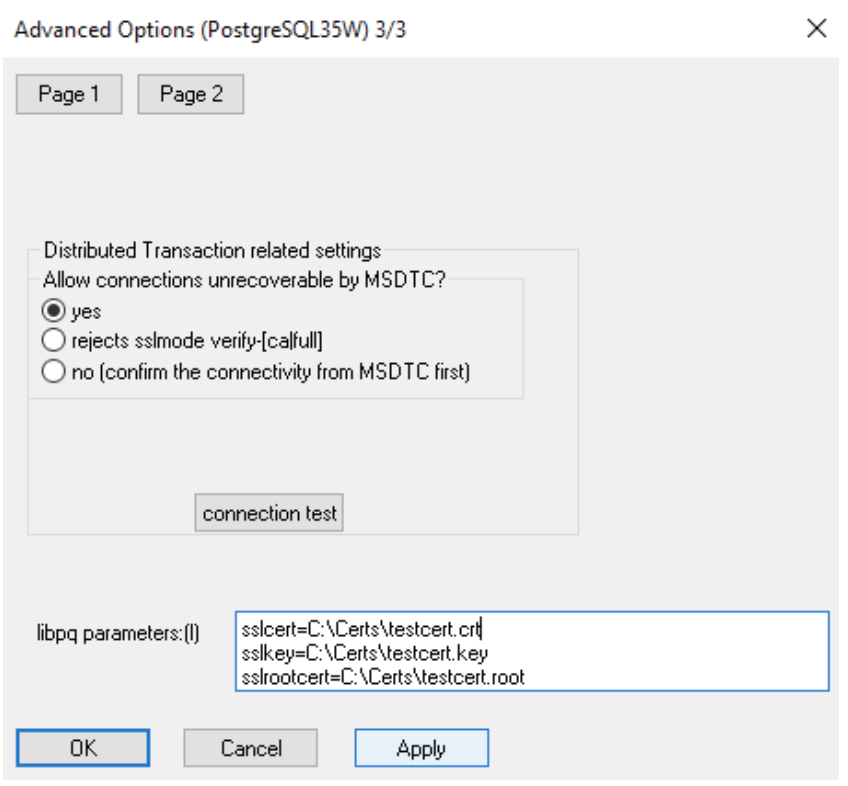
If you are not using TLS certificates for client authentication, you don’t need to add the sslcertand sslkey parameters.
After enter the parameters, click on Apply to set them. Click on OK button to close the Datasource dialog.
On the main dialog, click on Test to verify that you can connect successfully to CARTO.