CartoCSS Properties
Each CartoCSS map category has its own configurable properties. You can apply multiple symbolizers and properties to the same map layer. Navigate to a selected symbolizer to view a description of the CartoCSS property, sample CartoCSS code, the default value, and the available values.
Warning: CARTO is currently maintaining this library of CartoCSS properties and values. This content was adapted from the open source material provided by Mapbox, who has ceased active development of CartoCSS documentation.
CartoCSS Symbolizer
| Polygon (polygon) | Line (lines and polygons) | Markers (points, lines, and polygons) |
| Shield (points and lines) | Line Pattern (lines and polygons) | Polygon Pattern (polygons) |
| Raster (grid data layers) | Point (points) | Text (points, lines, and polygons) |
| Building |
CartoCSS Values
| Color | Float | URI |
| String | Boolean | Expression |
| Numbers | Percentages | Functions |
Other CartoCSS Parameters
| Common Elements | Map Background and String Elements | Debug mode |
In addition to customizing the look of your maps using CartoCSS, CARTO provides additional CartoCSS properties that you can apply to Torque style maps. For details, see CartoCSS Properties for Torque Style Maps.
Torque CartoCSS Properties
| -torque-frame-count | -torque-animation-duration | -torque-time-attribute |
| -torque-aggregation-function | -torque-resolution | -torque-data-aggregation |
Common Elements
These common element CartoCSS properties can be applied to any feature layer in a map. A feature layer is any data layer that contains points, lines, or polygons (not a basemap).
| comp-op | image-filters | opacity float |
comp-op keyword
| Description | The composite operation define how a layer behaves, relative to the layers around it. For example, you can style the way colors of overlapping markers interact. |
| Sample CartoCSS Code | comp-op: src-over; |
| Default Value | src-over, adds the current layer on top of other layers. |
| Available Values | clear src dst src-over dst-over src-in dst-in src-out dst-out src-atop dst-atop xor plus minus multiply screen overlay darken lighten color-dodge color-burn hard-light soft-light difference exclusion contrast invert invert-rgb grain-merge grain-extract hue saturation color value |
| Related Example | See CartoCSS Composite Operations for a description of composite operation effects. |
Note: The comp-op value can be applied as an overall style effect, or it can be applied to the specific symbolizer property, depending on the color blending (or alpha blending) operation that you are trying to achieve. For details, see Composite Operation Effects.
image-filters function
| Description | A list of image filters that applies a defined style to the active rendering canvas. |
| Sample CartoCSS Code | image-filters: functions(value, value, value); |
| Default Value | none, no filters applied. |
| Available Values | See functions. |
| Related Examples | You can add multiple image-filters to a layer, which creates a new active canvas and renders all of the defined styles, before compositing everything back into the main canvas. For example: image-filters:colorize-alpha(blue, cyan, green, yellow , orange, red);Applying stack-blur can help with gradient rendering of the image, i.e, image-filters: agg-stack-blur(#,#);.Note: There is a known issue about how tile edges are appearing. |
opacity float
| Description | An alpha value for the style. This indicates that the alpha value is applied to all features in a separate buffer, then composited back to main buffer. |
| Sample CartoCSS Code | opacity: 1; |
| Default Value | 1, no separate buffer is used and no alpha is applied to the style after rendering. |
| Available Values | See float. |
Map Background and String Elements
These generic CartoCSS background and string element properties can be applied to any layer in a map.
| background-image | background-image-comp-op | background-image-opacity |
| buffer-size |
background-image uri
| Description | An image that appears as the map background. This image appears underneath any other applied styles on the map. |
| Sample CartoCSS Code | background-image: url(imageurl); |
| Default Value | This parameter is not applied by default. The default background image is transparent. |
| Available Values | See uri. |
Note: The background-image-uri CartoCSS property is only supported when using the Maps API with Carto.js, not with the CARTO Editor.
background-image-comp-op keyword
| Description | Sets the compositing operation used to blend the image into the background. |
| Sample CartoCSS Code | background-image-comp-op keyword |
| Default Value | src-over, the background image is placed on top of any existing background-image. |
| Available Values | clear src dst src-over dst-over src-in dst-in src-out dst-out src-atop dst-atop xor plus minus multiply screen overlay darken lighten color-dodge color-burn hard-light soft-light difference exclusion contrast invert invert-rgb grain-merge grain-extract hue saturation color value |
Note: The background-image-comp-op CartoCSS property is only supported when using the Maps API with Carto.js, not with the CARTO Editor.
background-image-opacity float
| Description | Sets the opacity of the image. |
| Sample CartoCSS Code | background-image-opacity: 1; |
| Default Value | 1, indicates that the image opacity will not be changed when applied to the map background). |
| Available Values | See float. |
Note: The background-image-opacity-float CartoCSS property is only supported when using the Maps API with Carto.js, not with the CARTO Editor.
buffer-size float
| Description | Ensures that labels crossing tile boundaries are equally rendered in each tile. |
| Sample CartoCSS Code | buffer-size: float; |
| Default Value | 0, no buffer is applied by default. |
| Available Values | See float. |
Note: Enter any values in pixels and do not apply this property in combination with "avoid-edges".
Polygon
These CartoCSS properties can be applied to the fill and outline of a polygon layer.
| polygon-fill | polygon-opacity | polygon-gamma |
| polygon-gamma-method | polygon-clip | polygon-simplify |
| polygon-simplify-algorithm | polygon-smooth | polygon-geometry-transform |
| polygon-comp-op |
polygon-fill color
| Description | The fill color assigned to a polygon. |
| Sample CartoCSS Code | polygon-fill: rgba(128, 128, 128, 1); |
| Default Value | Gray (as indicated with the rgb color=128, 128, 128) and fully opaque (as indicated with alpha=1). |
| Available Values | See color. |
polygon-opacity float
| Description | The opacity of the polygon. |
| Sample CartoCSS Code | polygon-opacity: 1; |
| Default Value | 1, indicates that the default opacity as opaque. |
| Available Values | See float. |
polygon-gamma float
| Description | The level of antialiasing (smoothness of oversampling) of polygon edges. A range of 0-5 represents the most antialiased to the least antialiased. |
| Sample CartoCSS Code | polygon-gamma: 1; |
| Default Value | 1, fully antialiased, where polygons do not appear jagged. |
| Available Values | 0, 1, 2, 3, 4, 5Tip: If you notice that there are spaces between polygons on your map, enter anti-antialiased values, in increments closer to 0. |
polygon-gamma-method keyword
| Description | An anti-grain geometry method that represents a 2D rendering library, specific to controlling the quality of antialiasing and used to calculate pixel gamma (pow(x,gamma), which produces slightly smoother line and polygon antialiasing than the 'linear' method. |
| Sample CartoCSS Code | polygon-gamma-method: power; |
| Default Value | power |
| Available Values | power linear none threshold multiply |
Tip: Mapnik uses this method in combination with the 'gamma' value (which defaults to 1). These methods are documented in the the AGG GitHub source.
polygon-clip boolean
| Description | By default, geometries are clipped to map bounds. You can disable polygon clips to avoid rendering artifacts on a map if are having performance issues. |
| Sample CartoCSS Code | polygon-clip: true; |
| Default Value | true, geometry is clipped to map bounds before rendering. |
| Available Values | See boolean. |
polygon-simplify float
| Description | Simplifies geometries by a given tolerance value. |
| Sample CartoCSS Code | polygon-simplify: 0; |
| Default Value | 0, geometry is not simplified. |
| Available Values | See float. |
Note: The polygon-simplify-float CartoCSS property is only supported when using the Maps API with carto.js, not with the CARTO Editor.
polygon-simplify-algorithm keyword
| Description | Simplifies geometries by a given algorithm value. |
| Sample CartoCSS Code | polygon-simplify-algorithm: radial-distance; |
| Default Value | radial-distance, geometry is simplified using the radial distance algorithm. |
| Available Values | radial-distance zhao-saalfeld visvalingam-whyatt |
polygon-smooth float
| Description | Smooths out geometry angles. |
| Sample CartoCSS Code | polygon-smooth: 0; |
| Default Value | 0, no smoothing is applied. |
| Available Values | 0, 1Note: 0 indicates no smoothing is applied. 1 indicates that it is fully smoothed. Values greater than 1 produce wild, looping geometries. It is suggested to use a range between 0-1 for this value. |
polygon-geometry-transform functions
| Description | Applies transformation functions to the geometry. |
| Sample CartoCSS Code | polygon-geometry-transform: none; |
| Default Value | none, geometry is not transformed. |
| Available Values | See functions. |
polygon-comp-op keyword
| Description | The composite operation that defines how the symbolizer behaves relative to layers atop or below it. |
| Sample CartoCSS Code | polygon-comp-op: src-over; |
| Default Value | src-over, adds the current symbolizer on top of other symbolizers. |
| Available Values | clear src dst src-over dst-over src-in dst-in src-out dst-out src-atop dst-atop xor plus minus multiply screen overlay darken lighten color-dodge color-burn hard-light soft-light difference exclusion contrast invert invert-rgb grain-merge grain-extract hue saturation color value |
Line
These CartoCSS properties can be applied to both line and polygon layers.
line-color color
| Description | The color of the drawn line. |
| Sample CartoCSS Code | line-color: rgba(0,0,0,1); |
| Default Value | Black (as indicated with the rgb color=0, 0, 0) and fully opaque (as indicated with alpha=1). |
| Available Values | See color. |
line-width float
| Description | The width of a line, in pixels. |
| Sample CartoCSS Code | line-width: 1; |
| Default Value | 1 pixel. |
| Available Values | See float. |
line-opacity float
| Description | The opacity of a line. |
| Sample CartoCSS Code | line-opacity: 1; |
| Default Value | 1, the line is opaque. |
| Available Values | See float. |
line-join keyword
| Description | The behavior of lines when joined on a map. |
| Sample CartoCSS Code | line-join: miter; |
| Default Value | miter, joins the edges at the corners. |
| Available Values | miter round bevel |
line-cap keyword
| Description | The display of line endings. |
| Sample CartoCSS Code | line-cap: butt; |
| Default Value | butt, the ends of lines are squared off at the endpoints. |
| Available Values | butt round square |
line-gamma float
| Description | The level of antialiasing (smoothness of oversampling) of a stroke line. |
| Sample CartoCSS Code | line-gamma: 1; |
| Default Value | 1, is fully antialiased. |
| Available Values | 0-1. See float. |
line-gamma-method keyword
| Description | An anti-grain geometry method that represents a 2D rendering library, specific to controlling the quality of antialiasing and used to calculate pixel gamma (pow(x,gamma), which produces slightly smoother line and polygon antialiasing than the 'linear' method. |
| Sample CartoCSS Code | line-gamma-method: power; |
| Default Value | power |
| Available Values | power linear none threshold multiply |
Tip: Mapnik uses this method in combination with the 'gamma' value (which defaults to 1). These methods are documented in the the AGG GitHub source.
line-dasharray numbers
| Description | A pair of length values [a,b], where (a) is the dash length and (b) is the gap length. You can enter more than two values for more complex patterns. |
| Sample CartoCSS Code | line-dasharray: none; |
| Default Value | none, a solid line appears. |
| Available Values | See numbers. |
line-dash-offset numbers
| Description | Sets the line dash pattern offset (pixel on, pixel off, pixel on, etc.) to create an animation display for the line. |
| Sample CartoCSS Code | line-dash-offset: none; |
| Default Value | none, a solid line appears. |
| Available Values | See numbers. |
Note: This is a valid parameter for SVG but is currently not supported for rendering. For example, a value of 0 indicates that there is no line, a value of 1 displays a line. A line-dash-offset value of 0 1 0 1 0 1 displays the line offset pattern. You can change the value by one pixel 1 0 1 0 1 0 to change the offset of the line.
line-miterlimit float
| Description | The limit on the ratio of the miter length to the stroke-width. This is used to automatically convert miter joins to bevel joins for sharp angles, to avoid the miter extending beyond the thickness of the stroking path. Typically, this property does not need to be set. However, if you have jaggy artifacts during rendering, defining a larger value for this property helps. |
| Sample CartoCSS Code | line-miterlimit: 4; |
| Default Value | 4, auto-convert miters to bevel line joins when theta is less than 29 degrees as per the SVG definitions: 'miterLength / stroke-width = 1 / sin ( theta / 2 )') |
| Available Values | See float. |
Note: Define values as per SVG transformation definitions- which are values separated by whitespace and/or commas, from right to left.
line-clip boolean
| Description | By default, geometries are clipped to map bounds. You can disable line clips to avoid rendering artifacts on a map if are having performance issues. |
| Sample CartoCSS Code | line-clip: true; |
| Default Value | true, geometry is clipped to map bounds before rendering. |
| Available Values | See boolean. |
line-simplify float
| Description | Simplifies geometries by a given tolerance value. |
| Sample CartoCSS Code | line-simplify: 0; |
| Default Value | 0, geometry is not simplified. |
| Available Values | See float. |
Note: The line-simplify-float CartoCSS property is only supported when using the Maps API with CARTO.js, not with the CARTO Editor.
line-simplify-algorithm keyword
| Description | Simplifies geometries by a given algorithm value. |
| Sample CartoCSS Code | line-simplify-algorithm: radial-distance; |
| Default Value | radial-distance, geometry is simplified using the radial distance algorithm. |
| Available Values | radial-distance zhao-saalfeld visvalingam-whyatt |
Note: The line-simplify-algorithm-keyword CartoCSS property is only supported when using the Maps API with CARTO.js, not with the CARTO Editor.
line-smooth float
| Description | Smooths out geometry angles. |
| Sample CartoCSS Code | line-smooth: 0; |
| Default Value | 0, no smoothing is applied. |
| Available Values | 0 1Note: 0 indicates no smoothing is applied. 1 indicates that it is fully smoothed. Values greater than 1 produce wild, looping geometries. It is suggested to use a range between 0-1 for this value. |
line-offset float
| Description | Offsets a line parallel to its actual path, defined by a number in pixels. Positive values move the line left, negative values move it right (relative to the directionality of the line). |
| Sample CartoCSS Code | line-offset: 0; |
| Default Value | 0, no offset is applied. |
| Available Values | See float. |
line-rasterizer keyword
| Description | Exposes an alternate AGG (Anti-Grain Geometry) rendering method that sacrifices some accuracy for speed. |
| Sample CartoCSS Code | line-rasterizer: full; |
| Default Value | full |
| Available Values | full fast |
line-geometry-transform functions
| Description | Applies transformation functions to the geometry. |
| Sample CartoCSS Code | line-geometry-transform: none; |
| Default Value | none, geometry is not transformed. |
| Available Values | See functions. |
line-comp-op keyword
| Description | The composite operation that defines how the symbolizer behaves relative to layers atop or below it. |
| Sample CartoCSS Code | line-comp-op: src-over; |
| Default Value | src-over, adds the current symbolizer on top of other symbolizers. |
| Available Values | clear src dst src-over dst-over src-in dst-in src-out dst-out src-atop dst-atop xor plus minus multiply screen overlay darken lighten color-dodge color-burn hard-light soft-light difference exclusion contrast invert invert-rgb grain-merge grain-extract hue saturation color value |
Markers
These CartoCSS properties can be applied to point, line and polygon layers.
marker-file uri
| Description | Displays an SVG file at each marker placement. If no file is specified, an ellipse is shown for the marker. |
| Sample CartoCSS Code | marker-file: url(http://www.clipartbest.com/cliparts/nTX/AGX/nTXAGXyTB.svg); |
| Default Value | none, an ellipse appears if the width does not equal the height.Note: If the height is equal to the width, a circle appears. |
| Available Values | See uri. |
marker-opacity float
| Description | Sets the overall opacity of the marker, overriding any opacity and fill-opacity settings. |
| Sample CartoCSS Code | marker-opacity: 1; |
| Default Value | 1, the opacity and fill-opacity are applied. |
| Available Values | See float. |
marker-fill-opacity float
| Description | The fill opacity of the marker. |
| Sample CartoCSS Code | marker-fill-opacity: 1; |
| Default Value | 1, the fill-opacity is opaque.Tip: If you want to apply opacity to the entire symbol, apply the marker-opacity property. Similarly, for a line, apply the marker-line-opacity property. |
| Available Values | See float. |
marker-line-color color
| Description | The color of the stroke around a marker shape. |
| Sample CartoCSS Code | marker-line-color: black; |
| Default Value | black |
| Available Values | See color. |
marker-line-width float
| Description | The width of the line around the marker, in pixels, centered on the edge. |
| Sample CartoCSS Code | marker-line-width: 2; |
| Default Value | A defined pixel |
| Available Values | See float. |
| Related Example | The marker-line-width is positioned on the boundary, so high values can cover the area itself. For example, if you have a marker with a width (diameter) of 4, and add a line width of 3, 1.5 pixels of the line width appears on the inside of the edge, and covers the entire marker. |
marker-line-opacity float
| Description | The opacity of the marker line. |
| Sample CartoCSS Code | marker-line-opacity: 1; |
| Default Value | 1, the line is opaque. |
| Available Values | See float. |
marker-placement keyword
| Description | Places markers on a point, in the center of a polygon, or on a line. |
| Sample CartoCSS Code | marker-placement: point; |
| Default Value | point, places markers at the center point (centroid) of the geometry. |
| Available Values | point line interiorNote: If placing markers on a line, markers appear multiple times along a line. You can apply 'interior' to ensure correct placement on a line. Points placed on polygons are forced to be inside the polygon interior. |
Tip: See the note for how this property interacts with the Marker-multi-policy.
marker-multi-policy keyword
| Description | Enables you to control the rendering behavior for multi-geometries. |
| Sample CartoCSS Code | marker-multi-policy: each; |
| Default Value | each, all geometries display a marker. |
| Available Values | each whole largest |
| whole - indicates that the aggregate centroid between all geometries is applied | |
| largest - indicates that only the largest (by bounding box areas) renders a marker (similar to default text labeling behavior) |
Note: If the marker-placement property is also applied and the value is either point or interior, a marker is rendered for each placement. If you specified line as the marker-placement value, this marker-multi-policy property is not applied and all geometries display a marker.
marker-type keyword
| Description | Sets the default marker-type. If a SVG file is not defined with the marker-file property, an arrow, ellipse, or circle (if height is equal to width) is rendered. |
| Sample CartoCSS Code | marker-type: ellipse; |
| Default Value | ellipse |
| Available Values | arrow ellipse |
Note: If the height is equal to the width, a circle appears.
marker-width expression
| Description | If a default marker-type property is defined, this property indicates the width of the marker-type. |
| Sample CartoCSS Code | marker-width: 10.0; |
| Default Value | 10 |
| Available Values | See expression. |
marker-height expression
| Description | If a default marker-type property is defined, this property indicates the height of the marker-type. |
| Sample CartoCSS Code | marker-height: 10.0; |
| Default Value | 10 |
| Available Values | See expression |
marker-fill color
| Description | The fill color of the marker. |
| Sample CartoCSS Code | marker-fill: blue; |
| Default Value | blue |
| Available Values | See color. |
marker-allow-overlap boolean
| Description | Shows or hides overlapping markers on a map. |
| Sample CartoCSS Code | marker-allow-overlap: false; |
| Default Value | false, does not allow markers to overlap. Overlapping markers are not rendered if there are conflicts. Overlapping markers may appear when you zoom in, if there is room for markers to display. |
| Available Values | See boolean. |
marker-ignore-placement boolean
| Description | Prevents other placement properties from being rendered. |
| Sample CartoCSS Code | marker-ignore-placement: false; |
| Default Value | false, does not store placement geometries in the collision detector cache of the bbox (bounding box) |
| Available Values | See boolean. |
marker-spacing float
| Description | The space between repeated markers, in pixels. If spacing is less than the marker size, or larger than the line segment length, no markers are displayed. |
| Sample CartoCSS Code | marker-spacing: 100; |
| Default Value | 100 |
| Available Values | See float. |
marker-max-error float
| Description | The maximum difference between the actual marker placement and the marker-spacing parameter. |
| Sample CartoCSS Code | marker-max-error: 0.2; |
| Default Value | 0.2 |
| Available Values | See float. |
Note: Setting a high value can resolve placement conflicts with other symbolizers and improve rendering performance.
marker-transform functions
| Description | Defines SVG transformation functions to scale how markers appear. |
| Sample CartoCSS Code | marker-transform: scale (2,2); |
| Default Value | no transformation applied by default. |
| Available Values | See functions. |
Note: Define values as per SVG transformation definitions- which are values separated by whitespace and/or commas, from right to left.
marker-clip boolean
| Description | By default, geometries are clipped to map bounds. You can disable line clips to avoid rendering artifacts on a map if are having performance issues. |
| Sample CartoCSS Code | marker-clip: true; |
| Default Value | true, geometry is clipped to map bounds before rendering. |
| Available Values | See boolean. |
marker-smooth float
| Description | Smooths out geometry angles. |
| Sample CartoCSS Code | marker-smooth: float; |
| Default Value | 0, no smoothing is applied. |
| Available Values | See float. |
Note: 0 indicates no smoothing is applied. 1 indicates that it is fully smoothed. Values greater than 1 produce wild, looping geometries. It is suggested to use a range between 0-1 for this value.
marker-geometry-transform functions
| Description | Applies transformation functions to the geometry. |
| Sample CartoCSS Code | marker-geometry-transform: none; |
| Default Value | none, geometry is not transformed. |
| Available Values | See functions. |
marker-comp-op keyword
| Description | The composite operation that defines how the symbolizer behaves relative to layers atop or below it. |
| Sample CartoCSS Code | marker-comp-op: src-over; |
| Default Value | src-over, adds the current symbolizer on top of other symbolizers. |
| Available Values | clear src dst src-over dst-over src-in dst-in src-out dst-out src-atop dst-atop xor plus minus multiply screen overlay darken lighten color-dodge color-burn hard-light soft-light difference exclusion contrast invert invert-rgb grain-merge grain-extract hue saturation color value |
Shield
If you are displaying road shields on a map (for example, highway markers), these CartoCSS properties define the shield styling.
shield-file uri
| Description | The shield-file property is required before defining any shield styles. Define an image file to render the shield image. |
| Sample CartoCSS Code | shield-file: url(https://s3.amazonaws.com/com.cartodb.users-assets.production/production/username/assets/20150924175307shield2.png); |
| Default Value | none |
| Available Values | See uri. |
shield-name expression
| Description | The text name of a shield symbol on a map. Appears on top of the shield-file image by default. |
| Sample CartoCSS Code | shield-name: '[name_example]'; |
| Default Value | undefined |
| Available Values | See expression. The expression value is a data column specified by using brackets, as shown in the sample code above. |
Note: See shield-unlock-image to change how the shield-text appears relative to this shield-file image.
shield-face-name string
| Description | The font name and style for the shield-name property. |
| Sample CartoCSS Code | shield-face-name: ‘Open Sans Bold’; |
| Default Value | undefined |
| Available Values | See string. |
shield-unlock-image boolean
| Description | Sets the text alignment of the shield-name relative to the shield-file. |
| Sample CartoCSS Code | shield-unlock-image: false; |
| Default Value | false, the center of the shield-file image is the anchor for text positioning. |
| Available Values | See boolean. Note: If you are positioning text next to (as opposed to on top of a shield-file image), set the value to true. |
shield-size float
| Description | The size of the text for the shield-name property, in pixels. |
| Sample CartoCSS Code | shield-size: 12; |
| Default Value | undefined |
| Available Values | See float. |
shield-fill color
| Description | The fill color of the shield text. |
| Sample CartoCSS Code | shield-fill: #e16363; |
| Default Value | undefined |
| Available Values | See color. |
shield-placement keyword
| Description | Places shields on top of points, along multiple line places, on the vertexes of polygons, or in the interior inside a polygon. |
| Sample CartoCSS Code | shield-placement: point; |
| Default Value | point, the shield appears on the top of map points. |
| Available Values | point line vertex interior |
shield-avoid-edges boolean
| Description | Prevents shields from intersecting with tile boundaries. |
| Sample CartoCSS Code | shield-avoid-edges: false; |
| Default Value | false, shields do not intersect. |
| Available Values | See boolean. |
shield-allow-overlap boolean
| Description | Controls how shields appear when overlapping with other elements on the map. |
| Sample CartoCSS Code | shield-allow-overlap: false; |
| Default Value | false, shields do not overlap with other map elements. Overlapping shields are hidden. |
| Available Values | See boolean. |
shield-min-distance float
| Description | The minimum distance between the next shield symbol. (This does not apply to multiple shields at one point). |
| Sample CartoCSS Code | shield-min-distance: 0; |
| Default Value | 0 |
| Available Values | See float. |
shield-spacing float
| Description | The space between repeated shields, in pixels, on a line. |
| Sample CartoCSS Code | shield-spacing: 0; |
| Default Value | 0 |
| Available Values | See float. |
shield-min-padding float
| Description | The minimum distance, in pixels, that a shield is placed from the edge of a metatile (the tile/buffer space relationship). |
| Sample CartoCSS Code | shield-min-padding: 0; |
| Default Value | 0 |
| Available Values | See float. |
shield-wrap-width unsigned
| Description | The length of pixels that appears before the shield-name text wraps. |
| Sample CartoCSS Code | shield-wrap-width: 0; |
| Default Value | 0 |
| Available Values | Unsigned integer |
shield-wrap-before boolean
| Description | Determines how the wrap-text behaves relative to the wrap-width. |
| Sample CartoCSS Code | shield-wrap-before: false; |
| Default Value | false, wrapped text appears longer than the wrap-width. |
| Available Values | See boolean. Note: If value is true, the text wraps before wrap-width is reached. |
shield-wrap-character string
| Description | Enables you to wrap text with a character, rather than with a space. This is especially useful for long text names. |
| Sample CartoCSS Code | shield-wrap-character: '_'; |
| Default Value | undefined |
| Available Values | See string. |
shield-halo-fill color
| Description | Specifies the color of the halo around the text. |
| Sample CartoCSS Code | shield-halo-fill: #FFFFFF; |
| Default Value | #FFFFFF, the halo color is white by default |
| Available Values | See color. |
shield-halo-radius float
| Description | The radius of the halo, in pixels. |
| Sample CartoCSS Code | shield-halo-radius: 0; |
| Default Value | 0, no halo is applied. |
| Available Values | See float. |
shield-character-spacing unsigned
| Description | The horizontal space, in pixels, between text characters. |
| Sample CartoCSS Code | shield-character-spacing: unsigned; |
| Default Value | 0 |
| Available Values | Unsigned integer. |
Note: This property is not supported for line placement.
shield-line-spacing unsigned
| Description | The vertical spacing, in pixels, between two lines of multiline labels. |
| Sample CartoCSS Code | shield-line-spacing: none |
| Default Value | undefined |
| Available Values | Unsigned integer |
shield-text-dx float
| Description | Places the shield text within a fixed range of pixels, +/- along the X axis. A positive value shifts the text to the right. |
| Sample CartoCSS Code | shield-text-dx: 0; |
| Default Value | 0 |
| Available Values | See float. |
shield-text-dy float
| Description | Places the shield text within a fixed range of pixels, +/- along the Y axis. A positive value shifts the text down. |
| Sample CartoCSS Code | shield-text-dy: 0; |
| Default Value | 0 |
| Available Values | See float. |
shield-dx float
| Description | Places the shield within in a fixed range of pixels, +/- along the X axis. A positive value shifts the shield to the right. |
| Sample CartoCSS Code | shield-dx: 150; |
| Default Value | 0 |
| Available Values | See float. |
shield-dy float
| Description | Places the shield within a fixed range of pixels, +/- along the Y axis. A positive value shifts the shield down. |
| Sample CartoCSS Code | shield-dy: 0; |
| Default Value | 0 |
| Available Values | See float. |
shield-opacity float
| Description | Sets the opacity of the shield-file image. |
| Sample CartoCSS Code | shield-opacity: 1; |
| Default Value | 1 |
| Available Values | See float. |
shield-text-opacity float
| Description | The opacity of the text placed on top of the shield. |
| Sample CartoCSS Code | shield-text-opacity: 1; |
| Default Value | 1 |
| Available Values | See float. |
shield-horizontal-alignment keyword
| Description | The horizontal alignment of the shield from its center point. |
| Sample CartoCSS Code | shield-horizontal-alignment auto; |
| Default Value | auto |
| Available Values | left middle right auto |
shield-vertical-alignment keyword
| Description | The vertical alignment of the shield from its center point. |
| Sample CartoCSS Code | shield-vertical-alignment: middle;' |
| Default Value | middle |
| Available Values | top middle bottom auto |
shield-placement-type keyword
| Description | Enables you to reposition and resize the shield to avoid overlaps. |
| Sample CartoCSS Code | shield-placement-type: dummy; |
| Default Value | dummy, turns off and disables this feature. |
| Available Values | dummy simpleNote: The simple value is the shield placement string used for basic algorithms. |
shield-placements string
| Description | If shield-placement-type is set to simple, you can use this property to set the position of the shield placement. |
| Sample CartoCSS Code | shield-placements: E,NE,SE,W,NW,SW; |
| Default Value | none |
| Available Values | See string. |
shield-text-transform keyword
| Description | Identifies the text case of the shield-name. |
| Sample CartoCSS Code | shield-text-transform: none; |
| Default Value | none |
| Available Values | none uppercase lowercase capitalize |
shield-justify-alignment keyword
| Description | Defines how the shield-name text is aligned. |
| Sample CartoCSS Code | shield-justify-alignment: auto; |
| Default Value | auto |
| Available Values | left center right auto |
shield-transform functions
| Description | Defines SVG transformation functions to scale how shields appear. |
| Sample CartoCSS Code | shield-transform: none; |
| Default Value | none |
| Available Values | See functions. Note: Define values as per SVG transformation definitions- which are values separated by whitespace and/or commas, from right to left. |
shield-clip boolean
| Description | By default, geometries are clipped to map bounds. You can disable clips to avoid rendering artifacts on a map if are having performance issues. |
| Sample CartoCSS Code | shield-clip: true; |
| Default Value | true, geometry is clipped to map bounds before rendering. |
| Available Values | See boolean. |
shield-comp-op keyword
| Description | The composite operation that defines how the symbolizer behaves relative to layers atop or below it. |
| Sample CartoCSS Code | shield-comp-op: src-over; |
| Default Value | src-over, adds the current symbolizer on top of other symbolizers. |
| Available Values | clear src dst src-over dst-over src-in dst-in src-out dst-out src-atop dst-atop xor plus minus multiply screen overlay darken lighten color-dodge color-burn hard-light soft-light difference exclusion contrast invert invert-rgb grain-merge grain-extract hue saturation color value |
Line-Pattern
These CartoCSS pattern properties can be applied to both line and polygon elements on a map.
| line-pattern-file | line-pattern-clip | line-pattern-simplify |
| line-pattern-simplify-algorithm | line-pattern-smooth | line-pattern-offset |
| line-pattern-geometry-transform | line-pattern-comp-op |
line-pattern-file uri
| Description | A defined image file that renders the pattern of a line. The image repeats along the line. |
| Sample CartoCSS Code | line-pattern-file: url(https://s3.amazonaws.com/com.cartodb.users-assets.production/production/username/assets/20151005164516line-2.png); |
| Default Value | none |
| Available Values | See uri. |
line-pattern-clip boolean
| Description | By default, geometries are clipped to map bounds. You can disable line pattern clips to avoid rendering artifacts on a map if are having performance issues. |
| Sample CartoCSS Code | line-pattern-clip: true; |
| Default Value | true, geometry is clipped to map bounds before rendering. |
| Available Values | See boolean. |
line-pattern-simplify float
| Description | Simplifies geometries by a given tolerance value. |
| Sample CartoCSS Code | line-pattern-simplify: 0; |
| Default Value | 0, geometry is not simplified. |
| Available Values | See float. |
line-pattern-simplify-algorithm keyword
| Description | Simplifies geometries by a given algorithm value. |
| Sample CartoCSS Code | line-pattern-simplify-algorithm: radial-distance; |
| Default Value | radial-distance, geometry is simplified using the radial distance algorithm. |
| Available Values | radial-distance zhao-saalfeld visvalingam-whyatt |
line-pattern-smooth float
| Description | Smooths out geometry angles for line patterns. |
| Sample CartoCSS Code | line-pattern-smooth: 0; |
| Default Value | 0, no smoothing is applied. |
| Available Values | 0 1Note: 0 indicates no smoothing is applied. 1 indicates that it is fully smoothed. Values greater than 1 produce wild, looping geometries. It is suggested to use a range between 0-1 for this value. |
line-pattern-offset float
| Description | Offsets a line pattern parallel to its actual path, defined by a number in pixels. Positive values move the line pattern left, negative values move it right (relative to the directionality of the line pattern). |
| Sample CartoCSS Code | line-pattern-offset: 0; |
| Default Value | 0, no offset is applied. |
| Available Values | See float. |
line-pattern-geometry-transform functions
| Description | Applies transformation functions to the geometry. |
| Sample CartoCSS Code | line-pattern-geometry-transform: none; |
| Default Value | none, geometry is not transformed. |
| Available Values | See functions. |
line-pattern-comp-op keyword
| Description | The composite operation that defines how the symbolizer behaves relative to layers atop or below it. |
| Sample CartoCSS Code | line-pattern-comp-op: src-over; |
| Default Value | src-over, adds the current symbolizer on top of other symbolizers. |
| Available Values | clear src dst src-over dst-over src-in dst-in src-out dst-out src-atop dst-atop xor plus minus multiply screen overlay darken lighten color-dodge color-burn hard-light soft-light difference exclusion contrast invert invert-rgb grain-merge grain-extract hue saturation color value |
Polygon-Pattern
These CartoCSS pattern properties can be applied to both line and polygon elements on a map.
polygon-pattern-file uri
| Description | A defined image file that renders the pattern fill within a polygon. |
| Sample CartoCSS Code | polygon-pattern-file: url(http://com.cartodb.users-assets.production.s3.amazonaws.com/patterns/diagonal_1px_med.png); |
| Default Value | none |
| Available Values | See uri. |
polygon-pattern-alignment keyword
| Description | Specifies if the polygon-pattern-fill aligns with the map layer. |
| Sample CartoCSS Code | polygon-pattern-alignment: local; |
| Default Value | local |
| Available Values | local global |
polygon-pattern-gamma float
| Description | The level of antialiasing (smoothness of oversampling) of polygon pattern edges. A range of 0-5 represents the most antialiased to the least antialiased. |
| Sample CartoCSS Code | polygon-pattern-gamma: 1; |
| Default Value | 1, is fully antialiased. |
| Available Values | 0 1 2 3 4 5 |
polygon-pattern-opacity float
| Description | The opacity level of the polygon-pattern image. |
| Sample CartoCSS Code | polygon-pattern-opacity: 1; |
| Default Value | 1, indicates that the default opacity as opaque. |
| Available Values | See float. |
polygon-pattern-clip boolean
| Description | By default, geometries are clipped to map bounds. You can disable polygon-pattern-clips to avoid rendering artifacts on a map if are having performance issues. |
| Sample CartoCSS Code | polygon-pattern-clip: true; |
| Default Value | true, geometry is clipped to map bounds before rendering. |
| Available Values | See boolean. |
polygon-pattern-simplify float
| Description | Simplifies geometries by a given tolerance value. |
| Sample CartoCSS Code | polygon-pattern-simplify: 0; |
| Default Value | 0, geometry is not simplified. |
| Available Values | See float. |
polygon-pattern-simplify-algorithm keyword
| Description | Simplifies geometries by a given algorithm value. |
| Sample CartoCSS Code | polygon-pattern-simplify-algorithm: radial-distance; |
| Default Value | radial-distance, geometry is simplified using the radial distance algorithm. |
| Available Values | radial-distance zhao-saalfeld visvalingam-whyatt |
polygon-pattern-smooth float
| Description | Smooths out geometry angles. |
| Sample CartoCSS Code | polygon-pattern-smooth: 0; |
| Default Value | 0, no smoothing is applied. |
| Available Values | 0 1Note: 0 indicates no smoothing is applied. 1 indicates that it is fully smoothed. Values greater than 1 produce wild, looping geometries. It is suggested to use a range between 0-1 for this value. |
polygon-pattern-geometry-transform functions
| Description | Applies transformation functions to the geometry. |
| Sample CartoCSS Code | polygon-pattern-geometry-transform: none; |
| Default Value | none, geometry is not transformed. |
| Available Values | See functions. |
polygon-pattern-comp-op keyword
| Description | The composite operation that defines how the symbolizer behaves relative to layers atop or below it. |
| Sample CartoCSS Code | polygon-pattern-comp-op: src-over; |
| Default Value | src-over, adds the current symbolizer on top of other symbolizers. |
| Available Values | clear src dst src-over dst-over src-in dst-in src-out dst-out src-atop dst-atop xor plus minus multiply screen overlay darken lighten color-dodge color-burn hard-light soft-light difference exclusion contrast invert invert-rgb grain-merge grain-extract hue saturation color value |
Raster
These CartoCSS properties can be applied to raster (grid) data layers on a map.
| raster-opacity | raster-filter-factor | raster-scaling |
| raster-mesh-size | raster-comp-op | raster-colorizer-default-mode |
| raster-colorizer-default-color | raster-colorizer-epsilon | raster-colorizer-stops |
Note: Raster CartoCSS symbolizer properties are only supported when using the Maps API with Carto.js, not with the CARTO Editor.
raster-opacity float
| Description | The opacity of the raster symbolizer on top of other symbolizers. |
| Sample CartoCSS Code | raster-opacity: 1; |
| Default Value | 1, the raster is opaque. |
| Available Values | See float. |
raster-filter-factor float
| Description | Sets the filter factor used for rendering the datasource of the raster. Used by the Raster or GDAL datasources to pre-downscale images using overviews. |
| Sample CartoCSS Code | raster-filter-factor: -1; |
| Default Value | -1, allows the datasource to determine the appropriate downscaling option. |
| Available Values | See float. |
Note: Higher numbers can improve the output of the scaled image, but may reduce the speed of downscaling.
raster-scaling keyword
| Description | The algorithm applied to scale the resolution of the raster layer. |
| Sample CartoCSS Code | raster-scaling: near; |
| Default Value | near |
| Available Values | near fast bilinear bilinear8 bicubic spline16 spline36 hanning hamming hermite kaiser quadric catrom gaussian bessel mitchell sinc lanczos blackman |
Note: While the lanczos value may render the best quality, the bilinear value actually produces the best compromise between speed and accuracy.
raster-mesh-size unsigned
| Description | Specifies a reduced resolution mesh for raster reprojection. The total image size is divided by the mesh-size to determine the quality of the mesh. |
| Sample CartoCSS Code | raster-mesh-size: 16; |
| Default Value | 16, the reprojected mesh is 1/16 of the resolution of the source image. |
| Available Values | Unsigned integer |
Note: While values defined greater than the default (16) may produce faster reprojection, the image may be distorted.
raster-comp-op keyword
| Description | The composite operation that defines how the symbolizer behaves relative to layers atop or below it. |
| Sample CartoCSS Code | raster-comp-op: src-over; |
| Default Value | src-over, adds the current symbolizer on top of other symbolizers. |
| Available Values | clear src dst src-over dst-over src-in dst-in src-out dst-out src-atop dst-atop xor plus minus multiply screen overlay darken lighten color-dodge color-burn hard-light soft-light difference exclusion contrast invert invert-rgb grain-merge grain-extract hue saturation color value |
raster-colorizer-default-mode keyword
| Description | Sets the default coloring mode of the raster. |
| Sample CartoCSS Code | raster-colorizer-default-mode:linear; |
| Default Value | undefined |
| Available Values | discrete linear exact |
raster-colorizer-default-color color
| Description | Sets the color that is applied to all values outside of the range of the raster-colorizer-stop values. |
| Sample CartoCSS Code | raster-colorizer-default-color: transparent; |
| Default Value | undefined |
| Available Values | See color. |
raster-colorizer-epsilon float
| Description | Assigns an epsilon value to the raster colorizer. An epsilon value is when the exact input value matches the stop value to generate the translated color. |
| Sample CartoCSS Code | raster-colorizer-epsilon:0.41; |
| Default Value | undefined |
| Available Values | See float. |
Note: Epsilon values must be listed in ascending order and contain a minimum value and associated color.
Additionally, you can also include the color-mode as a third argument. For example: stop(100,#fff, exact)
raster-colorizer-stops tags
| Description | Assigns raster data values to colors. Stops must be listed in ascending order, and contain a minimum value, and the associated color. |
| Sample CartoCSS Code | raster-colorizer-stops:',Tip: See the related example for a complete CartoCSS syntax code example. |
| Default Value | undefined |
| Available Values | See float. |
Point
These CartoCSS properties can be applied to style points on a map.
| point-file | point-allow-overlap | point-ignore-placement |
| point-opacity | point-placement | point-transform |
| point-comp-op |
point-file uri
| Description | A defined image path that renders how a point appears. |
| Sample CartoCSS Code | point-file: url(http://www.image.com/image.png); |
| Default Value | none |
| Available Values | See uri. |
point-allow-overlap boolean
| Description | Shows or hides overlapping points on a map. |
| Sample CartoCSS Code | point-allow-overlap: false; |
| Default Value | false, does not allow points to overlap. Overlapping points are hidden |
| Available Values | See boolean. |
point-ignore-placement boolean
| Description | Prevents other placement properties from being rendered. |
| Sample CartoCSS Code | point-ignore-placement: false; |
| Default Value | false, does not store placement geometries in the collision detector cache of the bbox (bounding box). |
| Available Values | See boolean. |
point-opacity float
| Description | Sets the overall opacity of the point. |
| Sample CartoCSS Code | point-opacity: 1; |
| Default Value | 1, the point is fully opaque. |
| Available Values | 0 1 |
point-placement keyword
| Description | Determines how points are placed. |
| Sample CartoCSS Code | point-placement: centroid; |
| Default Value | centroid |
| Available Values | centroid interiorNote: Centroid calculates the geometric center of a polygon (which can outside of the polygon). Interior is always placed inside of a polygon. |
point-transform functions
| Description | Defines SVG transformation functions to scale how points appear. |
| Sample CartoCSS Code | point-transform: none; |
| Default Value | none, geometry is not transformed. |
| Available Values | See functions. Note: Define values as per SVG transformation definitions- which are values separated by whitespace and/or commas, from right to left. |
point-comp-op `keyword
| Description | The composite operation that defines how the symbolizer behaves relative to layers atop or below it. |
| Sample CartoCSS Code | point-comp-op: src-over; |
| Default Value | src-over, adds the current symbolizer on top of other symbolizers. |
| Available Values | clear src dst src-over dst-over src-in dst-in src-out dst-out src-atop dst-atop xor plus minus multiply screen overlay darken lighten color-dodge color-burn hard-light soft-light difference exclusion contrast invert invert-rgb grain-merge grain-extract hue saturation color value |
Text
Defines the text label properties on the map.
text-name expression
| Description | The name of the text label. |
| Sample CartoCSS Code | text-name: '[label_name_example]'; |
| Default Value | undefined |
| Available Values | See expression. The expression value is a data column specified by using brackets, as shown in the sample code above. |
text-face-name string
Note: A limited number of fonts can be applied directly through CARTO Builder. This CartoCSS property enables you to apply a larger range of fonts for your map label text. See the list of supported fonts that can be applied as values.
| Description | The font name and style for the text-name label. |
| Sample CartoCSS Code | text-face-name: ‘Open Sans Bold’; |
| Default Value | undefined |
| Available Values | See string. |
text-size float
| Description | The text size of the text label, in pixels. |
| Sample CartoCSS Code | text-size: 10; |
| Default Value | 10 |
| Available Values | See float. |
text-ratio unsigned
| Description | Defines the amount of text that appears on successive lines after text wrapping. |
| Sample CartoCSS Code | text-ratio: 0; |
| Default Value | 0 |
| Available Values | Unsigned integer |
text-wrap-width unsigned
| Description | The length of pixels that appears before the text-name label wraps. |
| Sample CartoCSS Code | text-wrap-width: 0; |
| Default Value | 0 |
| Available Values | Unsigned integer |
text-wrap-before boolean
| Description | Determines how the wrap-text behaves relative to the wrap-width. |
| Sample CartoCSS Code | text-wrap-before: false; |
| Default Value | false, wrapped text appears longer than the wrap-width. |
| Available Values | See boolean. |
text-wrap-character string
| Description | Enables you to wrap text with a character, rather than with a space. This is especially useful for long label names. |
| Sample CartoCSS Code | text-wrap-character: '_'; |
| Default Value | none |
| Available Values | See string. |
text-spacing unsigned
| Description | The space between repeated text lables, in pixels, on a line. |
| Sample CartoCSS Code | text-spacing: 0; |
| Default Value | undefined |
| Available Values | Unsigned integer |
text-character-spacing float
| Description | The horizontal space, in pixels, between characters. |
| Sample CartoCSS Code | text-character-spacing: 0; |
| Default Value | 0 |
| Available Values | See float. |
text-line-spacing unsigned
| Description | The vertical spacing, in pixels, between two lines of multiline text labels. |
| Sample CartoCSS Code | text-line-spacing: 0; |
| Default Value | 0 |
| Available Values | Unsigned integer |
text-label-position-tolerance unsigned
| Description | Allows you to adjust the default placement of a text label on a line, in pixels. |
| Sample CartoCSS Code | text-label-position-tolerance: 0; |
| Default Value | 0 |
| Available Values | Unsigned integer |
text-max-char-angle-delta float
| Description | The maximum angle change allowed between adjacent characters in a label (as measured in degrees). |
| Sample CartoCSS Code | text-max-char-angle-delta: 22.5; |
| Default Value | 22.5 |
| Available Values | See float. |
Note: Internally, the value is converted to the default value (22.5), by applying the following radian algorithm:
22.5*math.PI/180.0The higher the value, the fewer labels are placed around sharp corners.
text-fill color
| Description | The color of the label text. |
| Sample CartoCSS Code | text-fill: #000000; |
| Default Value | #000000, black |
| Available Values | See color. |
text-opacity float
| Description | The opacity of the text label. |
| Sample CartoCSS Code | text-opacity: 1; |
| Default Value | 1, fully opaque |
| Available Values | 0 1 |
text-halo-fill color
| Description | Specifies the color of the halo around the text label. |
| Sample CartoCSS Code | text-halo-fill: #FFFFFF; |
| Default Value | #FFFFFF, the halo color is white by default. |
| Available Values | See color. |
text-halo-radius float
| Description | The radius of the halo, in pixels. |
| Sample CartoCSS Code | text-halo-radius: 0; |
| Default Value | 0, no halo is applied. |
| Available Values | See float. |
text-halo-rasterizer keyword
| Description | Exposes an alternate AGG (Anti-Grain Geometry) rendering method that sacrifices some accuracy for speed. |
| Sample CartoCSS Code | text-halo-rasterizer: full; |
| Default Value | full |
| Available Values | full fast |
text-dx float
| Description | Places the text label within a fixed range of pixels, +/- along the X axis. A positive value shifts the text to the right. |
| Sample CartoCSS Code | text-dx: 0; |
| Default Value | 0 |
| Available Values | See float. |
text-dy float
| Description | Places the text label within a fixed range of pixels, +/- along the Y axis. A positive value shifts the text down. |
| Sample CartoCSS Code | text-dy: 0; |
| Default Value | 0 |
| Available Values | See float. |
text-vertical-alignment keyword
| Description | The vertical alignment of the text label from its center point. |
| Sample CartoCSS Code | text-vertical-alignment: auto; |
| Default Value | auto |
| Available Values | top middle bottom auto |
Note: The default value is affected by the dy (text down) value. If the dy value>0, the vertical alignment value is bottom. If the dy value<0, the vertical alignment is top.
text-avoid-edges boolean
| Description | Prevents text labels from intersecting with tile boundaries. |
| Sample CartoCSS Code | text-avoid-edges: false; |
| Default Value | false, labels do not intersect. |
| Available Values | See boolean. |
text-min-distance float
| Description | The minimum distance between the next text label. |
| Sample CartoCSS Code | text-min-distance: undefined; |
| Default Value | undefined |
| Available Values | See float. |
text-min-padding float
| Description | The minimum distance, in pixels, that a text label is placed from the edge of a metatile (the tile/buffer space relationship). |
| Sample CartoCSS Code | text-min-padding: undefined; |
| Default Value | undefined |
| Available Values | See float. |
text-min-path-length float
| Description | Enables you to place text labels on paths longer than the minimum length. |
| Sample CartoCSS Code | text-min-path-length: 0; |
| Default Value | 0, places text label on all paths. |
| Available Values | See float. |
text-allow-overlap boolean
| Description | Shows or hides overlapping text labels on a map. |
| Sample CartoCSS Code | text-allow-overlap: false; |
| Default Value | false, does not allow text labels to overlap. Overlapping text labels are hidden. |
| Available Values | See boolean. |
text-orientation expression
| Description | Enables you to change the orientation of the text label. |
| Sample CartoCSS Code | text-orientation: undefined; |
| Default Value | undefined |
| Available Values | See expression. |
text-placement keyword
| Description | Places text labels on top of points, along multiple line places, on the vertexes of polygons, or in the interior inside a polygon. |
| Sample CartoCSS Code | text-placement: point; |
| Default Value | point, the text label appears on the top of map points. |
| Available Values | point line vertex interior |
text-placement-type keyword
| Description | Enables you to reposition and resize the text label to avoid overlaps. |
| Sample CartoCSS Code | text-placement-type: dummy; |
| Default Value | dummy, turns off and disables this feature. |
| Available Values | dummy simple |
Note: The simple value is the text label placement string used for basic algorithms.
text-placements string
| Description | If text-placement-type is set to simple, you can use this property to adjust the placement of the text label. |
| Sample CartoCSS Code | text-placements: E,NE,SE,W,NW,SW; |
| Default Value | none |
| Available Values | See string. |
text-transform keyword
| Description | Identifies the text case of the text label. |
| Sample CartoCSS Code | text-transform: none; |
| Default Value | none |
| Available Values | none uppercase lowercase capitalize |
text-horizontal-alignment keyword
| Description | The horizontal alignment of the text label from its center point. |
| Sample CartoCSS Code | text-horizontal-alignment: auto; |
| Default Value | auto |
| Available Values | left middle right auto |
text-align keyword
| Description | Defines how text labels are justified, relative to the text-placement-type property. |
| Sample CartoCSS Code | text-align: auto; |
| Default Value | auto, text is centered by default except when text-placement-type value is simple, then the text is justified automatically depending on where the text can fit text-placements. |
| Available Values | left right center auto |
text-clip boolean
| Description | By default, geometries are clipped to map bounds. You can disable clips to avoid rendering artifacts on a map if are having performance issues. |
| Sample CartoCSS Code | text-clip: true |
| Default Value | true, geometry is clipped to map bounds before rendering. |
| Available Values | See boolean. |
text-comp-op keyword
| Description | The composite operation that defines how the symbolizer behaves relative to layers atop or below it. |
| Sample CartoCSS Code | text-comp-op: src-over; |
| Default Value | src-over, adds the current symbolizer on top of other symbolizers. |
| Available Values | clear src dst src-over dst-over src-in dst-in src-out dst-out src-atop dst-atop xor plus minus multiply screen overlay darken lighten color-dodge color-burn hard-light soft-light difference exclusion contrast invert invert-rgb grain-merge grain-extract hue saturation color value |
Building
Defines how building structures are rendered on a map.
| building-fill | building-fill-opacity | building-height |
building-fill color
| Description | The fill color of building walls. |
| Sample CartoCSS Code | building-fill: #FFFFFF; |
| Default Value | white, as indicated with the color #FFFFFF. |
| Available Values | See color. |
building-fill-opacity float
| Description | Sets the opacity of the building, including the opacity of the building walls. |
| Sample CartoCSS Code | building-fill-opacity; 1; |
| Default Value | 1 |
| Available Values | See float. |
building-height expression
| Description | The height of the building, in pixels. |
| Sample CartoCSS Code | building-height: 0; |
| Default Value | 0 |
| Available Values | See expression. |
Other CartoCSS Parameters
Debug-mode string
| Description | The mode for debug rendering. |
| Sample CartoCSS Code | debug-mode: collision; |
| Default Value | collision |
| Available Values | See string. |
CartoCSS Values
The following values can be applied to properties in CartoCSS.
Color
CartoCSS accepts a variety of syntaxes for colors - HTML-style hex values, rgb, rgba, hsl, and hsla. It also supports the predefined HTML colors names, such as yellow and blue.
#line {
  line-color: #ff0;
  line-color: #ffff00;
  line-color: rgb(255, 255, 0);
  line-color: rgba(255, 255, 0, 1);
  line-color: hsl(100, 50%, 50%);
  line-color: hsla(100, 50%, 50%, 1);
  line-color: yellow;
}
Note: Using hsl (hue, saturation, lightness) color values are often easier than rgb()values. CARTO also includes several color functions borrowed from Less, a CSS pre-processor:
// lighten and darken colors
lighten(#ace, 10%);
darken(#ace, 10%);

// saturate and desaturate
saturate(#550000, 10%);
desaturate(#00ff00, 10%);

// increase or decrease the opacity of a color
fadein(#fafafa, 10%);
fadeout(#fefefe, 14%);

// spin rotates a color around the color wheel by degrees
spin(#ff00ff, 10);

// mix generates a color in between two other colors.
mix(#fff, #000, 50%);
Each of above examples uses color variables, literal colors, or is the result of other functions operating on colors.
Float
In CartoCSS, float values are numbers specified in pixels. Unlike CSS, numbers are not units, but pixels.
#line {
  line-width: 2;
}
You can also apply simple math using float number values. For example:
#line {
  line-width: 4 / 2; // division
  line-width: 4 + 2; // addition
  line-width: 4 - 2; // subtraction
  line-width: 4 * 2; // multiplication
  line-width: 4 % 2; // modulus
}
URI
A uniform resource identifier (URI) is a string of characters used to identify the name of a resource, typically a path on your computer or an internet address. You can also apply a URL (as if using HTML), to define a URI image location.
In CARTO style code, only a URL to a publicly-available image can be used.
#markers {
  marker-file: url(http://com.cartodb.users-assets.production.s3.amazonaws.com/simpleicon/map43.svg);
}
Note: In Carto, images applied through CartoCSS cannot be selected from folders. You can define a resource of the image location with this URI value.
String
In CartoCSS, string values are identified as the text within the quotations. In the following example, the name of the font is the string value.
shield-face-name: 'Open Sans Bold';Note: String values are different than text-name values, which are text label values defined with brackets, as shown in the following example.
#labels {
  text-name: "[MY_FIELD]";
}
Boolean
Boolean values are either true (Yes, the property is enabled) or false (No, the property is turned off).
#markers {
  marker-allow-overlap:true;
}
Expression
Expressions are flexible statements that can include fields, numbers, and other types of defined variables. For example, you can build an expression by entering a field name, a relation, set a predefined value, or enter a range of values.
#buildings {
  building-height: [HEIGHT_FIELD] * 10;
}
Numbers
CartoCSS number values are comma-separated lists, identifying one or more numbers, in a specific order. For example, a number value is used is the line-dasharray property, which specifies a pair of numbers for the value.
#disputedboundary {
  line-dasharray: 1, 4, 2;
}
Percentages
The percentage symbol, % universally indicates value/100. Use percentage values with ratio-related properties, such as the opacity of a shape or color, as shown in the following example.
#world {
  // this syntax
  polygon-opacity: 50%;

  // is equivalent to:
  polygon-opacity: 0.5;
}
Note: Do not use percentages as widths, heights, or other properties. Unlike CSS, percentages are not relative to cascaded classes or page size. They are simply the value divided by one hundred.
Functions
Functions are comma-separated lists of one or more functions.
For example, point-transform, defines function values according to SVG transformation definitions- which are values separated by whitespace and/or commas, from right to left.
#point {
  point-transform: scale(2, 2);
}
Fonts
View the open-source library of fonts that can be selected in CARTO Builder when LABELS are enabled for a map layer. If you are using the text-face-name: 'string' property, a much larger range of font values are supported. These are the font families and the supported weights for each font family.
-
Open Sans
Light, Regular, Semibold, Bold, Extrabold, Light Italic, Italic, Semibold Italic, Bold Italic, Extrabold Italic -
DejaVu Sans
ExtraLight, Book, Oblique, Bold, Bold Oblique, Condensed, Condensed Oblique, Condensed Bold, Condensed Bold Oblique -
DejaVu Serif
Book, Italic, Bold, Bold Italic, Condensed, Condensed Italic, Condensed Bold, Condensed Bold Italic -
Lato
Hairline, Hairline Italic, Light, Light Italic, Regular, Italic, Bold, Bold Italic, Black, Black Italic -
Graduate
Regular -
Gravitas One
Regular -
Old Standard TT
Regular, Italic, Bold -
Unifont
Medium
CartoCSS Properties for Torque Style Maps
While you can use most of the CartoCSS properties to customize Torque maps, CARTO provides additional CartoCSS properties that are specific for Torque style maps. You can add these CartoCSS properties to Torque, Torque Heatmaps, and Torque Category maps.
Note: For a reference of the CartoCSS properties that are currently supported with Torque, see the torque-reference.json file.
CartoCSS - Torque Maps
The following CartoCSS properties can be applied to Torque style maps. Note that some values vary, depending on the type of Torque map you are creating.
| -torque-frame-count | -torque-animation-duration | -torque-time-attribute |
| -torque-aggregation-function | -torque-resolution | -torque-data-aggregation |
| frame-offset |
Note: All Torque CartoCSS syntax is prefaced with a hypen.
-torque-frame-count number
| Description | Specifies the number of animation steps/frames in your torque animation. |
| Sample CartoCSS Code | -torque-frame-count:128; |
| Default Value | 128, the data is broken into 128 time frames when parsing CartoCSS. If the data contains a fewer number of total frames, a lessor value is used. |
| Available Values | See numbers. |
Tip: In the CARTO Builder, this is the STEPS value when the style is ANIMATED.
-torque-animation-duration number
| Description | Specifies the length of time for your animation, in seconds. |
| Sample CartoCSS Code | -torque-animation-duration:30; |
| Default Value | undefined. Any positive number value is accepted. |
| Available Values | See numbers. This can also be a decimal - see float. |
Tip: In the CARTO Builder, this is the DURATION value when the style is ANIMATED.
-torque-time-attribute string
| Description | Defines the name of the date column in your dataset. This column can be an integer or a date. |
| Sample CartoCSS Code | -torque-time-attribute:"cartodb_id"; |
| Default Value | undefined |
| Available Values | See string. |
Tip: In the CARTO Builder, this is the COLUMN value when the style is ANIMATED.
-torque-aggregation-function keyword
Note: Please note the different available values that should be applied if you are using a Torque Category map.
| Description | Since Torque maps renders data in clusters, this property defines how values are displayed in each cluster of the map. Column data must be numeric. For example, you can define: a maximum value, a count, or the total number of values in each cluster. Note: When visualizing Torque style maps, it is required that you normalize your data to show a total count, or a range, of 0-255. For more details, see this description about statistical normalization. |
| Sample CartoCSS Code | -torque-aggregation-function: "count(cartodb_id)"; |
| Default Value | "count(cartodb_id)" |
| Available Values | count(column_name), max(column_name), sum(column_name) |
| Related Example | Wiki page about how spatial aggregation works. |
Note: Since the CARTO geospatial database is built on the PostgreSQL platform and supports advanced PostGIS capabilities, see PostgreSQL Aggregate Functions for additional supported values.
Tip: Functions can also be combinations of functions and operations. For example, log(1 + max(column_name)).
-torque-resolution float
| Description | Since Torque maps create a grid from your data and aggregates data to each cell of that grid, this property defines the width and height of each cell, in pixels. |
| Sample CartoCSS Code | -torque-resolution:2; |
| Default Value | undefined |
| Available Values | Resolution values should be applied in powers of 2 (for example, 2 4 8 and so on). The maximum value is 256. |
Note: Defining a larger number applies a larger grid to your data.
Tip: In the CARTO Builder, this is the RESOLUTION value when the style is ANIMATED.
-torque-data-aggregation keyword
| Description | Defines how Torque maps display past data. By default, linear data aggregation is applied, where no traces of past data appears. Optionally, you can show past data markers cumulatively. |
| Sample CartoCSS Code | -torque-data-aggregation:linear; |
| Default Value | linear, does not leave any trace of past data. |
| Available Values | linear cumulative |
Tip: In the CARTO Builder, this is the OVERLAP value when the style is ANIMATED.
frame-offset number
| Description | Once your data is aggregated, you can further customize your Torque animation options by specifying how a pixel is rendered in the frames, after the initial rendering (the explosion effect on a Torque map). |
| Sample CartoCSS Code | [frame-offset=1] { ... } |
| Default Value | undefined, customize the marker options for each frame-offset property to add more styling. |
| Available Values | See numbers. |
Tip: In the CARTO Builder, this is the TRAILS value when the style is ANIMATED.
The following example displays additional frame-offset values applied to a Torque map.
#twitter_citymaps[frame-offset=1] {
 marker-width:12;
 marker-fill-opacity:0.45;
}
#twitter_citymaps[frame-offset=2] {
 marker-width:14;
 marker-fill-opacity:0.225;
}
#twitter_citymaps[value=1] {
 marker-fill:#A6CEE3;
}
Tip: You can also select each cluster value and apply custom marker styles, based on the data category. For example, suppose you want to apply a unique style only to the maximum value in your dataset, change the marker style for the maximum value in your animation. These values are located in your CartoCSS properties.
The following example displays CartoCSS properties with a Torque map.
/** torque visualization */

Map {
-torque-frame-count:512;
-torque-animation-duration:30;
-torque-time-attribute:"cartodb_id";
-torque-aggregation-function:"count(cartodb_id)";
-torque-resolution:2;
-torque-data-aggregation:linear;
}

#twitter_citymaps{
  comp-op: lighter;
  marker-fill-opacity: 0.9;
  marker-line-color: #FFF;
  marker-line-width: 1.5;
  marker-line-opacity: 1;
  marker-type: ellipse;
  marker-width: 6;
  marker-fill: #ff9900;
}
#twitter_citymaps[frame-offset=1] {
 marker-width:8;
 marker-fill-opacity:0.45;
}
#twitter_citymaps[frame-offset=2] {
 marker-width:10;
 marker-fill-opacity:0.225;
}
CartoCSS - Torque Heatmaps
While any of the Torque CartoCSS properties can be applied to a Torque Heatmap, the following CartoCSS properties can also be applied to Torque Heatmaps.
-
image-filters
functions, enables you to define the color stop for your heatmap -
marker-file
uri, when creating a Torque Heatmap with Carto, marker files are automatically provided. You cannot change these options
Note: It is a known issue that certain marker properties are not supported when applied to Torque and Torque Category maps. Specifically, when the marker-file and marker-fill CartoCSS properties are applied, you cannot color a sprite using the marker-fill value. You must create a sprite per color when applying these properties to Torque map. Optionally, change the map type to a Torque Heatmap as a workaround.
The following example displays CartoCSS properties with a Torque Heatmap.
/** torque_heat visualization */

Map {
-torque-frame-count:1;
-torque-animation-duration:10;
-torque-time-attribute:"cartodb_id";
-torque-aggregation-function:"count(cartodb_id)";
-torque-resolution:2;
-torque-data-aggregation:linear;
}

#twitter_citymaps{
  image-filters: colorize-alpha(blue, cyan, #008000, yellow , orange, red);
  marker-file: url(http://s3.amazonaws.com/com.cartodb.assets.static/alphamarker.png);
  marker-fill-opacity: 0.4*[value];
  marker-width: 35;
}
#twitter_citymaps[frame-offset=1] {
 marker-width:37;
 marker-fill-opacity:0.2;
}
#twitter_citymaps[frame-offset=2] {
 marker-width:39;
 marker-fill-opacity:0.1;
}
CartoCSS - Torque Category Maps
While any of the Torque CartoCSS properties can be applied to a Torque Category map, the -torque-aggregration-function contains different available values that are specific for Torque Category maps.
-torque-aggregation-function keyword (Torque Category only)
| Description | Torque Category applies a PostgreSQL command to find the values that appear most often in your data (in order to cluster your data accordingly). Note: When visualizing Torque style maps, it is required that you normalize your data to show a total count, or a range, of 0-255. For more details, see this description about statistical normalization. |
| Sample CartoCSS Code | -torque-aggregation-function:"CDB_Math_Mode (torque_category)"; |
| Default Value | "CDB_Math_Mode(torque_category)" |
| Available Values | count(column_name), max(column_name), sum(column_name)Tip: For a Torque category layer that is created dynamically with carto.createLayer, the SQL query must explicitly include how to build the torque_category column. You must include both the sql and table_name parameters. See this createLayer with torque category layer example.Note: column_name is a column that contains an integer or number for each category in the map. If you are applying CartoCSS with the CARTO Editor, you can select a text column. When applied as the CDB_Math_Mode value, the statistical mode, or category, of the most occurrences over time appear as a Torque pixel. If a pixel returns multiple values, the colors may overlap and render incorrectly.Tip: An advanced math trick to properly blend colors is to apply the sum(distinct(column_name)); value. This enables you to render pixels in categories and apply colors to each value. For example, when all pixel values=1, the sum of distinct is 1. When all pixels values=2, the sum of distinct is 2. When the values are mixed with either 1 or 2, the sum of distinct is 3. You can then apply marker-fill colors to each value category (value=1, value=2, value=3). If you have more than two values in your column, use these guidelines to figure out your own math trick to render the data.Additionally, you can use the column_name value to diverge values (i.e. when there is only one record of category 1 and 99 records of category 2).Tip: Since Torque does not return negative values, set this value high, i.e. 100. For example, "100+sum(floor(category_name*1.5)-2)"; converts values to negative and positive values and sums them up. The greater the negative value, the greater the preference to category 1 in the pixel. The greater the positive value, the greater the preference to category 2. |
| Related Examples | Wiki page about how spatial aggregation works. |
The following example displays CartoCSS properties with a Torque Category map.
/** torque_cat visualization */

Map {
  -torque-frame-count:1024;
  -torque-animation-duration:30;
  -torque-time-attribute:"dates";
  -torque-aggregation-function:"CDB_Math_Mode(torque_category";
  -torque-resolution:2;
  -torque-data-aggregation:linear;
}
CartoCSS Best Practices
While there are many ways to apply the same visual effects with CartoCSS properties, this section describes the most efficient and intuitive methods for structuring your CartoCSS syntax.
You can apply CartoCSS properties to the overall map style, or to specific map symbolizers (such as markers and points). Sometimes, applying properties to a symbolizer is not the most effective workflow for enhancing your overall map style. Other times, applying a style to the overall map is not rendered if there is no default value defined, and thus, not needed. For example, see how composite operations can be used for color blending, based on style or symbolizer.
When applying CartoCSS syntax, it helps to understand how values are applied to your map:
- The source is where the style is applied (either as a value or as a symbolizer property)
- The destination is the effect on the rest of the map, underneath the source
- Any layers that appear above the source are unaffected by the applied style and are rendered normally
-
Typically, you apply CartoCSS properties to different layers on a map. You can add multiple styles and values for each layer
- Alternatively, you can apply CartoCSS by nesting categories and values. Categories contain multiple values listed under the same, single category using brackets
{ }. This enables you visualize all of the styling elements applied to the overall map or to individual symbolizers, and avoid adding any redundant or unnecessary parameters. This is the suggested method if you are applying styles to a multi-scale map.
Note: Be mindful when applying styles to a map with multiple layers. Instead of applying an overall style to each map layer, apply the style to one layer on the map using this nested structure. For example, suppose you have a map with four layers, you can define zoom dependent styling as a nested value in one map layer. You do not have to go through each layer of the map to apply a zoom style. Using the nested structure allows you to apply all of the styling inside the brackets { }. This is a more efficient method of applying overall map styling.
Each of the examples below produces the same visual effect. Note how the CartoCSS syntax is structured.
Example 1: CartoCSS syntax structured by point
Marker fill values are applied to the overall style of the map. Each map point is labeled #continent_points[continent="name"] { and contains its own marker-fill style.
#continent_points {
  marker-fill-opacity: 0.9;
  marker-line-color: #FFF;
  marker-line-width: 1;
  marker-line-opacity: 1;
  marker-placement: point;
  marker-type: ellipse;
  marker-width: 10;
  marker-allow-overlap: true;
}
#continent_points[continent="Africa"] {
  marker-fill: #A6CEE3;
}
#continent_points[continent="Antarctica"] {
  marker-fill: #1F78B4;
}
#continent_points[continent="Asia"] {
  marker-fill: #B2DF8A;
}
#continent_points[continent="Australia"] {
  marker-fill: #33A02C;
}
#continent_points[continent="Europe"] {
  marker-fill: #FB9A99;
}
#continent_points[continent="North America"] {
  marker-fill: #E31A1C;
}
#continent_points[continent="Oceania"] {
  marker-fill: #FDBF6F;
}
#continent_points[continent="South America"] {
  marker-fill: #FF7F00;
}
Example 2: CartoCSS syntax structured by category
Marker fill values are applied to the overall style of the map. marker-line-opacity, marker-placement, and marker-type are removed from the overall map style, since the default values for these properties do not render any styling effects, they are not necessary.
Tip: In some cases, default values for CartoCSS properties render no styling effects on your map. If you apply CartoCSS syntax with the default values noneundefined, the map appears the same with or without these properties. Ensure to define values for properties that apply no default styling.
Each point is categorized as [continent="name"] { and contains its own marker-fill style.
You do not need to preface each point with the #continent_points label. Note how syntax highlighting is applied to clearly indicate the category.
#continent_points {
  marker-fill-opacity: 0.9;
  marker-line-color: #FFF;
  marker-line-width: 1;
  marker-width: 10;
  marker-allow-overlap: true;

  [continent="Africa"] {
    marker-fill: #A6CEE3;
  }
  [continent="Antarctica"] {
    marker-fill: #1F78B4;
  }
  [continent="Asia"] {
    marker-fill: #B2DF8A;
  }
  [continent="Australia"] {
    marker-fill: #33A02C;
  }
  [continent="Europe"] {
    marker-fill: #FB9A99;
  }
  [continent="North America"] {
    marker-fill: #E31A1C;
  }
  [continent="Oceania"] {
    marker-fill: #FDBF6F;
  }
  [continent="South America"] {
    marker-fill: #FF7F00;
  }
}
Example 3: CartoCSS syntax structured by @ values
Apply the @ symbol to lists of all the color values for your categories. CartoCSS syntax is structured so that you can apply all your color changes in one section @name: color; and reference the point style within the category label marker-fill: @name;. This enables you to visualize exactly where your marker-fill values are located, in addition to the overall map styles.
@africa: #A6CEE3;
@antarctica: #1F78B4;
@asia: #B2DF8A;
@australia: #33A02C;
@europe: #FB9A99;
@northamerica: #E31A1C;
@oceania: #FDBF6F;
@southamerica:#FF7F00;

#continent_points {
  marker-fill-opacity: 0.9;
  marker-line-color: #FFF;
  marker-line-width: 1;
  marker-width: 10;
  marker-allow-overlap: true;

  [continent="Africa"] {
   marker-fill: @africa;
  }
  [continent="Antarctica"] {
    marker-fill: @antarctica;
  }
  [continent="Asia"] {
    marker-fill: @asia;
  }
  [continent="Australia"] {
    marker-fill: @australia;
  }
  [continent="Europe"] {
    marker-fill: @europe;
  }
  [continent="North America"] {
    marker-fill: @northamerica;
  }
  [continent="Oceania"] {
    marker-fill: @oceania;
  }
  [continent="South America"] {
    marker-fill: @southamerica;
  }
}
Example 4: Multiple Symbolizers for a Map Layer
In some cases, you may need to apply multiple symbolizers to one map layer. For example, a point layer typically contains marker syntax. You can also attach other compatible symbolizer properties, to achieve a desired styling effect.
Enter a double-colon symbol :: to indicate a duplicate map layer without actually adding a new layer to your map. This dummy layer created through CartoCSS styling acts as an attachment, enabling you to apply multiple symbolizers to the selected layer.
Suppose you have a point symbol and want to put a glowing halo around it. You need CartoCSS values for the point style and CartoCSS values for the glowing halo.
- Add the styling for the points in your map layer
- Add a second, attachment, layer of the same data and create the styling for the halo
/** bottom attachment of the glowing halo **/

#layer {
 marker-width: 20;
 marker-fill: teal;
 marker-fill-opacity: 1;
 marker-line-color: #FFF;
 marker-line-width: 0;
 marker-line-opacity: 1;
 marker-placement: point;
 marker-type: ellipse;
 marker-allow-overlap: true;
}
/** top layer of the symbol**/
#layer {
marker-width: 10;
marker-fill: #FFB927 ;
marker-fill-opacity: 0.9;
marker-line-color: #FFF;
marker-line-width: 0;
marker-line-opacity: 1;
marker-placement: point;
marker-type: ellipse;
marker-allow-overlap: true;
}Alternatively, you can achieve the same effect by using a single map layer and inserting the double-colon symbol :: You can type any text to describe the styling element that is being applied.
#layer {

 //bottom layer of symbol
  ::halo {
    marker-width: 20;
    marker-fill: teal;
    marker-fill-opacity: 1;
    marker-line-color: #FFF;
    marker-line-width: 0;
    marker-line-opacity: 1;
    marker-placement: point;
    marker-type: ellipse;
    marker-allow-overlap: true;
  }

//top layer of symbol
   marker-width: 10;
   marker-fill: #FFB927 ;
   marker-fill-opacity: 0.9;
   marker-line-color: #FFF;
   marker-line-width: 0;
   marker-line-opacity: 1;
   marker-placement: point;
   marker-type: ellipse;
   marker-allow-overlap: true;
}-
The ::halo describes the style elements that you are applying to the halo
-
The default, top layer describes the style elements that you are applying to the point
Note: Similar to how map layers are rendered, symbolizers are rendered from bottom to top. To see an example, view this live map which is using multiple symbolizers applied to point styles.
Example 5: Zoom-Based Styling with CartoCSS
Zoom-based styling refers to the ability to change what is displayed on a map, or how it is visualized, based on the zoom-level. When you zoom in or out of the Map View, certain features or data (such as streets, waterways, or labels) appear or fade away.
For example, apply the STAMEN TONER basemap to your map and notice how buildings and features are shown or hidden, depending on the zoom level. You can apply the same functionality to your data by applying zoom-based styling with CartoCSS.
Whenever CartoCSS properties are enclosed in brackets [zoom] { }, this indicates that zoom-based styling should be activated when the map meets the specified zoom level. It enforces rules for when and how data appears on your map. For example, you can specify conditional styling to:
- Change the size of marker symbols at a specified zoom level.
- Show or hide text labels at a specified zoom level and/or define how labels appear. For more details about text labels and zoom-based styling, see the Applying Text Labels to your Data Guide in CARTO Builder documentation.
In the following example, the [zoom] value indicates that the size of the geometry should change when zoom level 4 is reached. [Square brackets] indicate zoom-based styling, while the {curly brackets} indicate styling conditions to be applied at that zoom level.
[zoom = 4] {marker-width: 6}Tip: You can specify the logical operator for the zoom level (greater than >, less than <, equal to = or a combination of those).
The following syntax displays how the entire layer is styled in CartoCSS. Layer styling shows that the default marker-width is 3. When the zoom level is equal to 4, or equal to/greater than 5, the marker-width values change on your visualization. This styling increases the geometry size as the map is zoomed.
#layer{
  marker-fill-opacity: 0.9;
  marker-line-color: #FFF;
  marker-line-width: 0;
  marker-line-opacity: 1;
  marker-placement: point;
  marker-type: ellipse;
  marker-width: 3;
  marker-fill: #FF6600;
  marker-allow-overlap: true;
  [zoom = 4] {marker-width: 6}
  [zoom = 5] {marker-width: 12}
  [zoom > 5] {marker-width: 16}
}
Similarly, you can use the attachment method to apply multiple zoom-based styling parameters to a layer.
#layer[type='City'][zoom>=4]{
 ::inner{
   marker-fill-opacity: 1;
   marker-fill:#2b2b2b;
   marker-line-width: 0;
   marker-line-opacity: 0.65;
   marker-placement: point;
   marker-type: ellipse;
   marker-width: 5;
   marker-line-color: #2b2b2b;
   marker-allow-overlap: true;
 }
Adding Comments to your Code
If you are just learning CartoCSS, it might be useful to add comments next to lines of your CartoCSS code. For example, you can add comments to describe a specific hex color, the default value for a property, the available values, and so on.
Enter comments by using the following format in your CartoCSS code. Note the required spacing:
cartocss-property; /* comment */
Example of Comments in CartoCSS
In the following example, there are user comments entered in the marker-line-color, marker-placement, marker-width, and marker-fill CartoCSS properties.
/** simple visualization */

#month_day{
  marker-fill-opacity: 0.9;
  marker-line-color: #FFF; /* white */
  marker-line-width: 1;
  marker-line-opacity: 1;
  marker-placement: point; /* options are point, line, interior */
  marker-type: ellipse;
  marker-width: 15; /* default value was 10 */
  marker-fill: #2E5387; /* hex color is St Tropaz */
  marker-allow-overlap: true;
  marker-comp-op: overlay;
}
As long as you are careful with the spacing, these comments will not interfere when applying CartoCSS style to your map.
Tip: You are notified if there any errors in the CartoCSS code.
CartoCSS Errors
Entering CartoCSS styling is simple. Most common errors are a caused by typos and missing formatting. If you are using CartoCSS in the Builder, you are notified which line of syntax contains an error. You can also click the undo and redo arrow buttons after entering code changes with CartoCSS.

Always apply the following format when entering CartoCSS code and be mindful of any quotes, brackets, and end line semi-colons.
#layer_name {
  cartocss-property-name: value;
  cartocss-property-name: value;
  cartocss-property-name: value;
  cartocss-property-name: value;
}
Note: If you are entering CartoCSS syntax for Torque specific properties, all Torque CartoCSS syntax is prefaced with a hypen.
Tip: See CartoCSS Best Practices for suggestions about how to structure your CartoCSS syntax.
CartoCSS Composite Operations
Composite operations style the way colors of overlapping geometries interact with each other. Similar to blend operations in Photoshop, these composite operations style the blend modes on your map. The main reason to use composite operations is to fine-tune how much some features in your map stand out compared to others. They are a great way to control your maps legibility.
-
There is a shortcut for selecting the BLENDING composite operation value, directly from the STYLE options of a selected map layer
Tip: See how to select a BLENDING
comp-opvalue through the STYLE options. -
You can also enter CartoCSS syntax to apply the
comp-opproperty with additional values
Effects of Composite Operations
Composite operations are blending modes for your map layers. They fall into two main categories: color and alpha, and can be applied to all non-basemap elements in your CARTO map by adding the comp-op value to your CartoCSS code.
Composite operations can be applied as an overall style effect, as shown in the following code:
comp-op: multiply;Or, it can be applied to the specific symbolizer property, depending on the color blending operation you are trying to achieve. For example:
marker-comp-op: multiply;
polygon-comp-op: color-burn;
text-comp-op: screen;-
The layer (or text) that you choose the composite operation in is called the source
-
Its composite operation is applied to each layer beneath, which are called destination layers. In CARTO, the source layer itself needs to have a color fill, but its composite operations apply to destination layers with color or texture fills (even raster layers)
Note: Any layers that appear above the source are unaffected by the
comp-opvalue and are rendered normally.
CartoCSS Symbolizer Values
The following CartoCSS properties can be used as a blending effect on a map layer. Alternatively, these properties can be applied to invoke a composite operation effect on a particular symbolizer. For details, see Effects of Composite Operations. Click a link to view the CartoCSS property description.
| line-comp-op | line-pattern-comp-op | marker-comp-op |
| point-comp-op | polygon-comp-op | polygon-pattern-comp-op |
| raster-comp-op | shield-comp-op | text-comp-op |
Color Blending Values
The following color blending operations can be applied with the comp-op property.
Overlay
Overlay is a color blend mode that combines multiply and screen composite operations. Black appears as dark, as it originally is in its layer; white appears as bright, as it originally is in its layer. How purely other colors are rendered depends on how close they are to white or black. The closer a color is in value to pure midtone gray, the less it will appear. Use this when you want to show both light and dark in your overlapping layers, for example if you are using a textured polygon fill and want the highlights and shadows to appear through another layer. Notice in the example below how the gray-equivalent areas take on the color of the source layer.
marker-comp-op: overlay;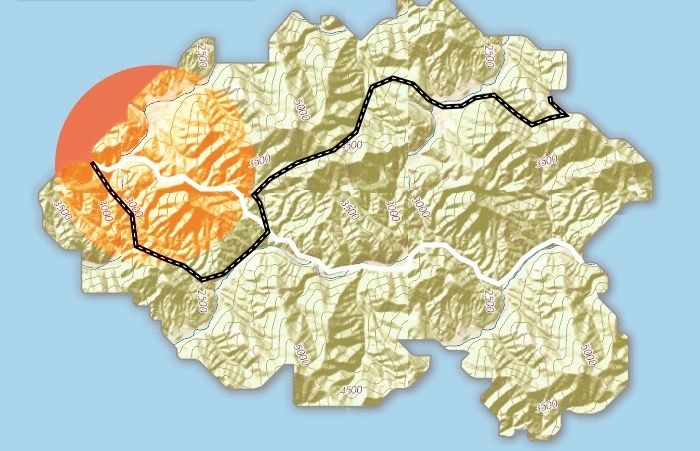
Multiply
Multiply literally multiplies the color of the top layer by the color of each layer beneath, which typically results in the overlapping areas become darker.
A layers color is made of a mix of red, green and blue color channels. Each channel is assigned a percentage decimal value from 0 to 1. If all channels had a 0 value, the color is completely black; if the value is 1, the color is completely white. Multiply takes these channel numbers for one layer and multiplies them with the channel numbers of another. Your colors will often get darker which multiplying two decimal numbers together gives you a smaller decimal. The result is closer to 0 (black). Multiplying 1 (white) by another value will give you that other value, so the area where white mixes with another color will become that other color. Multiplying any color by 0 (black) will always render black.
Imagine it like layering colored sheets of cellophane over one another; white disappears, black stays black. Use this when you want to darken overlapping areas in your map.
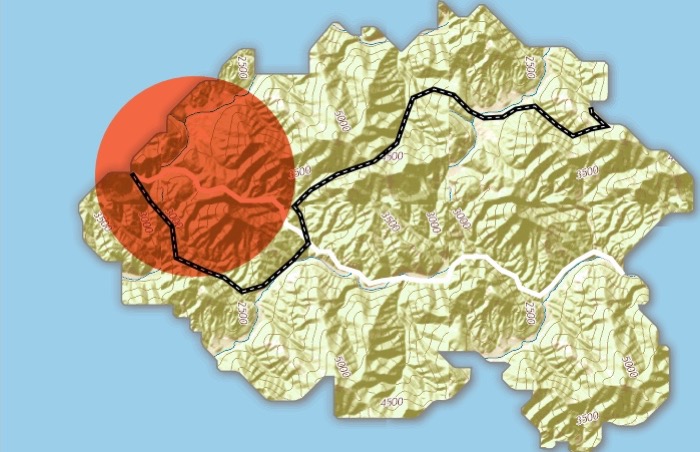
Choosing multiply as the Blending option adds the following CartoCSS code:
marker-comp-op: multiply;Color-Dodge
The color-dodge color blend mode is similar to screen but the overall effect is more extreme. Your elements become much brighter (except if your source layer is black). Darker areas are tinted towards the source color. Use this when you want to have a major lightening effect with extreme contrast between your layers, without much detail showing.
marker-comp-op: color-dodge;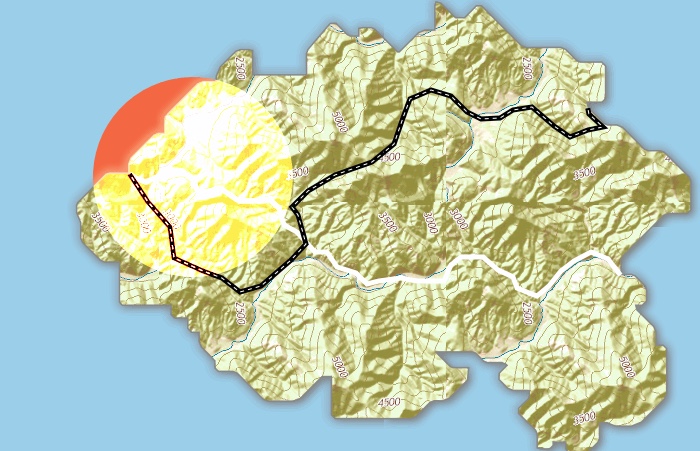
A good reason to lighten a map element is to reduce how much it visually competes with more important map features. For example, see what graticules look like over polygons in this map, when Screen is applied:
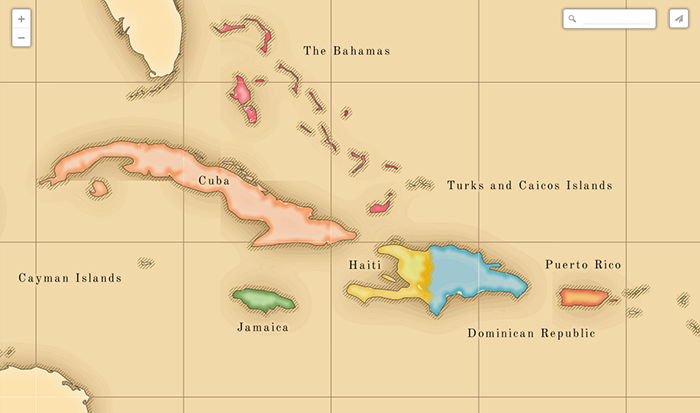
Plus
The plus composite operation adds the color channel values of the source with the destinations. Visually, it adds the sources color to the darkest parts of the destination, and brightens the lighter parts, but tinted towards the source color. If you add a source color where red is the dominant color channel to the destinations red green and blue color channels, the dominant color in the result will be red. The overall effect is brighter than color-dodge. Lighter source colors effect the destination layer more than dark ones. A black source layer will have no effect; a white one will paint the whole destination layer white in the area of overlap.
marker-comp-op: plus;
Minus
Minus works the same way as plus, but instead of adding the color channel values it subtracts them. For example, if your source layer is mostly red, it will subtract this from the destination layers so the overall color is mostly blue and green. This darkens the destination layer more extremely than color-burn, and is also more tinted towards the source color.
marker-comp-op: minus;
Screen
Similar to Multiply, screen multiplies the overlapping areas. Unlike multiply, it subtracts the multiplied color channel numbers from their added value to invert them. This makes the overlapping areas brighter. If white is used, it will not change appearance. Black areas will disappear. Use this when you want to lighten overlapping areas in your map.
marker-comp-op: screen;
Darken
Darken has a similar effect to multiply, but is more extreme. As it applies the color from the source layer to the destination layers, it compares each to find the darkest-colored pixels and keeps those. In the example below displays the darken composite operation in the top circle layer. Notice how only the hillshade shadows and black line show through from the destination layers, because all other elements have lighter-colored pixels than the circle. All pixel colors that are lighter than the top circle take on the circle’s color. Use this when you want a darken effect that shows original color in the darkest areas of overlap, or when you want less detail than is shown in multiply.
marker-comp-op: darken;
Lighten
Lighten works the same way as darken, but inversely. The lightest-colored pixels from each layer are kept, and if pixels are darker than the source layer, then the source layer color replaces them. This can be useful when you want to change the color of your overlapping area’s shadows.
marker-comp-op: lighten;
Hard Light
Hard Light is another color comp-op that you can use with CartoCSS:
marker-comp-op: hard-light;It works similarly to soft light, but is more extreme. Instead of using screen and multiply it uses color-dodge and color-burn, although not applied as strongly as with those comp-ops.
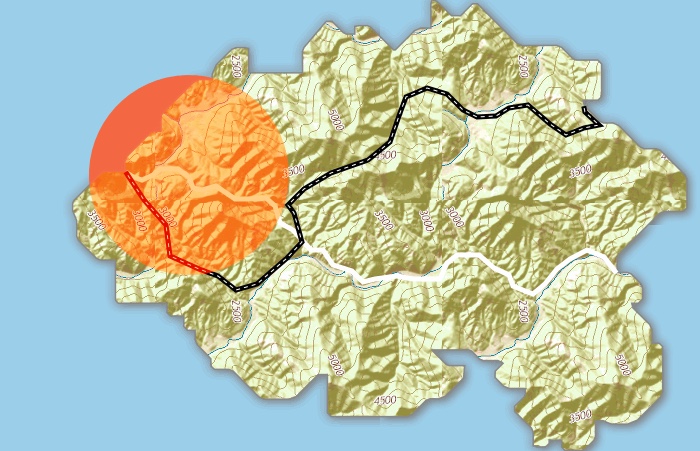
Soft Light
Soft Light will either screen or multiply the destination layer colors, depending on the color of the source layer. If the source color is darker than 50% gray, the multiply effect will be used. If it is lighter than 50%, then screen will be used. Soft-light’s effects are not applied as strongly as multiply’s or screen’s though, so the resulting colors are less extremely tinted. Usually darks will not be pure black and highlights are not pure white.
marker-comp-op: soft-light;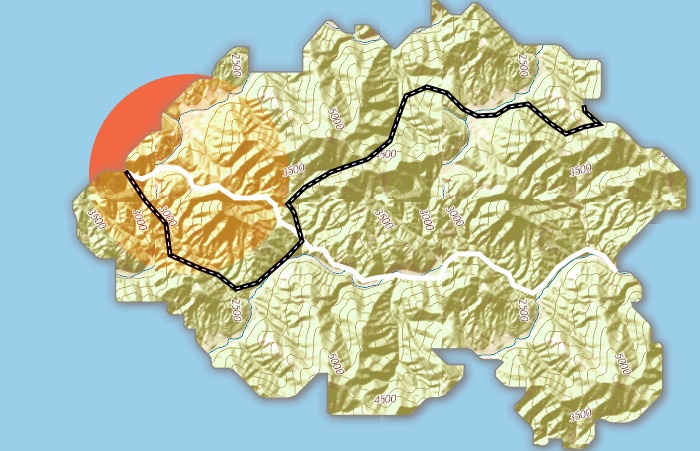
Grain-Merge
Grain-merge is the opposite of grain-extract. It adds the source and destination layer color channel values together, then subtracts 128. When used with textured destination layers, the overall visual effect shows the destination layers texture in the source layer overlap area, but with colors tinted towards the source layers.
marker-comp-op: grain-merge;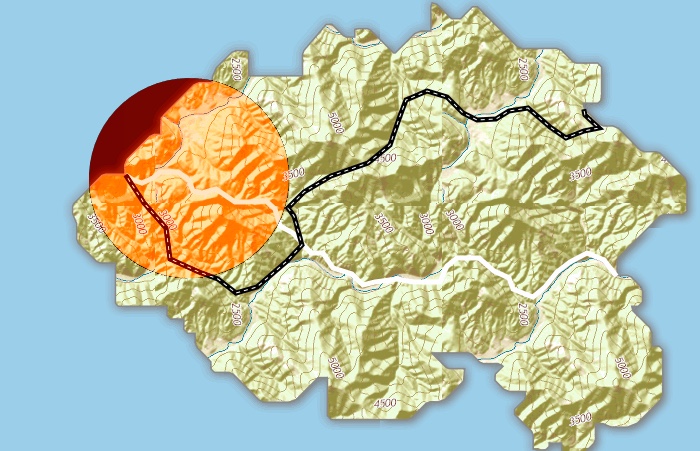
Grain-Extract
Grain-extract subtracts destination layer color channel values from the source layer, and then adds 128. When used with textured destination layers, the overall visual effect shows the destination layers texture in the source layer overlap area, but with a brightened film-negative effect.
marker-comp-op: grain-extract;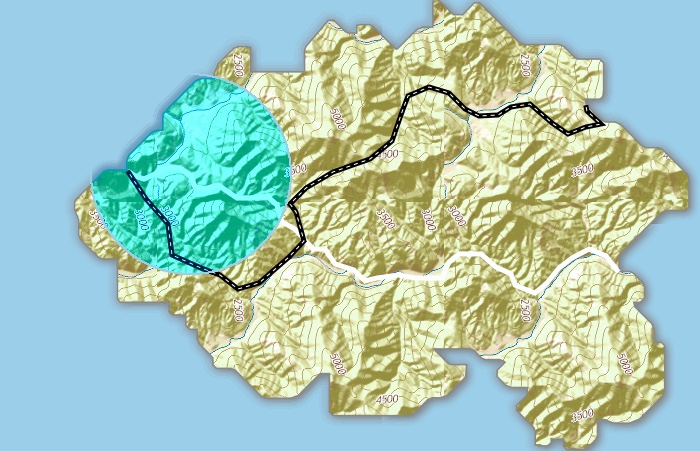
Hue
Hue keeps the color brightness and saturation levels of the destination layers, but renders a result with the same hue as the source layer.
marker-comp-op: hue;
Saturation
Saturation keeps the hue and brightness levels of the destination layers, but renders a result with the same level of saturation as the source layer. If you are using white in the source layer, there will be less saturation in the result. Black will render the highest level of saturation. Color half way between them, gray, will not have an effect.
marker-comp-op: saturation;
Color
Color keeps the source layer’s hue and saturation levels, but renders a result with the brightness of the destination layers.
marker-comp-op: color;
Value
Value keeps the brightness levels of the source, but renders a result with the hue and saturation levels of the destination layers.
marker-comp-op: value;
Color-Burn
Color-burn works similarly to color-dodge, but has a darkening effect. It increases the contrast between source and destination layers, with pixels in your overlapping area tinted towards the source color. Use this when you want a darkening effect with more contrast than multiply or darken.
marker-comp-op: color-burn;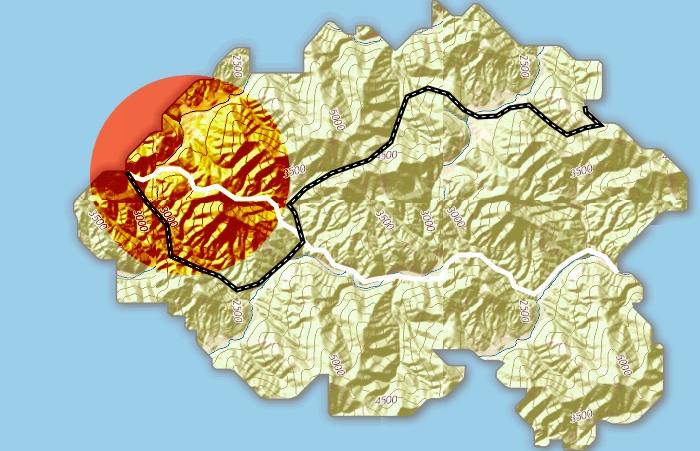
For a good example of using darkening effects, view this election map. Its lower layer shows population density with gray scale colors, and its upper layer shows U.S. political parties in red and blue. When you use a darkening composite operation, the polygons show voting results by political party, modulated by the population density.
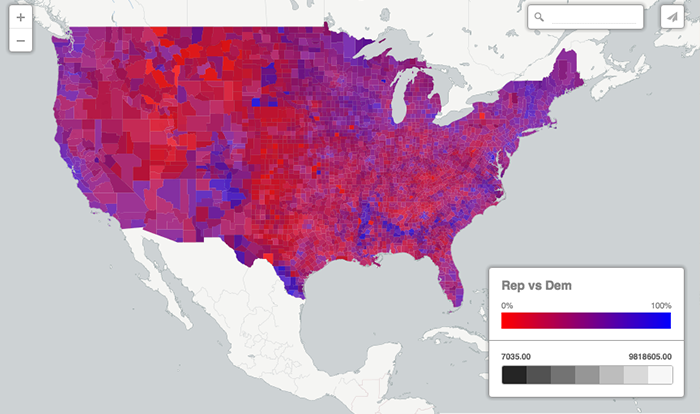
Difference
The difference blending mode compares the source to the destination layers and finds the brightest color areas for each color channel. It gets the difference between color channel numbers by subtracting them from each other, and taking that absolute value. Using pure white inverts the colors it is blending with; black has no effect. In areas where the colors being compared are very close in value, the result is black.
marker-comp-op: difference;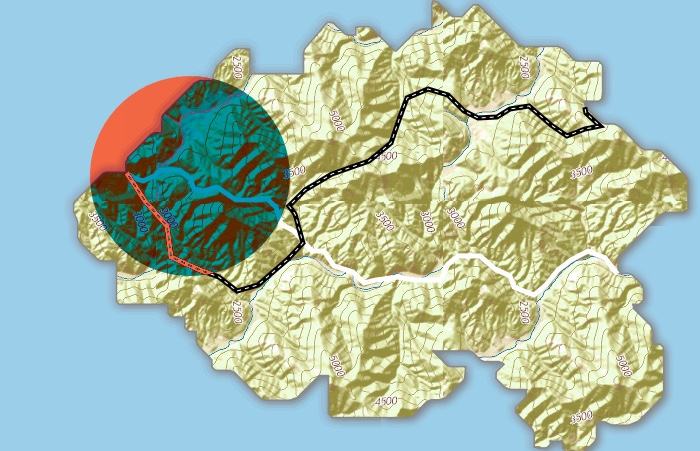
Exclusion
Exclusion is similar to difference, but less extreme. In areas where the colors being compared are very close in value, the result is lighter than black. For example, notice the gray areas where the circle is the same color as the layers beneath, in following map:
marker-comp-op: exclusion;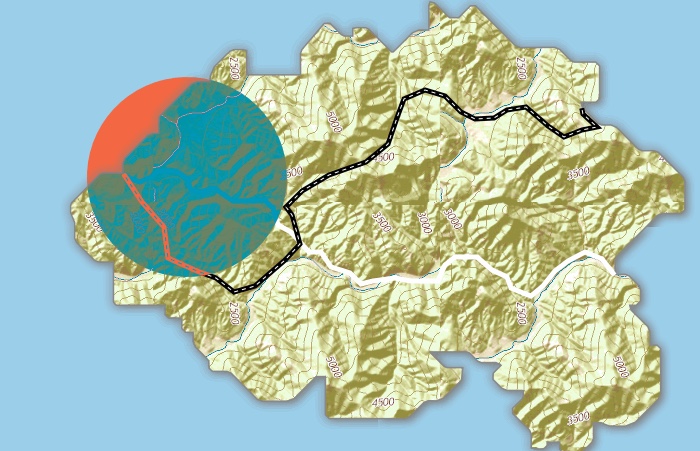
Contrast
Contrast magnifies the difference between the dark and light areas of your overlapping layers. If the source layer color is lighter than 50% gray, the destination layers will show through the source layer with decreased contrast. If the source is darker than 50% gray, the destination layers will show through the source layer with increased contrast. Besides making lighter areas brighter and darker areas darker, this has the visual effect of erasing fine detail.
marker-comp-op: contrast;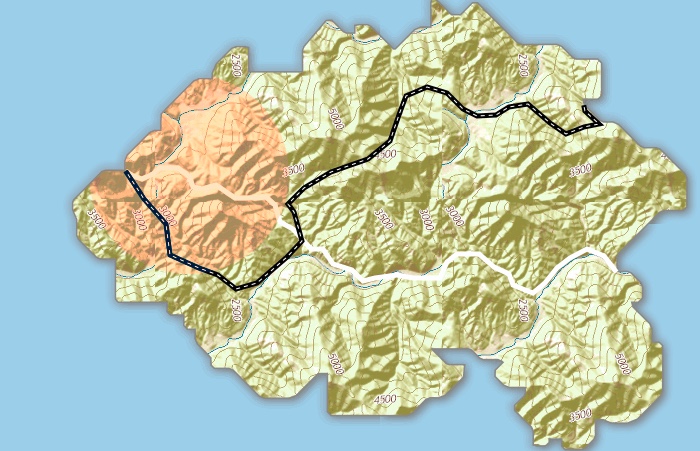
Use contrast effects when you are trying to control how both dark and light elements in your map stand out from the other elements, or blend in with them better. For example, compare the dark red and blue areas to the lighter colored areas in the the map below. Notice how the gray county outlines do not stand out as well against the darker red and blue backgrounds.
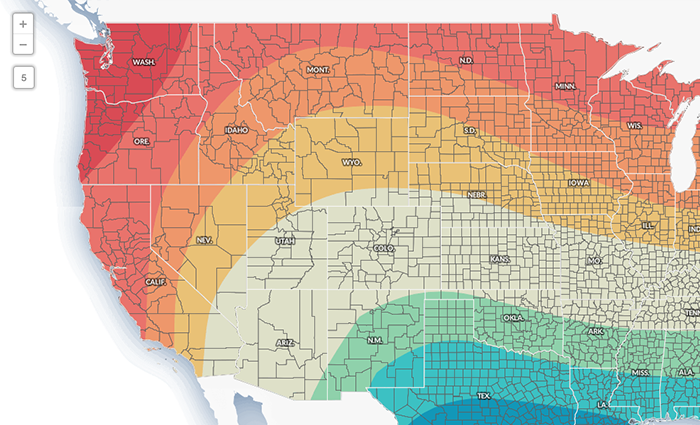
Now, look how much more evenly the county lines blend with background colors in this map. We have also kept the white state outlines.
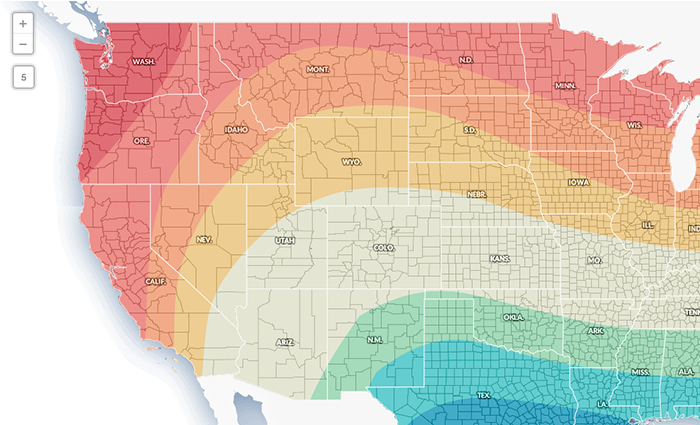
Invert
Invert turns each RGB channel color into its opposite. Areas that look black originally will turn white, areas that look red will turn green, blues will turn orange, yellows will turn purple.
marker-comp-op: invert;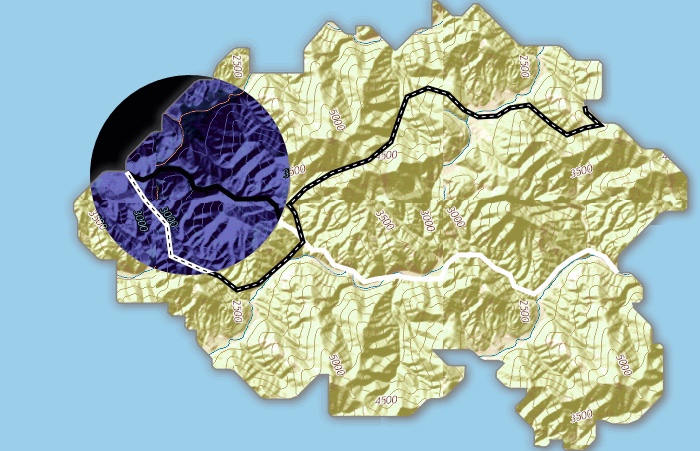
Invert-RGB
Invert-rgb also inverts color channel colors, but then tints them towards the source color.
marker-comp-op: invert-rgb;
Alpha Blending Values
The following alpha blending values can be applied with the comp-op property and combine different levels of source transparency with destination layers. These are useful for masking parts of one layer with another. They use the shape of the layer to show or hide the rest of the rendered map, as opposed to altering the color of a layer.
Tip: Alpha values are useful when applying the comp-op property to the overall map style effect. As an additional resource for working with alpha composition methods, see Duff-Porter Alpha Composition Methods.
| src | dst | src-over |
| dst-over | src-in | dst-in |
| src-out | dst-out | src-atop |
| dst-atop | xor | clear |
Src
Src is an alpha composite operation that keeps the full transparency of the source layer. Whether the source layer is above or below layers using other composite operations, it will show through completely opaque.
marker-comp-op: src;
Dst
Dst is an alpha composite operation that keeps the full transparency of the destination layers. The source layer becomes invisible in areas where it is overlapping with the destination layers.
marker-comp-op: dst;
Src-over
Src-over keeps the full transparency of both the source and destination layers. The visual effect is that the source layer shows on top of all layers involved in the overlap area.
marker-comp-op: src-over;
Src-in
Src-in only shows the part of the source layer that intersects with the destination layer.
marker-comp-op: src-in;
Src-out
Src-out only shows the part of the source layer that does not intersect with the destination layer. The destination layers are also not drawn within the area of overlap.
marker-comp-op: src-out;
Src-atop
Src-atop makes sure that the source layer is shown at the top of all layers involved in the composite operation, within the area of overlap.
marker-comp-op: src-atop;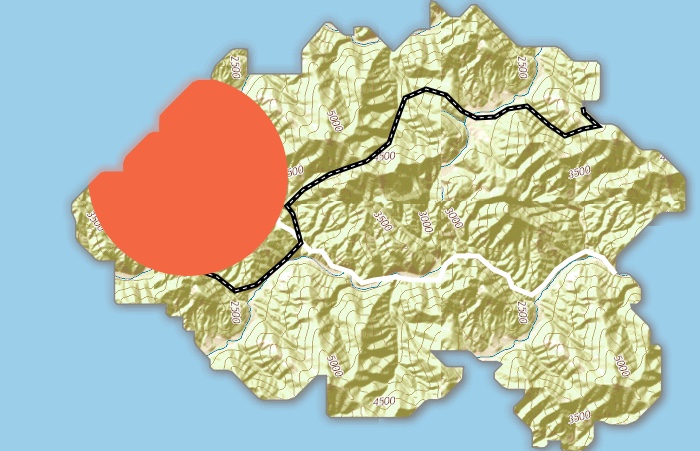
Dst-over
Dst-over also keeps the full transparency of the source and destination layers, but its effect is that the source is shown beneath all destination layers.
marker-comp-op: dst-over;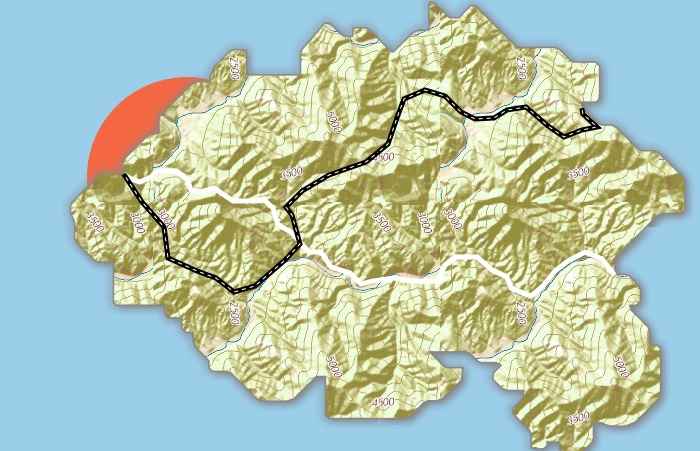
Dst-in
Inside the overlap area, dst-in only shows the destination layer.
marker-comp-op: dst-in;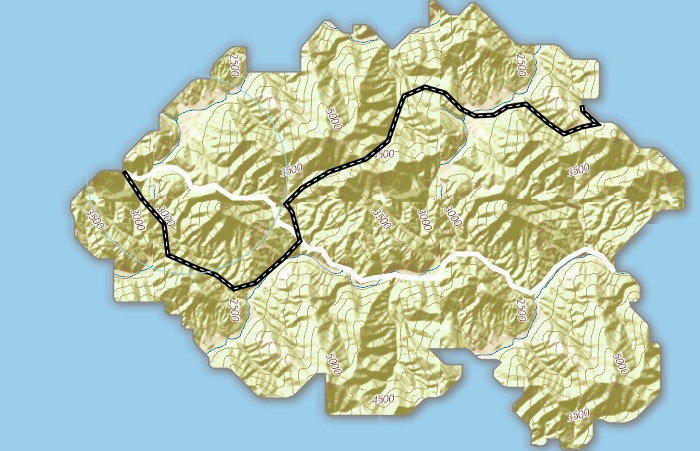
Dst-out
Dst-out only shows the part of the destination layer that does not overlap with the source layer. It also removes the source layer’s color.
marker-comp-op: dst-out;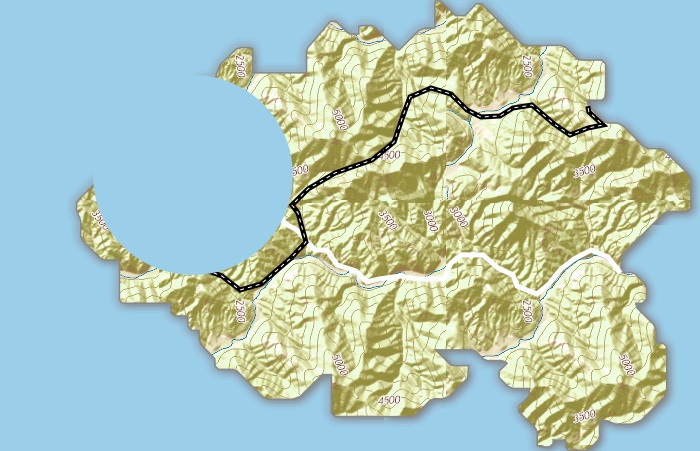
Dst-atop
Dst-atop shows the destination layers on top of the source layer, in the places where they overlap.
marker-comp-op: dst-atop;
Xor
Xor shows both the source and destination layers, but only the parts that do not overlap each other.
marker-comp-op: xor;
Clear
The clear composite operation acts as an eraser. It makes all pixels transparent in the area where source and destination layers overlap.
marker-comp-op: clear;
*Contains public sector information licensed under the Open Government Licence v3.0.
- Null Island topography taken from USGS National Map. Map services and data available from U.S. Geological Survey, National Geospatial Program.