Editor FAQs - Datasets and Data
Frequently asked questions about Editor datasets and data in CARTO.
What databases are supported by CARTO?
The CARTO geospatial database is built on the PostgreSQL platform and supports advanced PostGIS capabilities. All of our tables include the_geom column, which is a geometry field that indexes geometries with the EPSG:4326 (WGS 1984) coordinate system. All tables also automatically generate and update the_geom_webmercator column, which references the column internally to quickly create tiles for maps. The CARTO Engine connects your database with the Map API and the SQL APIs so that you can interact with data remotely and access the most recent data libraries.
How to export datasets from CARTO?
You can export any of your datasets for use offline. The Export option is available from the Edit menu when a dataset is selected. Additionally, you can also export a dataset layer directly from a selected map with the Export layer menu option.
-
Visit the Data page.
-
Click on the name of a dataset.
-
The selected dataset opens in the Data View.
-
Select Export from the Edit drop-down menu.
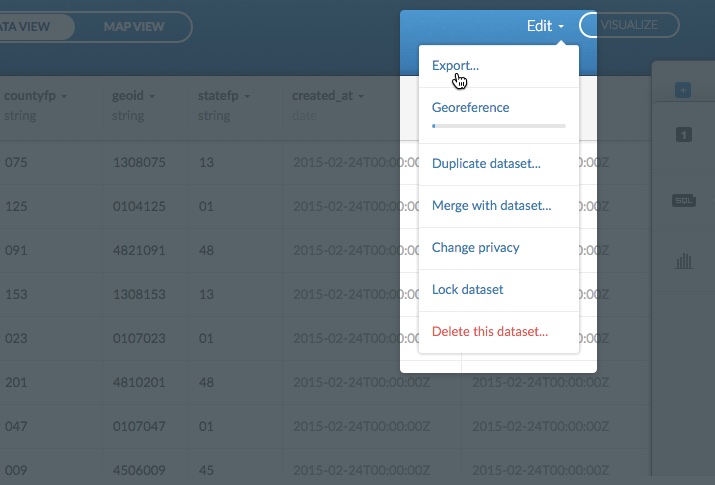
Tip: You can also export a dataset layer directly from a selected map. From your maps dashboard, select Edit layer from the Edit map options of a selected map.
The export dataset options appear. Options may vary, depending on your data.
-
Select the preferred file format.
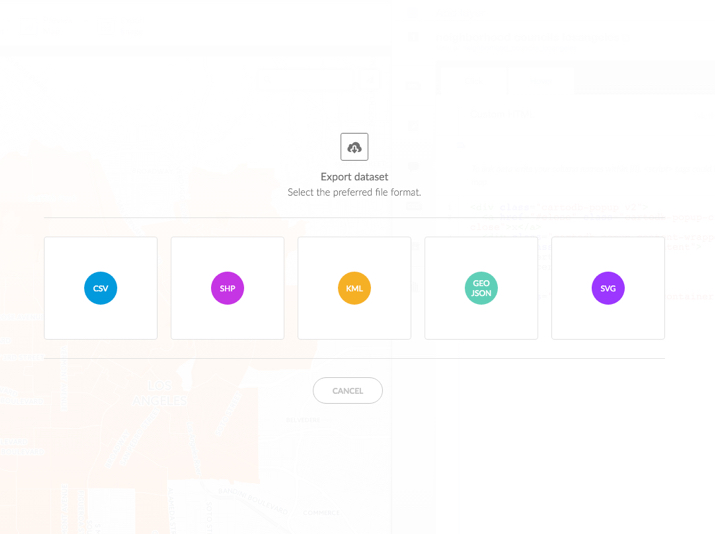
Note: CARTO supports the following file formats for exporting geospatial data: CSV, Shapefile, KML, GeoJSON, and SVG formats.
The dataset is downloaded based on your web browser process.
Tip: If you are using the SQL API, you can use your table URL to run a response query and export downloads in different formats. For example, the following sample code shows the CSV export format for an SQL API request.
http://{USERNAME}.cartodb.com/api/v2/sql?format=csv&q=SELECT+*+FROM+tm_world_borders_simFor more information about using the SQL API, see this section of the CARTO Developer Center.
What licensing terms does CARTO administrate for my uploaded data?
See the terms and conditions for Subscriber Content at /legal.
What format does CARTO use for geographic coordinates?
CARTO utilizes geographic coordinates written as decimal degrees. Applying a latitude and longitude format is an alternative to using degrees, minutes and seconds. Decimal degrees is the most common georgraphic coordinate format used for web mapping applications.
Why does CARTO use Census Bureau ZCTAs, and not USPS zip codes, for postal codes?
For the USA, US Census Zip Code Tabulation Areas (ZCTA) are used to reference geocodes for USPS postal codes service areas. This is not a CARTO restriction, this is a US Government licensing protection of their zip code data source, which is not publicly available. Additionally, zip codes are considered service areas and are not actually geometric areas. As a solution, the US Census provides ZCTA data, which tabulates GIS postal codes for USPS locations by aggregating census blocks. For details about how ZCTAs are created, see ZIP Code™ Tabulation Areas (ZCTAs™). If you are geocoding data and your zip codes fail, ensure you are using ZCTAs for the postal code.
Why has my dataset size increased after uploading to CARTO?
A database table has a lot more storage considerations than a CSV file. For example, an uploaded dataset contains indexes and data types. It is also important to recognize that data stored on a disk is optimized for lookup and retrieval speed over storage space.
Can I synchronize my datasets in real time?
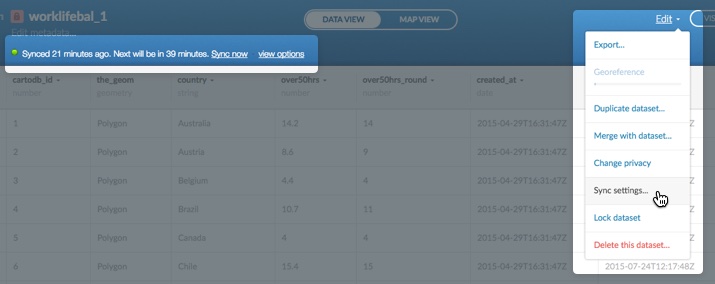
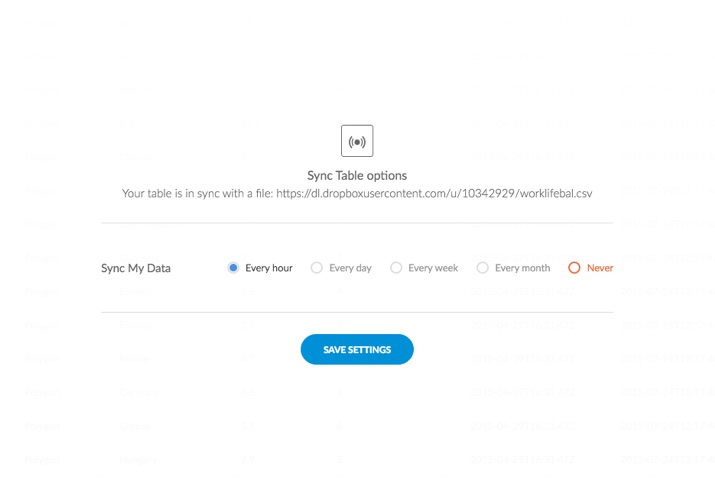
If you have applied sync settings for your dataset, the shortest automatic syncing interval is every one hour. Optionally, you can force a manual synchronization up to every 15 minutes. The example image below shows the Sync settings option, located from the Edit menu of your datasets dashboard. Once a dataset is synced, the sync status appears above your table in the Data View.
-
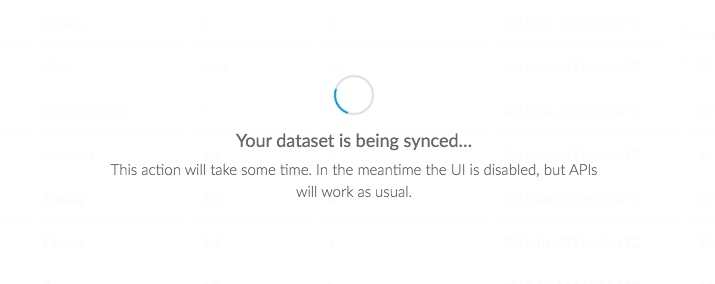
Click Sync now to sync your data in real time.
-
Alternatively, click view options to open the Sync Table options and select the sync settings.
How do I geocode IP addresses that are included in my data?
CARTO requires that IP addresses are in an isolated column in order recognized and geocoded. You can run an SQL query to store values in a new column and isolate IP addresses. For example:
UPDATE tablename SET new_ip_column = substring(old_ip_address_column_name, '(?:\d{1,3}\.){3}\d{1,3}')Optionally, from your datasets dashboard of the CARTO Editor, click Georeference from the Edit menu and select IP Addresses to select where your IP Addresses are stored.
How can I lock a dataset/map?
To prevent your data from undesired changes, you can lock your datasets and maps. Locking a dataset or map hides it from your dashboard.
Locking a Dataset/Map
There are several methods to lock a dataset or map.
Note: The following example describes how to lock a dataset, but the same procedure applies to maps. Options are applicable based on the selected page.
-
Visit the Data page.
- The datasets view appears, displaying all of your datasets.
- You can access the lock options directly from that page, or from the dataset view.
-
From the Data page:
-
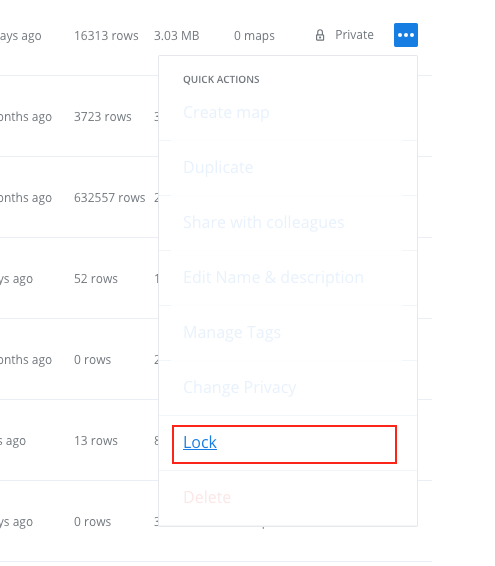
Click on the icon with three dots to expand the quick actions menu.
-
Click Lock.
- A confirmation dialog box appears.
- Click OK,LOCK.
- The page refreshes, hiding the locked dataset from the view.
-
-
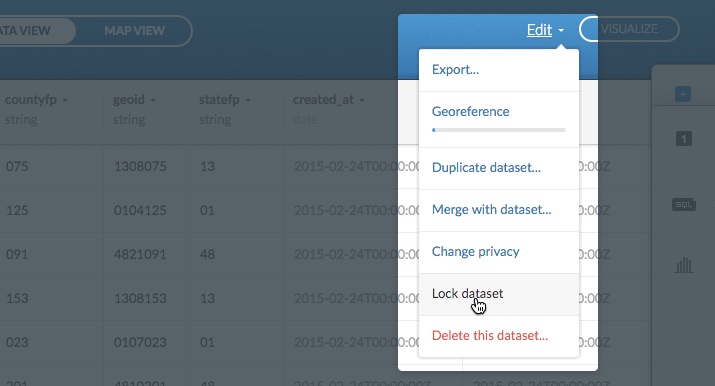
From the dataset view:
- Click the name of a dataset.
- The selected dataset opens in the Data View.
-
Select Lock dataset from the Edit menu.
Viewing Locked Datasets/Maps:
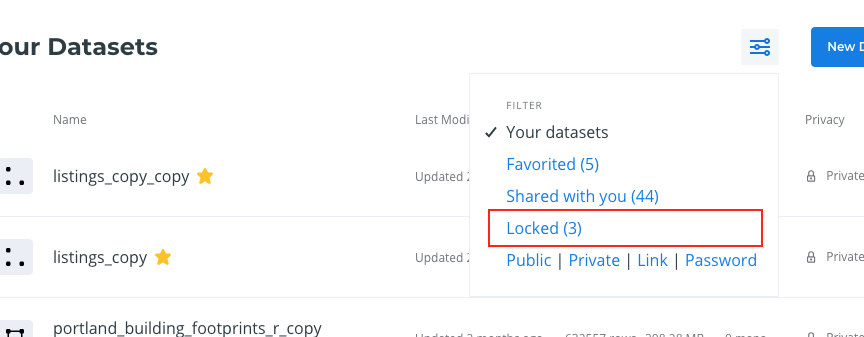
Once your dataset is locked, you can access it using the Locked filter. If you attempt to view a locked dataset, a confirmation dialog appears. You are prompted to unlock your dataset before viewing it.
Why isn’t my Shapefile importing?
CARTO creates datasets from shapefiles by importing a single zipped file. If your shapefile is not importing, make sure that:
- You are uploading a zipped file, and not just one of the files it contains, such as a .shp file.
- Your zipped file contains .shp, .dbf, .shx, and .prj files.
- Your file names all have the same prefix. For example, myshapefile.zip, myshapefile.shp, myshapefile.dbf, myshapefile.shx, and myshapefile.prj.
Why is my URL-imported dataset empty?
When you create a dataset in the CARTO Editor by importing data from a public URL, an empty dataset is generated if the proper files are not imported from that data. Download the URL file and check that it contains information. If the URL provides you with a .zip containing more than one file, CARTO only uploads one of them.
To create your dataset properly, import only the data file you need. See a list of the supported geospatial data formats that CARTO accepts.
Note: If you are working with a shapefile, its components must be uploaded in a single zip file.
Tip: View the Common Data section to see if your public URL’s data is already available through CARTO.
How can I export my dataset without geocoded data?
In some cases, you might want to export your dataset without the location information (geocoded data). While you are not able to manually delete the_geom column from your dataset, you can apply an SQL query to create a new dataset and specify which data to include in your export. From the CARTO Editor, click SQL from the CARTO sidebar to open the Custom SQL query. Enter the following request:
SELECT {column name}, {another column name} FROM {tablename}-
Replace
column nameandanother column namewith the names of columns to include in your export.Tip: You can add more columns to your result by adding more comma-separated column names.
- Replace
tablenamewith the name of your current dataset. -
Click Apply query.
The data view refreshes, excluding your geocoded data.
- Click Export from the Edit menu to export your dataset.