Publishing and Sharing Maps
Describes how to publish and share any CARTO Map.
This guide describes how you can publish and share any CARTO map through CARTO Builder.
Map Publishing Options
CARTO Builder lets you GET THE LINK to share a link to your map, or EMBED IT using HTML code for a blog or website.
Prepare Map for Publishing
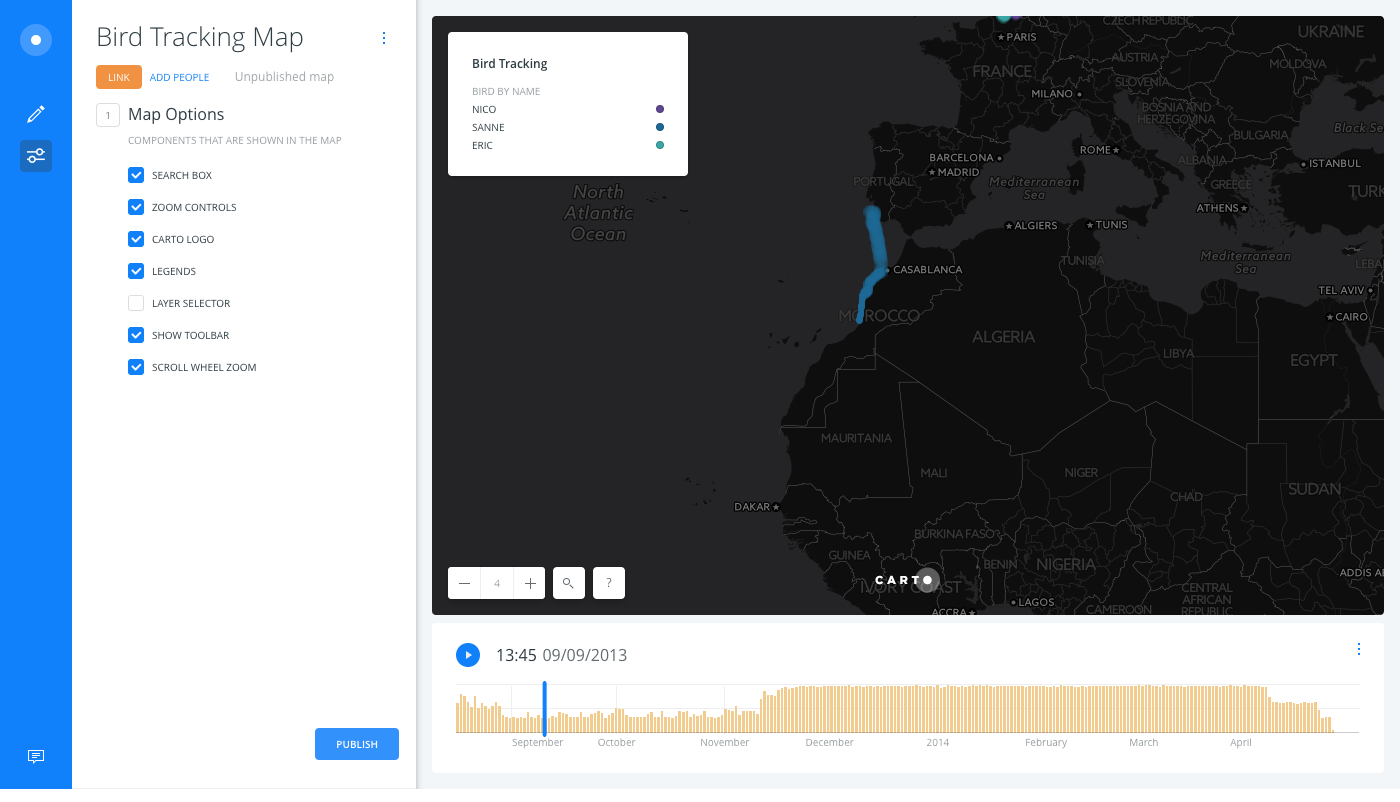
Before publishing your map, you can control the features that display on your map from the Map Options, which are available from the Builder toolbar.
CHEATSHEET: Attribution Requirements
Attributions represent the data sources used in your map, which may have copyright protections. There are several methods of defining map attributions. For more information, see how CARTO defines attributions as part of our Terms of Service.
- Automatic Attributions - When you choose a basemap, export a map as an image, or download a map as a .carto file with CARTO Builder, map attributions are automatically included.
- Dataset Attributions - When you are using third-party data for your maps, you may need to provide attributions about the data sources. To add attributions to a dataset, use the "Edit metadata" option, which is accessible from the dataset name menu option.
- Print Attributions - When you are printing CARTO maps, be sure map attributions are included. For details, see Printing Map Images.
CARTO provides privacy settings for your map and the datasets used in the map. The default privacy setting varies, depending on the account type. For some accounts, you can change the privacy setting at any time.
Ensure that your dataset reflects the privacy setting that you intend for the target audience; so that data is visible and accessible when you share your map.
Share Map (Enterprise Accounts)
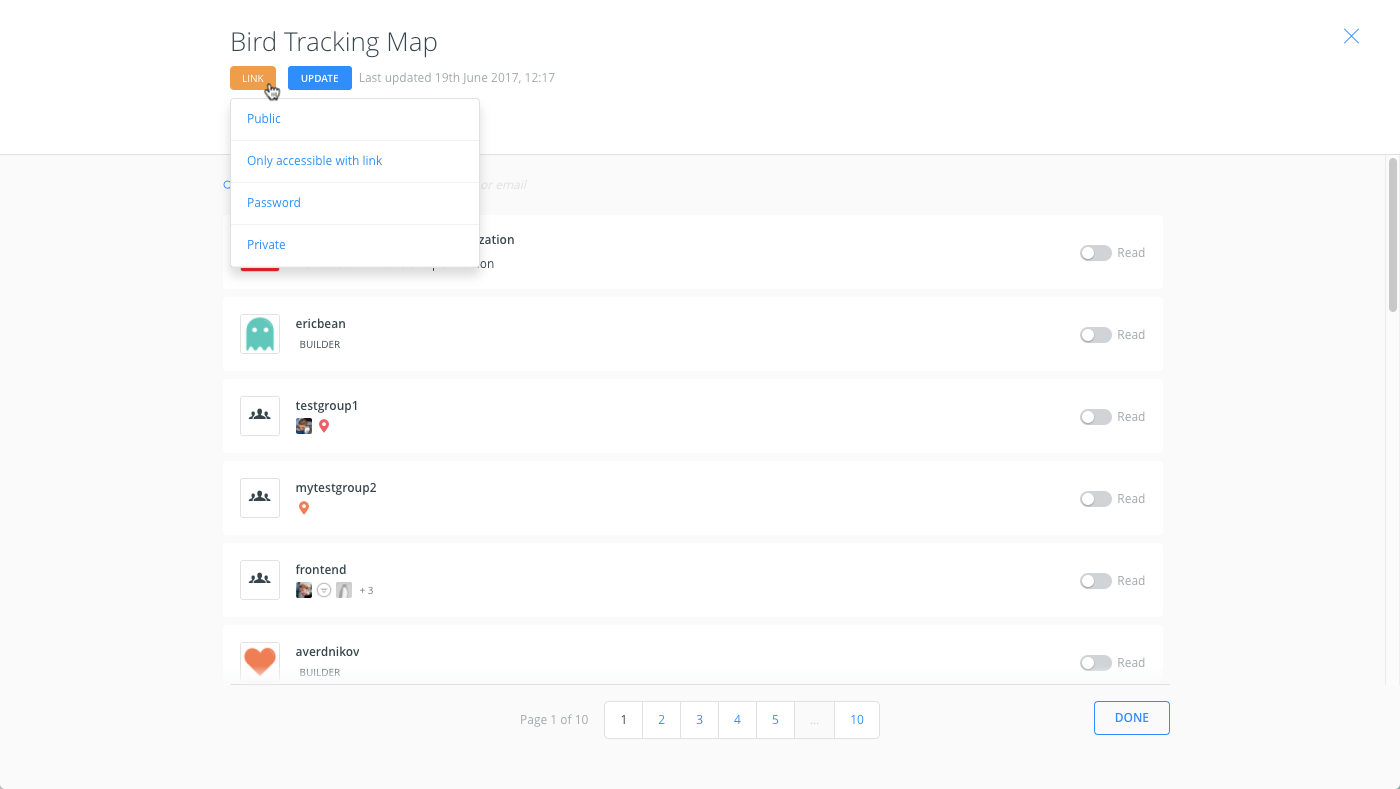
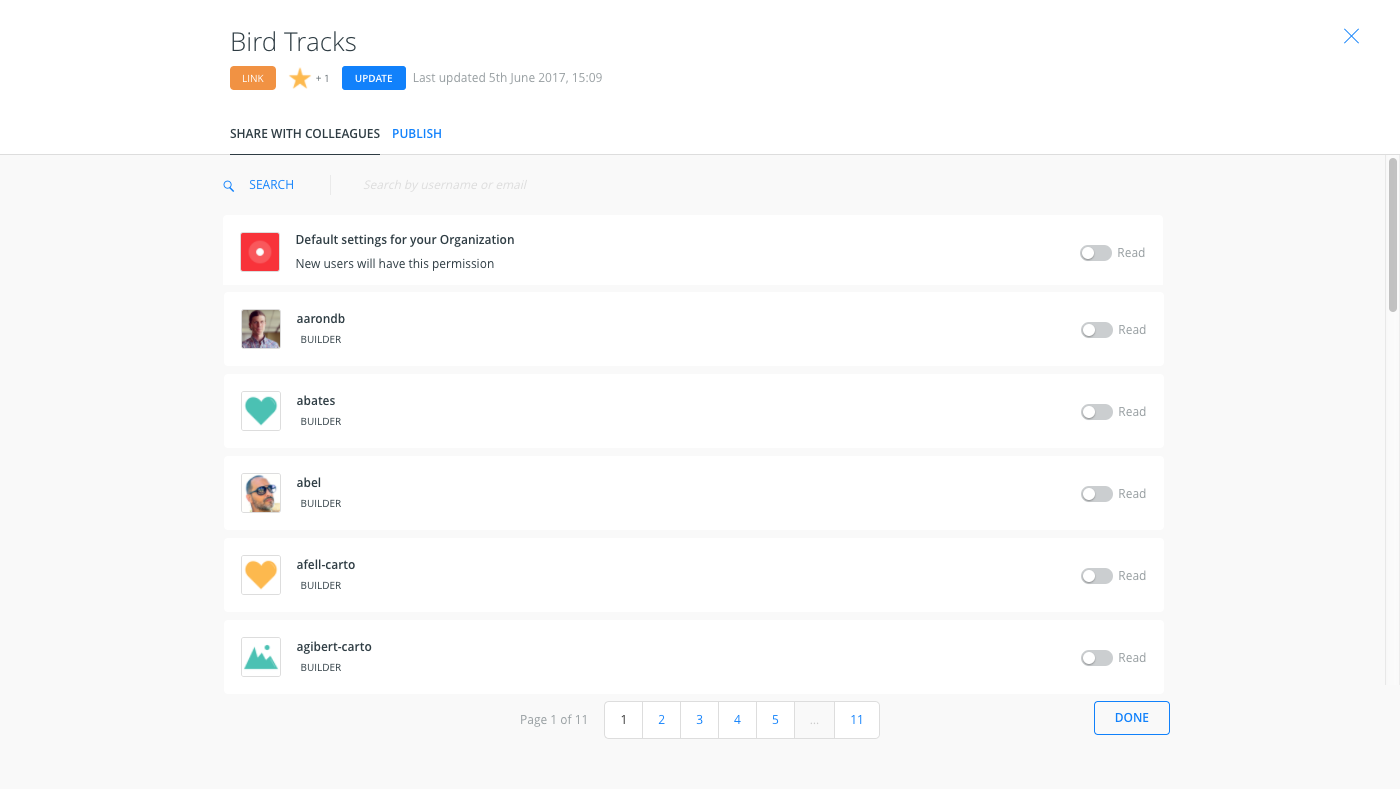
For Enterprise accounts, you can access the sharing settings directly from the publishing options and share maps between colleagues in your organization. Sharing a map is not the same as publishing a map. Sharing is internal, publishing is external.
-
From the LAYERS list of Builder, click SHARE.
The SHARE WITH COLLEAGUES subtab appears by default; where you can specify who you want to share your map with. You can also view these options by clicking ADD PEOPLE, located underneath the map name.
-
Search for team members by username or email, or select a team member from your group.
-
Click the slider button to activate Read access for the team member. If the user is part of a group, they can share the map or dataset with the group that they belong to.
The users, groups, and access levels that appear are managed by your organization administrator.
All maps are read-only (this is intentional by design, so that the original map owner can prevent any unwanted edits).
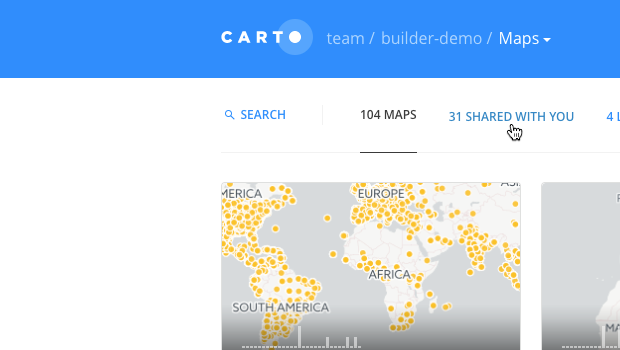
- If you have read-only access to a map, you can select the map from the "SHARED WITH YOU" section of _Your maps_ dashboard, download it from the user's public profile page, and import the .carto file to your account to edit it.
- If you are sharing datasets with your colleagues (from _Your datasets_ dashboard), the share options will display read and write access options.
Publish and Update Map
Once your map options are adjusted and your privacy settings are set, you can publish (and update) your map externally.
For Enterprise accounts, only users assigned write access (Builder) can publish maps. User access levels are set by your organization administrator.
-
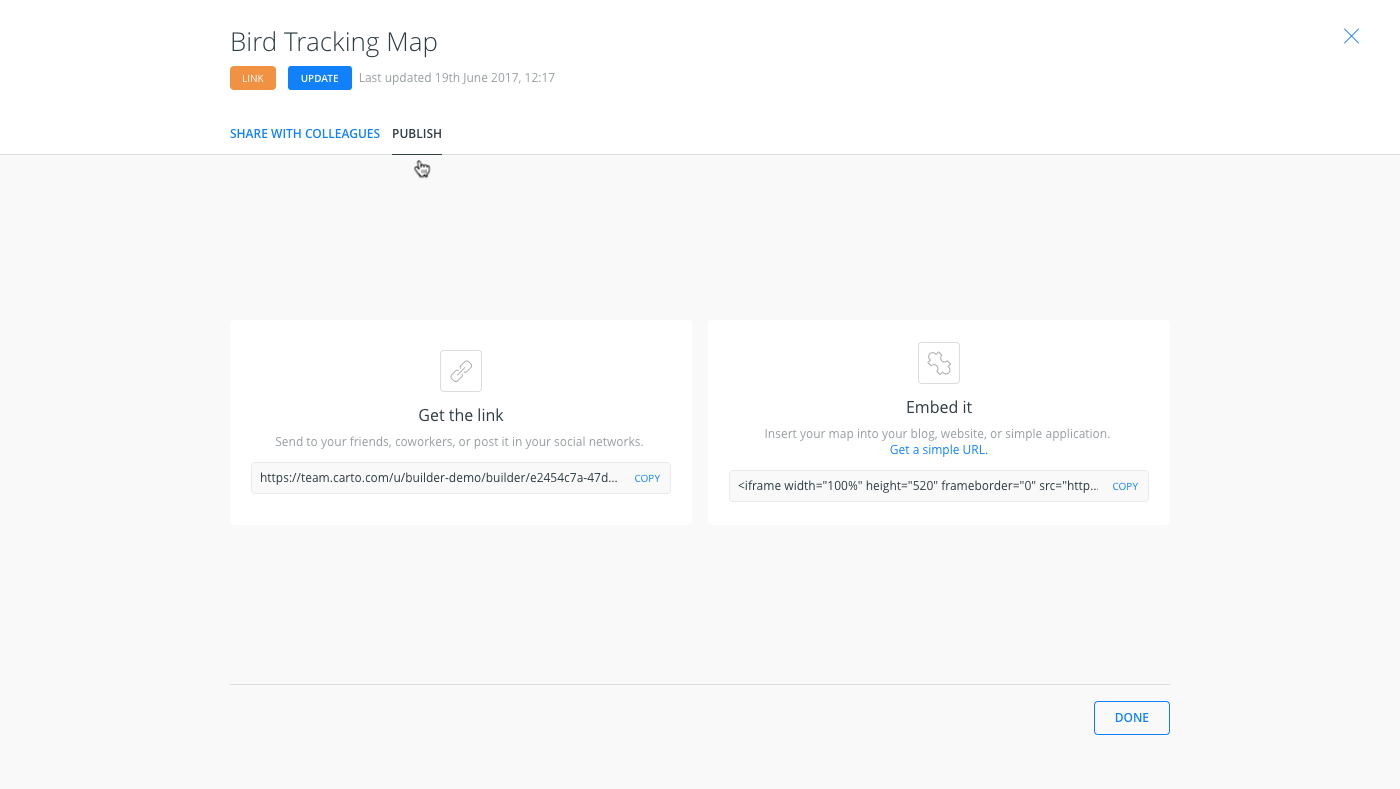
From an open map in Builder, click PUBLISH to open the publishing options.
The publishing options display the SHARE WITH COLLEAGUES and the PUBLISH options. You can toggle between these subtabs if you are an Enterprise user. Otherwise, the publish options appear.
-
Click the PUBLISH button, located underneath the map name. (If the map has already been published, this button appears as UPDATE).
If you are publishing a private map, the Get the link and Embed it options are disabled. There is a shortcut to change your map privacy directly from the publishing options.
The link and embed code appear.
-
Click DONE to close the publishing options and return to Builder.
All maps reflect the timestamp for when they are published. You can continue to edit your map in Builder without modifying your live, published version!
If you apply any changes to your map and need to update it, click the PUBLISH button to repeat this procedure. The live url and embed link reflect your changes automatically after you update!
All CARTO maps can be downloaded as .carto files. See the Downloading and Importing CARTO Maps guide for more information.