Creating your own basemap with data layer
Describes how to apply style a custom basemap for rendering your map background in CARTO Builder.
As discussed in the intro guide to basemaps, basemaps are made up of a series of image tiles that render maps of the world. As an alternative to using one of the basemap sources in Builder, you can create your own with custom data and styling.
This guide outlines how to create a basemap in Builder with custom layers and CartoCSS.
Turn Off the Basemap
You can turn off the basemap in Builder by changing the background of your Map View to white. This essentially removes the map background, enabling you to apply custom styling to your own data.
- Import the template .carto file packaged from the “Download resources” of this guide and create the map.
Click on "Download resources" from this guide to download the zip file to your local machine. Extract the zip file to view the .carto file(s) used for this guide.
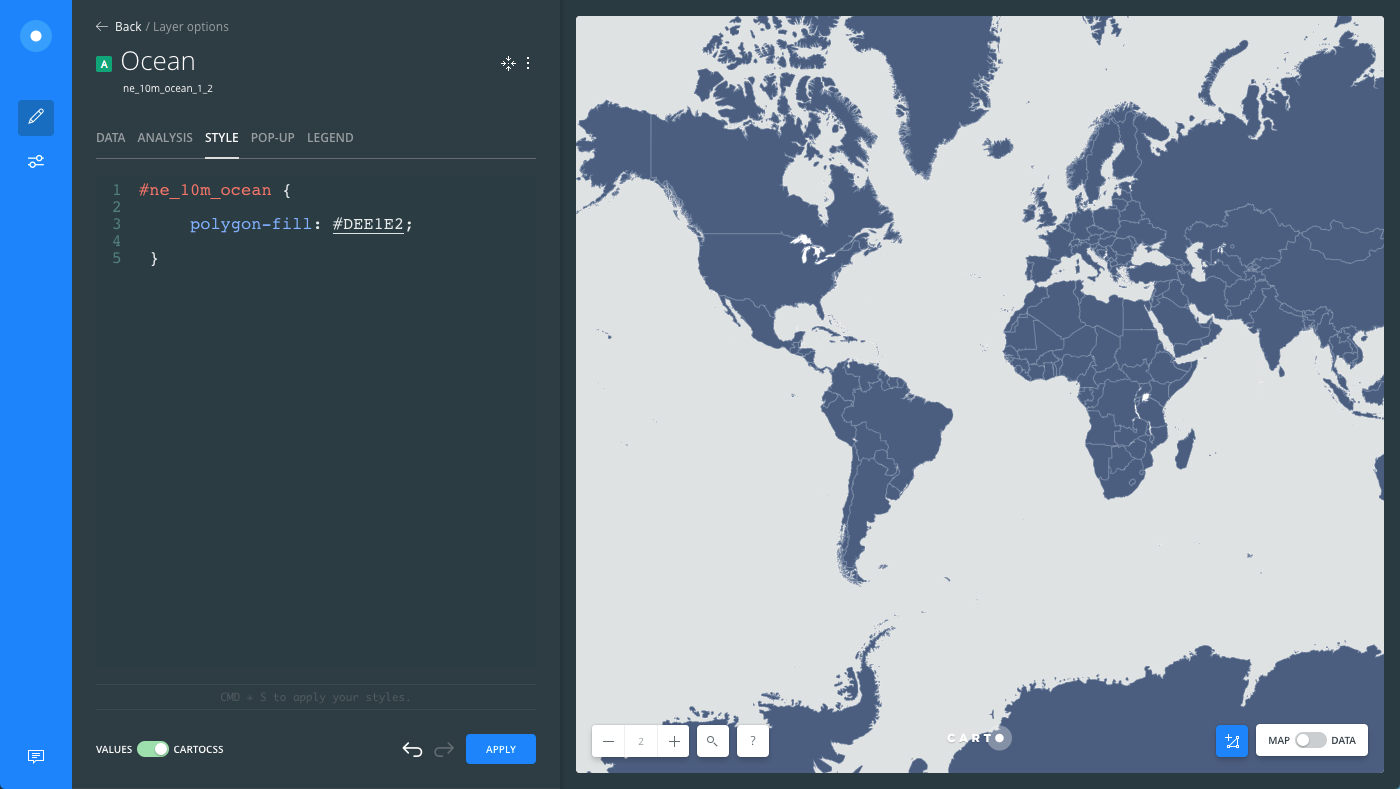
The map contains two layers from Natural Earth. The layer Ocean, contains ocean polygons derived from 10m ocean coastlines. This data includes water clipping levels as part of its data. The layer Countries, contains cultural vector polygons derived from 247 countries in the world, and has interior lake boundaries clipped out.
-
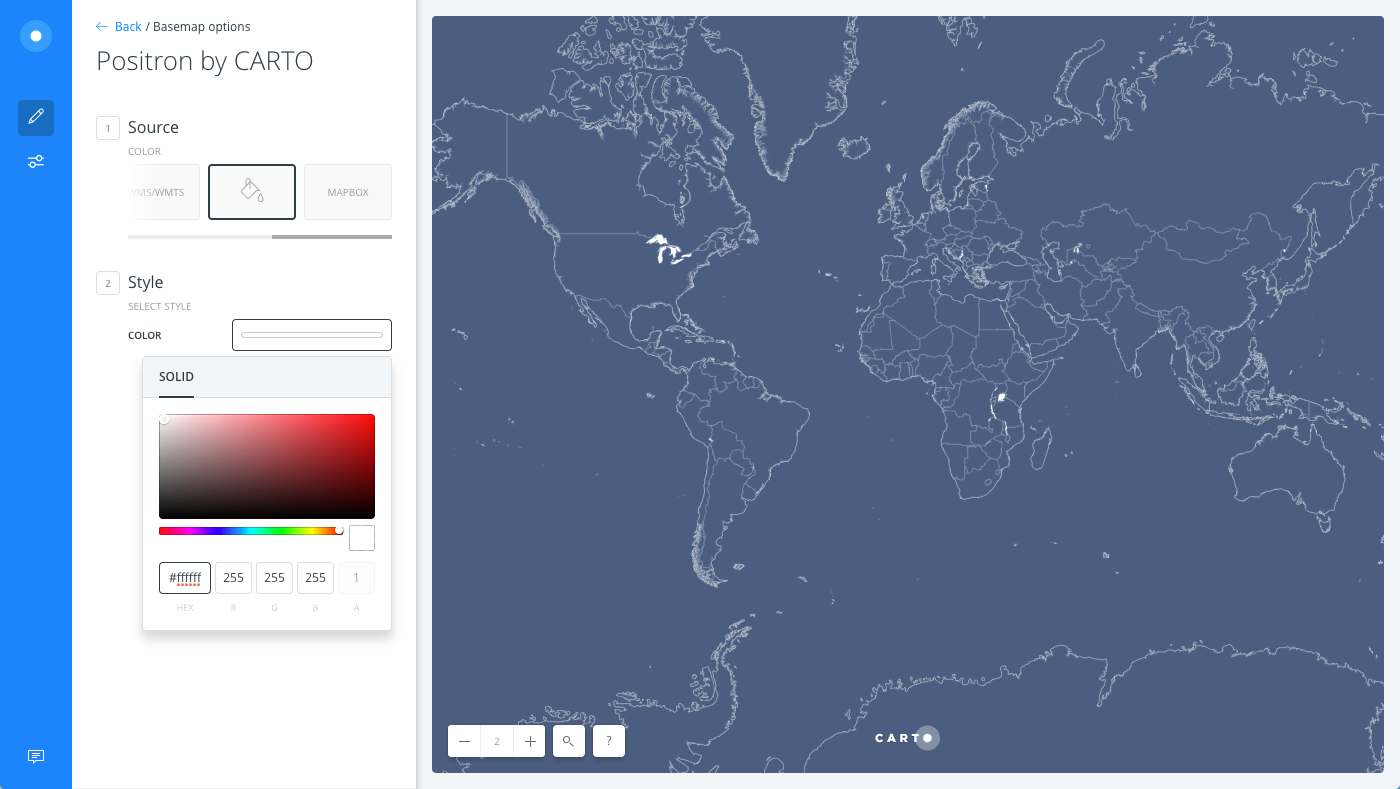
From the LAYERS list, click on the basemap name to view the basemap options.
-
Change the basemap source to a COLOR.
-
Apply white
#ffffffas the HEX code for the background color
Custom Fill Properties
The following steps describe how to apply custom CartoCSS to style both map layers.
-
Apply a fill color to the Ocean map layer:
- From the LAYERS list, select the Ocean map layer.
- Click the STYLE tab.
- Click the slider button from VALUES to CARTOCSS.
- Apply the following CartoCSS to style this layer.
 #ne_10m_ocean {
     polygon-fill: #DEE1E2;
 }
The defined HEX code is applied as the fill color for the Ocean layer.
-
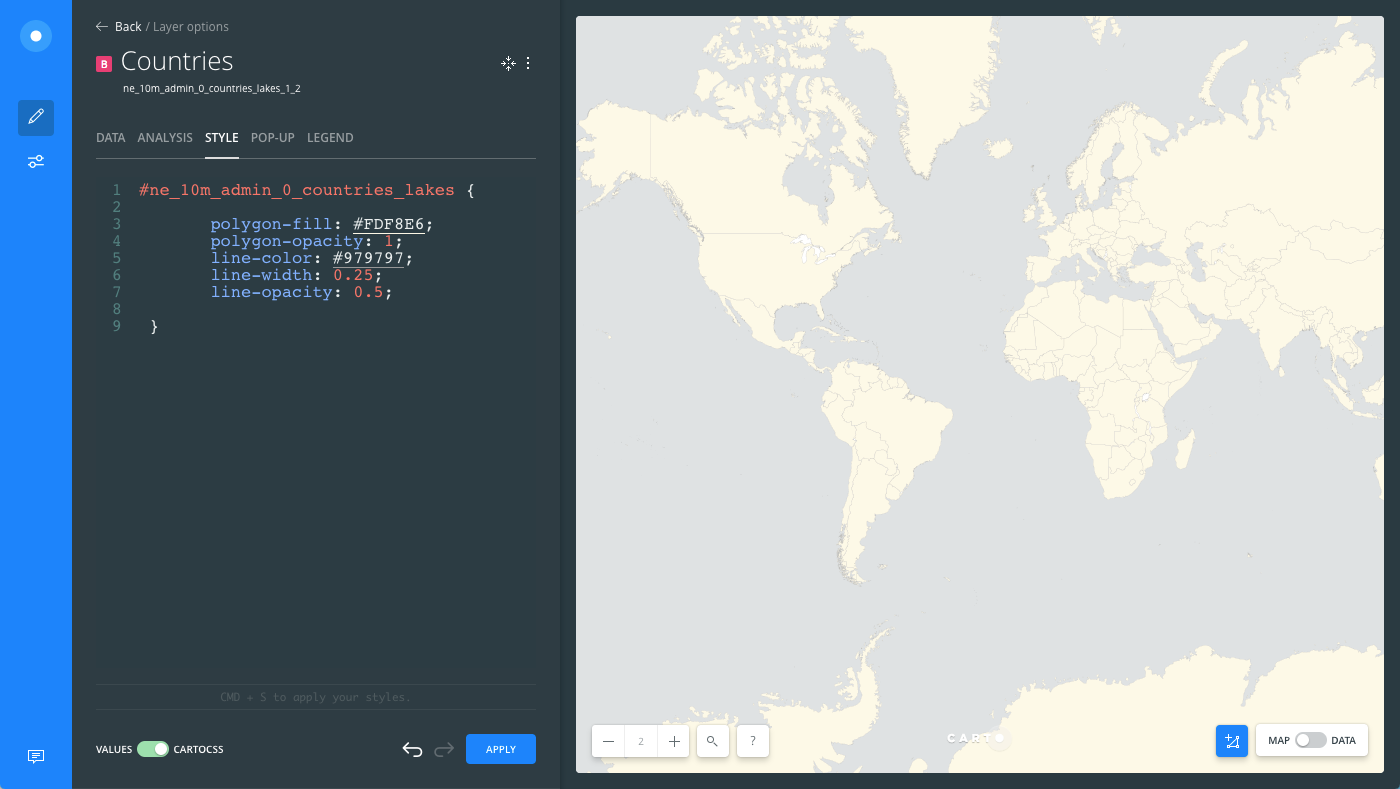
Apply styling for the fill, line, and opacity properties of the Countries layer:
- From the LAYERS list, select the Countries map layer.
- Click the STYLE tab.
- Click the slider button from VALUES to CARTOCSS.
- Apply the following CartoCSS to create the fill background for this layer.
 #ne_10m_admin_0_countries_lakes {
       polygon-fill: #FDF8E6;
       polygon-opacity: 1;
       line-color: #979797;
       line-width: 0.25;
       line-opacity: 0.5;
 }
The two defined HEX codes are applied to the fill and line properties respectively. Also, the polygon and line properties of the Countries layer have been adjusted to reflect the additional line and opacity settings defined in the custom CartoCSS.
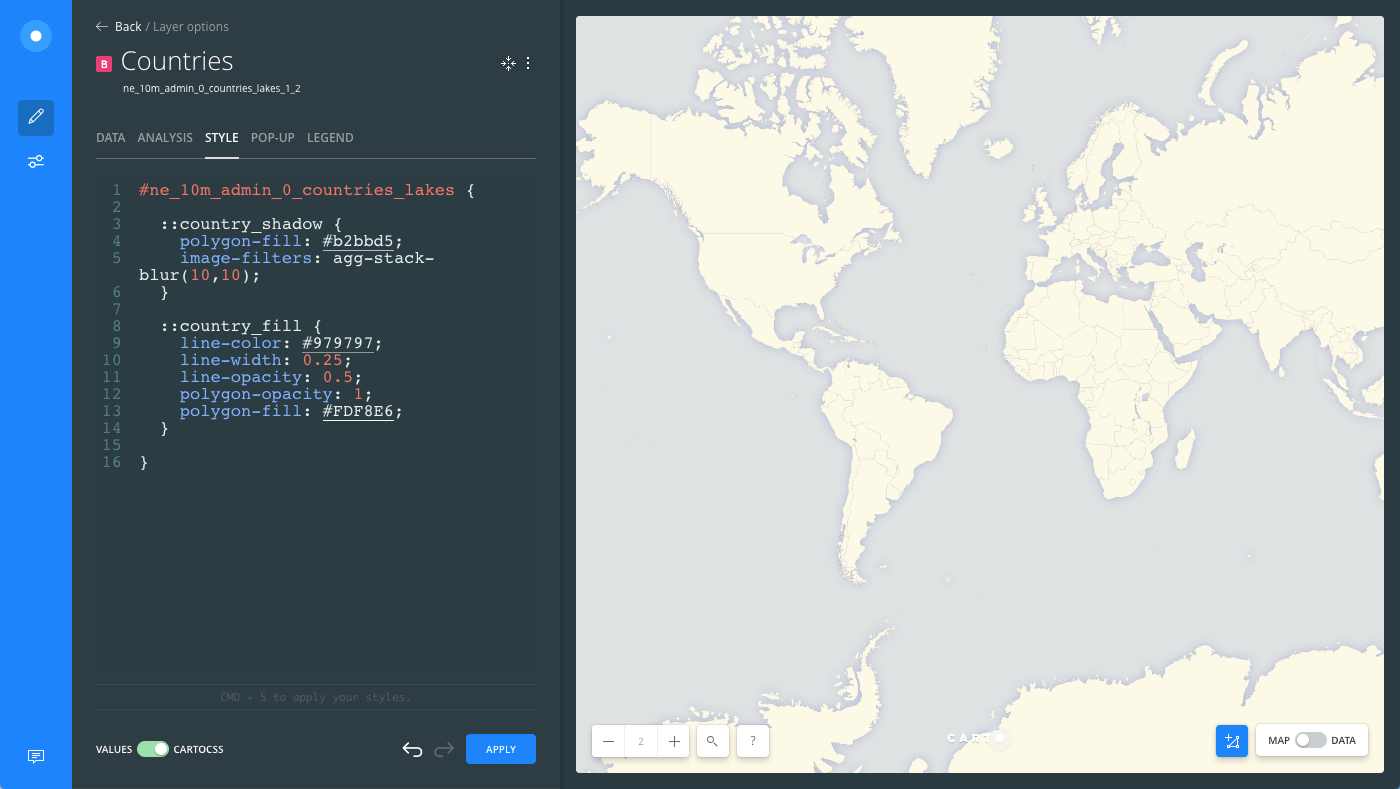
Custom Drop-Shadow Effect
To promote visual hierarchy between the Countries and Ocean polygons, use image-filters to apply a drop-shadow effect to the Countries layer.
- From the CartoCSS view of the Countries layer, add the following
country_shadowsyntax above the fill properties, and place the properties from above in a second attachmentcountry_fill:
#ne_10m_admin_0_countries_lakes {

  ::country_shadow {
    polygon-fill: #b2bbd5;
    image-filters: agg-stack-blur(10,10);
  }
  ::country_fill {
    line-color: #979797;
    line-width: 0.25;
    line-opacity: 0.5;
    polygon-opacity: 1;
    polygon-fill: #FDF8E6;
  }
}
The CartoCSS code above is using a double-colon symbol :: as an attachment, enabling you to apply multiple symbolizers to the selected layer. For more details about this method, see the CartoCSS documentation.
Notice how this promotes more definition between the two layers, and the map transforms into a custom basemap.