Export Map as an Image
Export your map as an exported static image with CARTO Builder.
The Export image map option enables you to export a static image of your map in .PNG or .JPG format. You can customize the selected size of your visualization before exporting it as an image.
This feature is useful if you need an offline image of your map. For example, suppose you are doing a presentation and want to include your map in an external document (such as a PDF or an Excel report), or perhaps you want to include a map image in a newspaper to be printed. Once your map image is exported, you can print it and share it!
Export Image
This guide describes how to export any map as a static image from CARTO Builder.
-
From Your maps dashboard in CARTO, open a map in Builder.
-
From the map name context menu, scroll down to select Export image.
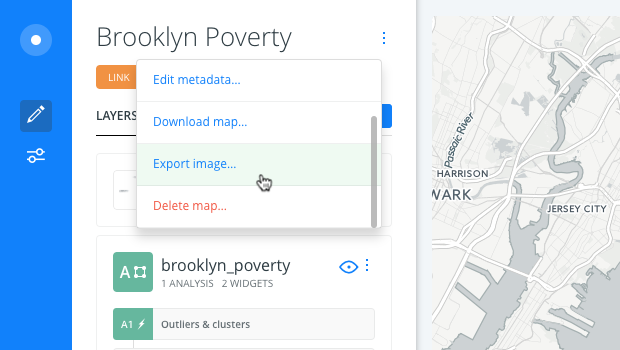
A selection area appears on your Map View, and the Export as image options appear.
-
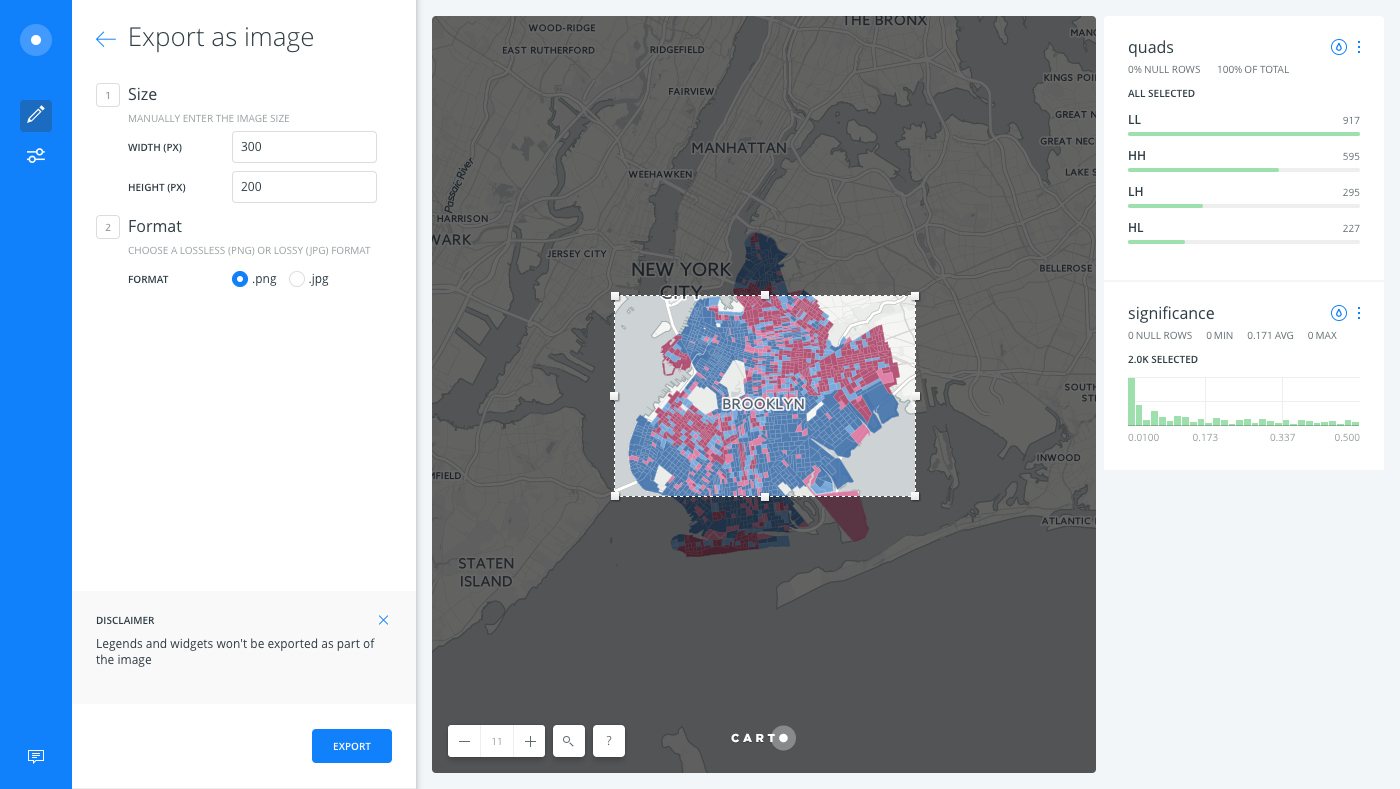
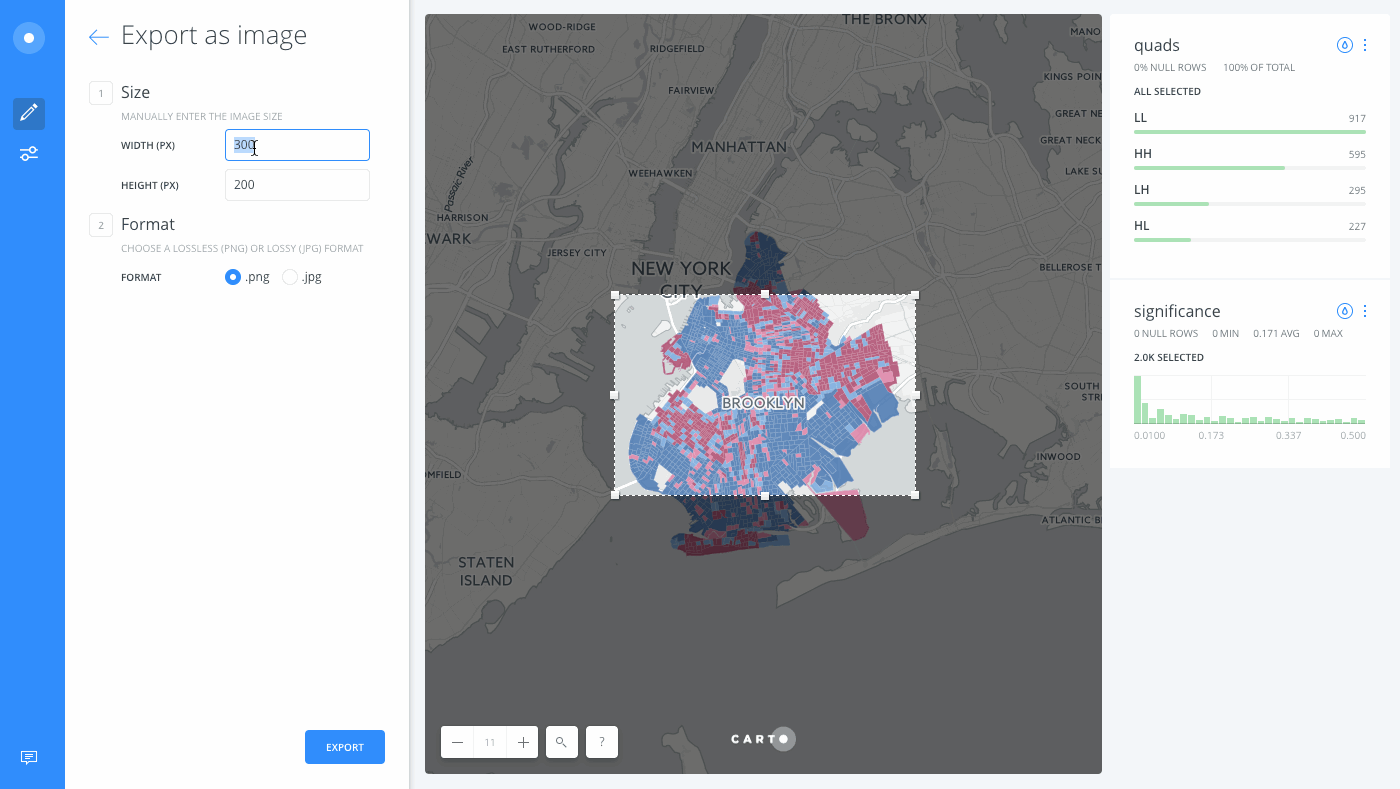
Modify the size for the selected image.
- You can manually enter the WIDTH and HEIGHT (in pixels) from the Size options.
Or
- Click and drag the edges of the image selector on the Map View.
View the static map limits that are enforced when exporting an image.
If you need to adjust the zoom level within the image selector, use the increase (+) or decrease (-) buttons, located to the bottom-left of the Map View.
-
Choose the format of the exported image.
Lossless (.PNG) and lossy (.JPG) are terms that describe how images are compressed, depending on the file format. What does “lossy” mean in reference to images? Choose the file format that works best for you.
-
Click EXPORT.
Ensure that your browser pop-up blocker is disabled.
The image is downloaded based on your web browser process, and available for use offline.
When you export an image with CARTO Builder, map attributions are automatically included.
CHEATSHEET: Attribution Requirements
Attributions represent the data sources used in your map, which may have copyright protections. There are several methods of defining map attributions. For more information, see how CARTO defines attributions as part of our Terms of Service.
- Automatic Attributions - When you choose a basemap, export a map as an image, or download a map as a .carto file with CARTO Builder, map attributions are automatically included.
- Dataset Attributions - When you are using third-party data for your maps, you may need to provide attributions about the data sources. To add attributions to a dataset, use the "Edit metadata" option, which is accessible from the dataset name menu option.
- Print Attributions - When you are printing CARTO maps, be sure map attributions are included. For details, see Printing Map Images.
High-Resolution Browser Limitation
If your map contains high-resolution imagery (such as a map containing HERE Satellite Day basemap), the download may fail, or you may receive a connection error during the export image process. However, the image was actually downloaded. This is a limitation due to browser timeout behavior and high-resolution imagery. You can view and save the downloaded image from your browser Developer Tools.
-
Before exporting, view the Network tab of the Developer Tools console for your browser.
The Network tab contains a Preview subtab, where all downloaded browser images can be previewed.
-
Export the image from CARTO.
-
From the Preview subtab in the Developer Tools console, click on the png file. (These steps may vary, depending on your browser).
-
Right-click on the previewed png and save the image directly from the Developer Tools.
Setting the Print Resolution for Exported Images
The maximum print PPI (pixels per inch) resolution for exported images is 72ppi. If the quality of you exported image is not sufficient, you can export the image at a larger dimension and use an external image editor (such as Photoshop) to size down the image to your desired print dimensions. For example:
- If you are creating an 11x17 inch image for printing at 300ppi resolution, the pixel dimensions are 3300 pixels wide by 5100 pixels tall.
- If you are creatinge an 11x17 inch image for 72ppi resolution, the pixel dimensions are 792 pixels wide by 1224 pixels tall
- For landscape format, you should apply 1224 px x 792 px dimensions.
- If you are using the 72ppi image in a program that prints out at 300ppi resolution, it will not fill the area of the printed page.
Printing Map Images
Once you have set up the print quality resolution and exported the map as an image, you can print the image.
- When you Export image with CARTO Builder, map attributions are automatically included.
- If you are publishing your map as a static image with the API, you must manually add attributions for your static map image. For details, see the Static Maps API documentation.