How to connect to your CARTO database from QGIS
Connecting to your CARTO database from QGIS.
We strongly recommend reading the Direct SQL Connection article to learn more about that feature before reading this one.
Introduction
With the Direct SQL Connection feature you can connect QGIS directly to your CARTO database. With this connection you can use QGIS to create new CARTO datasets, modify existing CARTO datasets with QGIS’s powerful editing capabilities, and perform complex spatial analysis using the QGIS processing framework.
This feature has been tested on:
- macOS Catalina 10.15.3
- QGIS 3.12.1 (DB Manager is not able to connect using client certificate)
- QGIS 3.4.15
Setting up the connection
Add a certificate
You need to perform this step only if you want to use a TLS certificate for authenticating the client. If not, you can directly create a new connection.
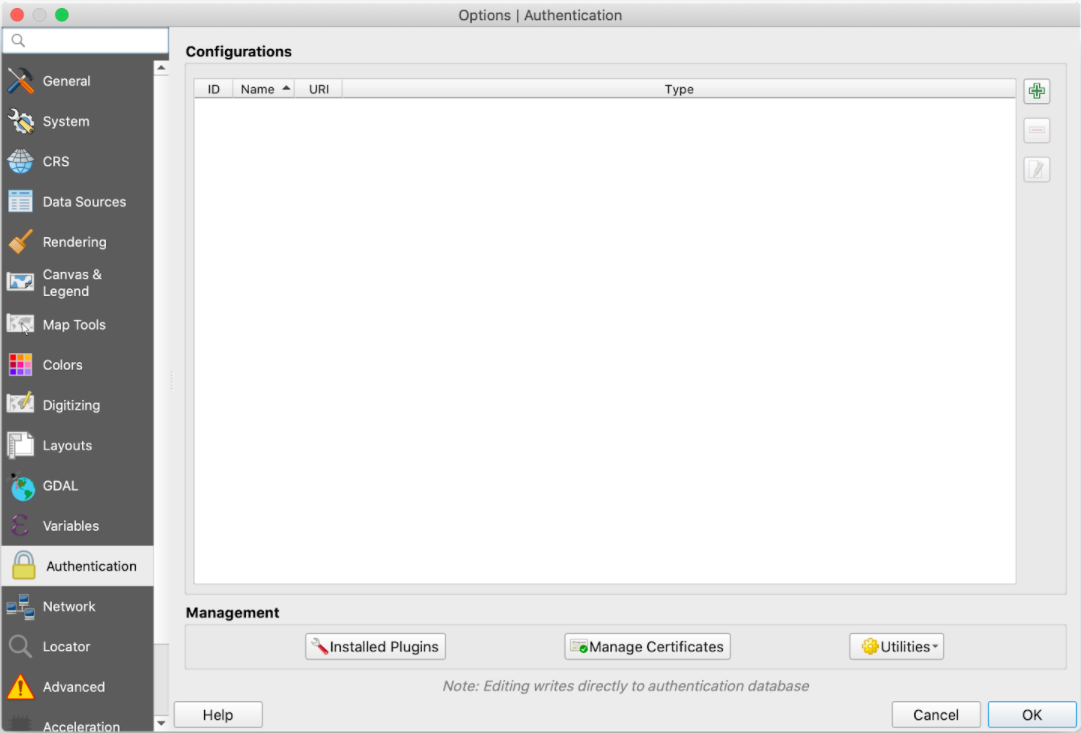
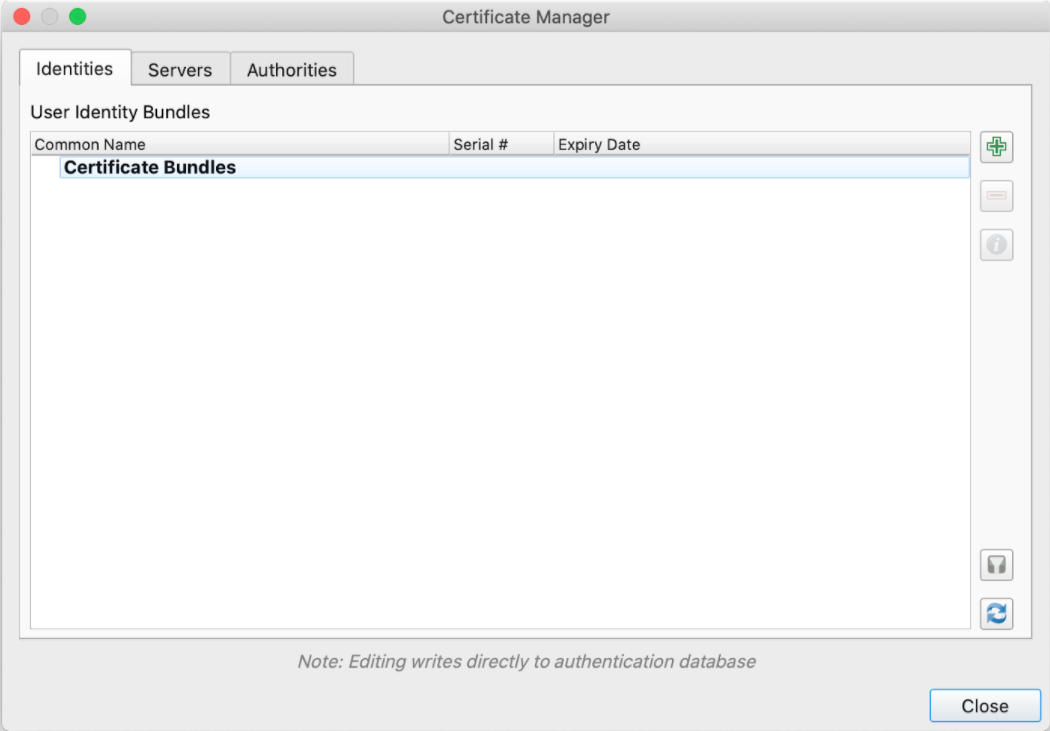
- Go to QGIS Preferences and click on the Manage Certificates button.
- In the
Identitiestab, click the+icon to import a new certificate.
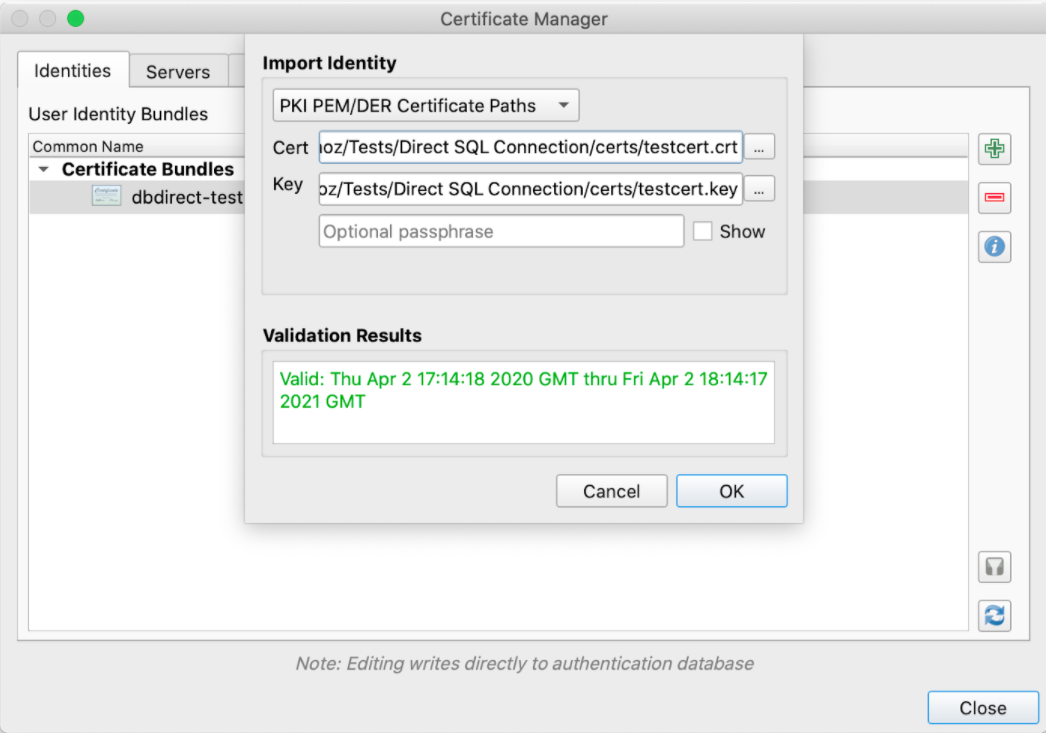
- Then, select
PKI PEM/DER Certificate Pathsoption and browse until you locate theCertandKeyfiles. You can use both the RSA PEM (.key) or DER PKCS #8 (.key.pk8) files.
Create a configuration
- In the Configurations section click the
+icon to add a new authentication configuration- Add a name
- Select PKI stored identity certificate
- Select the certificate imported in step 2
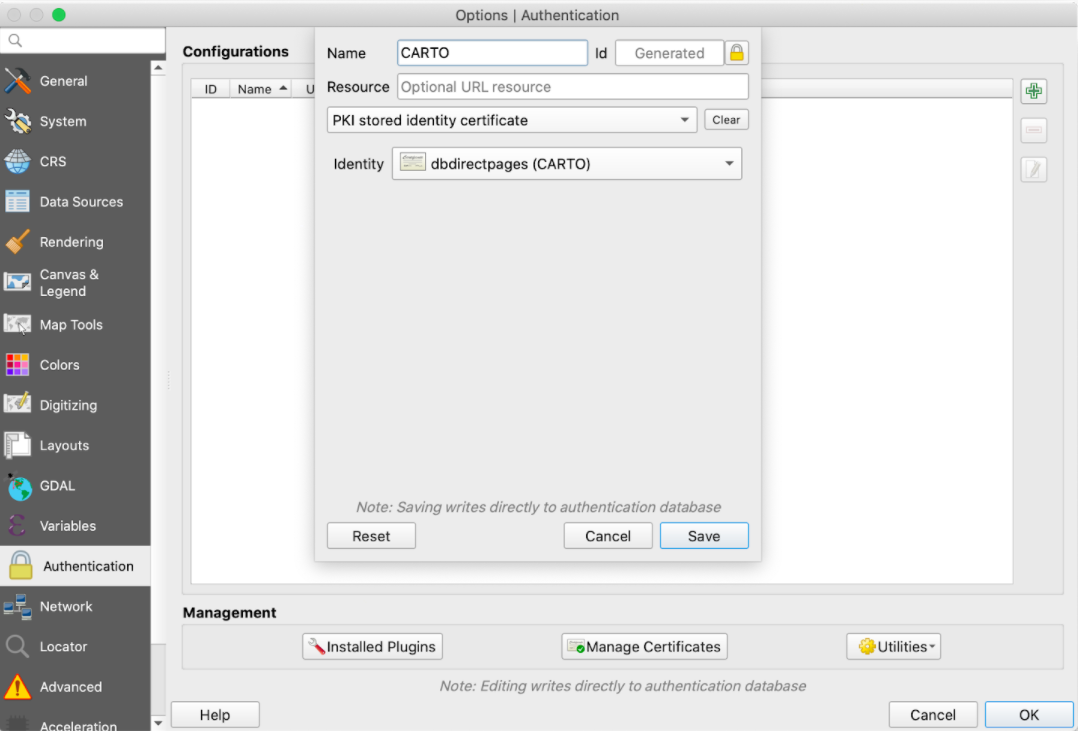
Click the Save and OK buttons in the Configurations dialog.
Create the connection to your CARTO account
In the Browser panel, right-click on the PostGIS node and select New Connection…. Once you have done that you would need to set the different parameters:
- Add a name for the connection
- Add the hostname that you can find in the readme.txt file that you downloaded with your certificate files
- Keep port 5432
- Leave database blank
- Select SSL Mode verify-full if you have imported the client certificate; otherwise select verify-ca
- In the Authentication section, select the Configuration created in the previous section, if you are using TLS certificates for client authentication
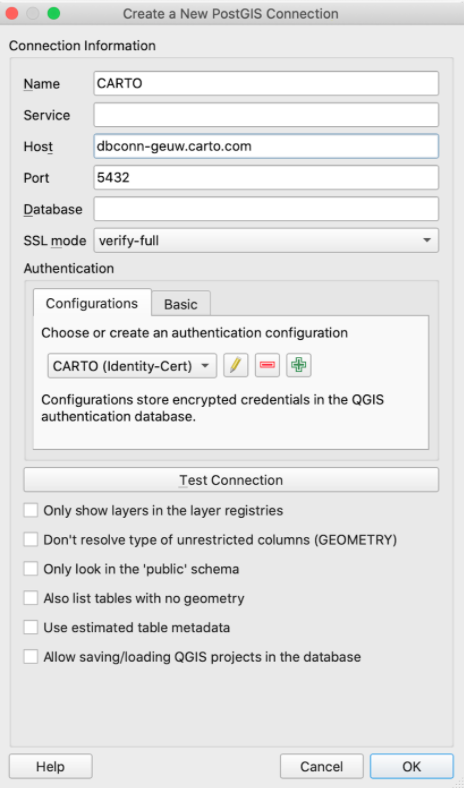
Finally, click on the button Test connection to ensure that the connection has been succesffully done. In order to test it you would need to:
-
Introduce your CARTO username.
-
Introduce your CARTO API Key in the password field.
Visualizing CARTO datasets
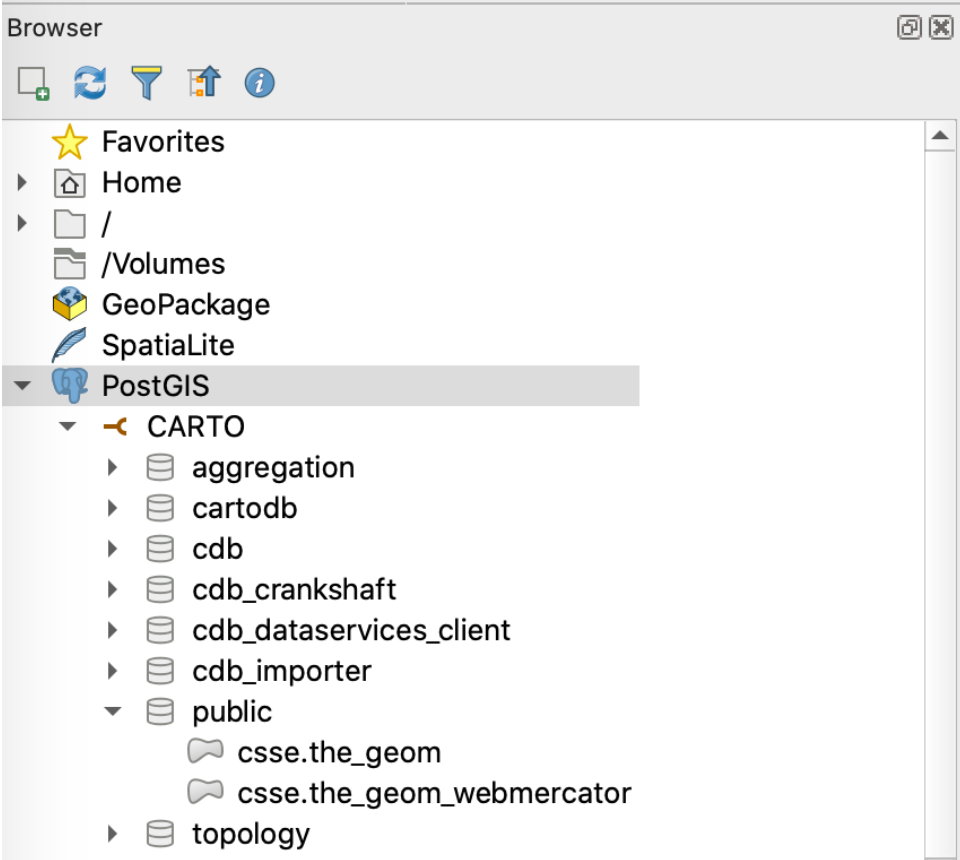
After setting up the connection, a new connection node will be added to the PostGIS node. If you select the new node, you will be able to see the list of database schemas of your CARTO account.
The schema that stores your CARTO datasets is the one that has your CARTO username.
- Click on the user schema that has the same name as your CARTO username. Each dataset in your account appears twice. This happens because all CARTO datasets have two geometry fields: “the_geom”, which stores the geometry in EPSG:4326 (WGS84) spatial reference system and is used for calculations; and “the_geom_webmercator”, which stores the geometry in EPSG:3857 (Web Mercator) and is used for visualization.
-
Add one of the tables to the QGIS project by double clicking or dragging it to the Layers panel. Depending on your project spatial reference system, you should use one or another.
-
Right click your layer in the Layers panel and change the style.
-
Right click your layer again and select the Open Attribute Table option to show a table view of the features in the CARTO dataset.
-
Select the “Identify Features” tool and click on any of the features to get all the information about the feature
Creating a new CARTO dataset
-
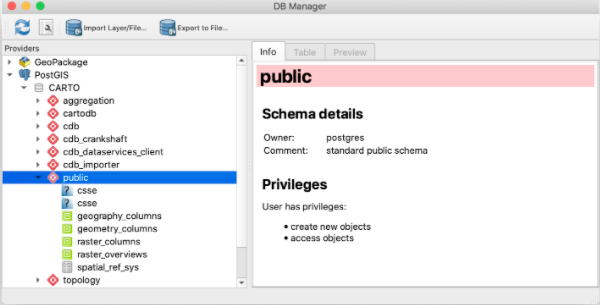
Select “Database” in the main menu and open the DB Manager
-
DB Manager requires you to have the root certificate file in the .postgresql folder in your home directory (different directory depending on OS), if you are using the verify-ca or verify-full SSL mode. Copy the server_ca.pem file provided in the ZIP file to this folder and rename it to “root.crt”.
-
Select your connection to CARTO in the Providers panel. You will see a list of the schemas in the database. You must select your schema (identified by your username) that is the one holding your datasets.
-
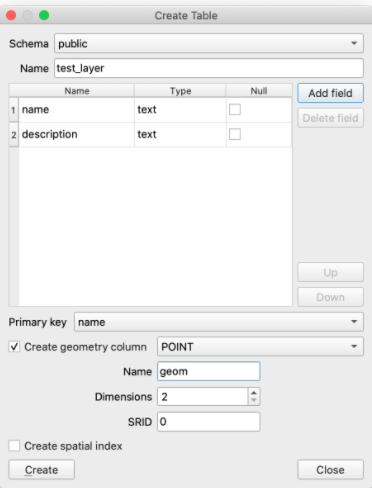
After you have selected your schema, go to DB Manager main menu and select the “Create Table…” option in the “Table” menu.
-
Specify the name for the table (use only lowercase letters) and the names and types for the fields. If you are creating a table with geometries, mark the “Create geometry column” checkbox and select the geometry type. Optionally rename the geometry column to “the_geom”.
-
Click on the “Create” button and the table will be created in the CARTO database.
-
Now you can go back to QGIS main screen and drag the recently created table from the Browser panel to the Layers panel.
-
You can toggle editing on and start adding features to the table using QGIS editing tools.
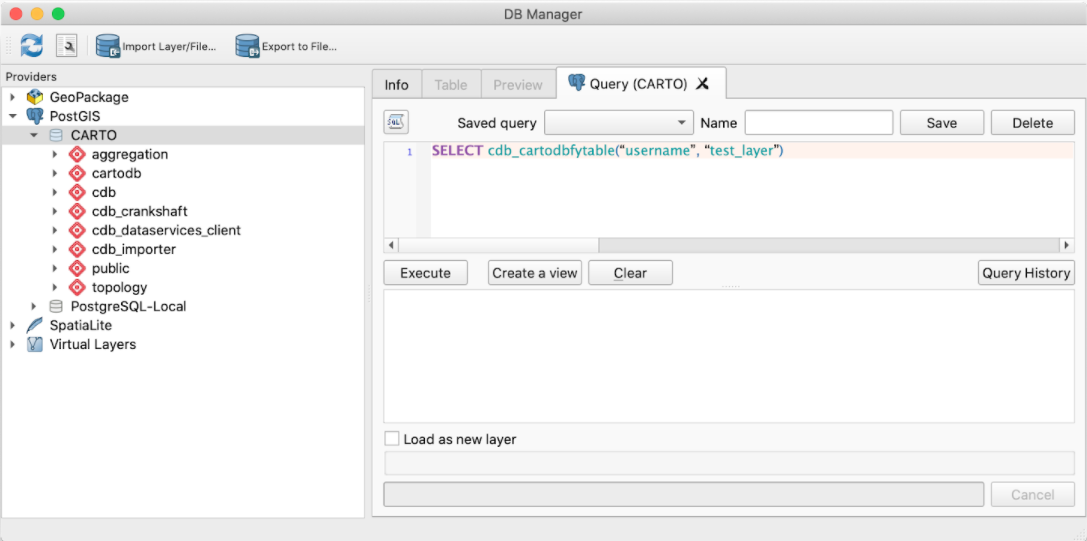
-
If you navigate to your CARTO dashboard you won’t see this dataset yet. Before you can start using it in CARTO, there is one additional step: you must “CARTOdbfy” the table you just created. This is a process that prepares the table to be used within the CARTO platform. To execute this process you must open the DB Manager plugin again, select the connection to CARTO database, open the SQL Window and execute the following query:
SELECT cdb_cartodbfytable("username", "tablename")