How to connect to your CARTO database from Tableau
Connecting to your CARTO database from Tableau.
We strongly recommend reading the Direct SQL Connection article to learn more about that feature before reading this one.
Introduction
With the CARTO Direct SQL Connection feature you can use the data stored in your CARTO database in your Tableau reports and dashboards.
Tested environments
- Windows 10 64 bits
- Tableau Desktop 2020 64 bits with PostgreSQL driver (installation option set by default)
Configuration
Connection with Tableau can be made using the ODBC or JDBC connectors (which allow use of a client certificate), or the native Tableau PostgreSQL connector that does not support TLS client authentication. If you want to connect to tables containing geometry columns and you want to visualize them in a Tableau map, you need to use the native PostgreSQL connector.
Connnection using ODBC
-
Follow the steps for adding an ODBC System DSN pointing to the CARTO database that are explained in this article
-
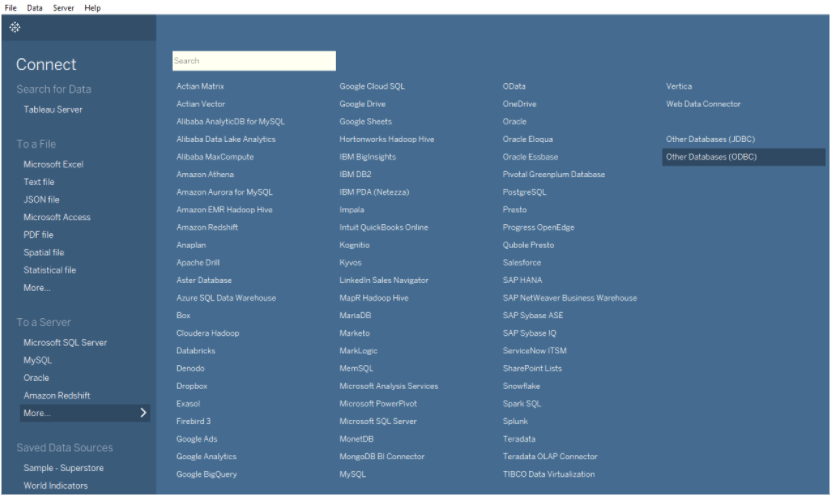
Open up Tableau Desktop and select
More...Other Databases (ODBC).
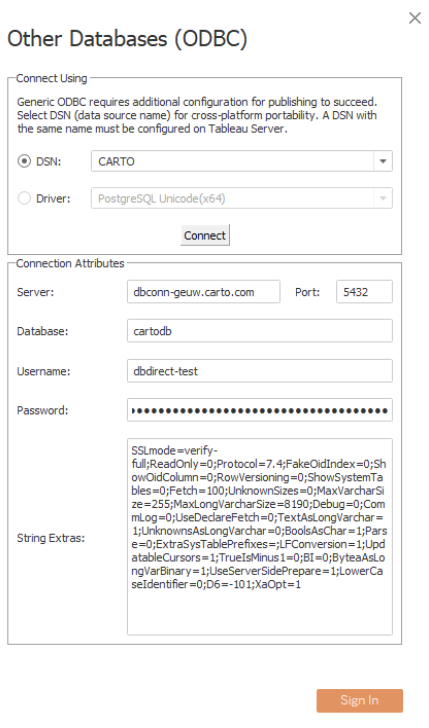
- Select the DSN created in step 1. Click “Connect” and then click “Sign In”.
-
Tableau may suggest using a data extract because some features are not supported with the ODBC driver. We also recommend creating an extract to improve overall performance. The downside of the “extract” is that must be refreshed whereas a “live” connection will to remain up-to-date.
-
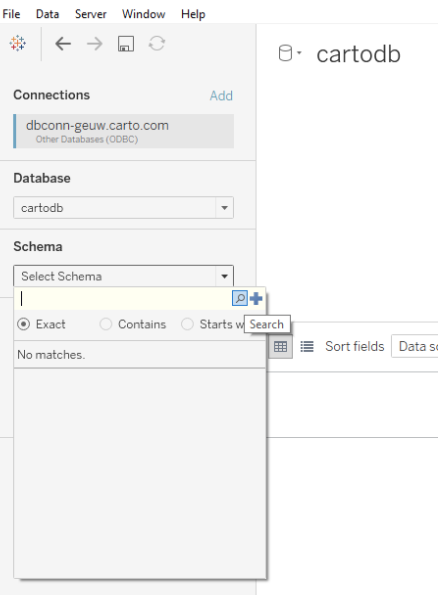
Select the schema containing your datasets (identified by your username) by clicking in the search icon in the Schema dropdown.
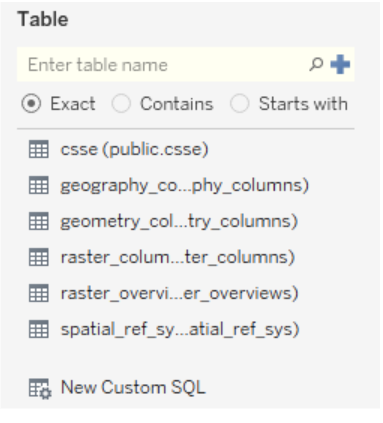
- Then we need to select the table by clicking in the search icon for tables to retrieve the list of tables in the current schema
-
Drag the table(s) that you want to use in your dashboard to the right. Select “Live” or “Extract” connection” and click “Update Now” to show a preview of your CARTO dataset.
-
Then go to your worksheet, configure your visualizations and add the sheet to your dashboard.
Connnection using JDBC
-
Install the Java Runtime Environment 8 or newer
-
Copy the PostgreSQL driver (JAR file) to the “C:\Program Files\Tableau\Drivers” folder
-
Create a “.properties” file with the following connection parameters (the private key file must be the DER PKCS #8 version, with “.pk8” extension and this example assumes that you have copied the files to the C:\Certs folder):
ssl=True
sslmode=verify-full
sslcert=c:/certs/client.crt
sslkey=c:/certs/client.key.pk8
sslrootcert=c:/certs/server_ca.pem
It is not mandatory to use TLS certificates for client authentication. If you don’t want to use them, you can change the sslmode property to verify-ca and remove the sslcert and sslkey properties.
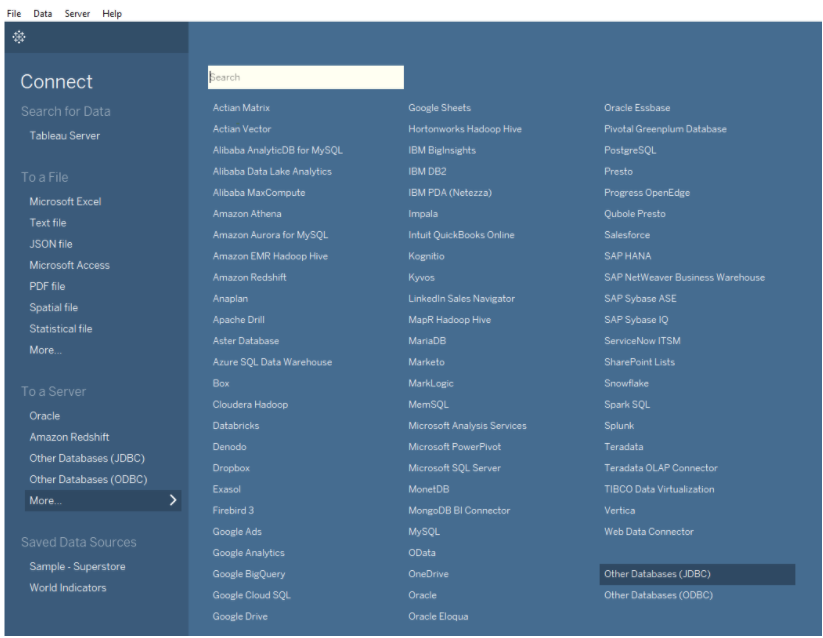
- Open up Tableau Desktop and select
More...Other Databases (JDBC).
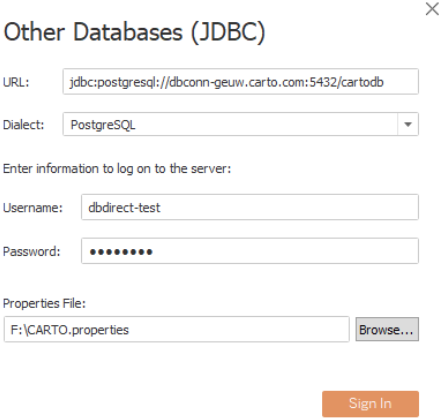
- Enter the JDBC URL for connecting with your PostgreSQL database specifying server, port and database name. Enter your username and password (API key) and browse your filesystem and select the Properties file created in step 3. Click Sign In.
-
Tableau may suggest using a data extract because some features are not supported with the ODBC driver. We also recommend creating an extract to improve overall performance. The downside of the “extract” is that must be refreshed whereas a “live” connection will to remain up-to-date.
-
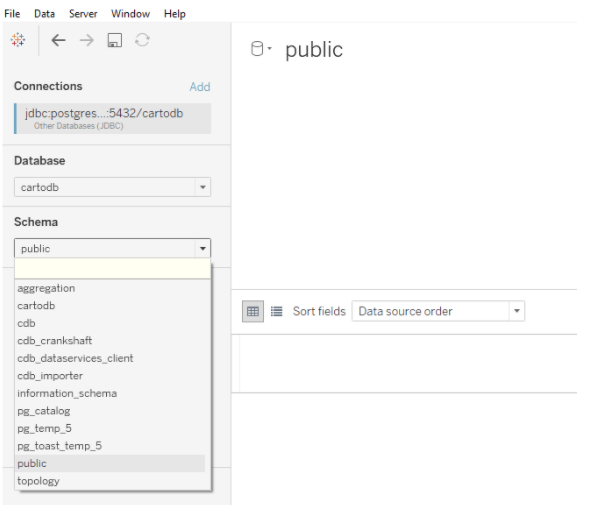
Select the Schema containing your datasets (identified by your username)
-
Drag the table(s) that you want to use in your dashboard to the right. Select “Live” or “Extract” connection” and click “Update Now” to show a preview of your CARTO dataset.
-
Then go to your worksheet, configure your visualizations and add the sheet to your dashboard.