Geocoding with Builder using Country Names and IP Addresses
Apply the Geocode analysis to convert country names and IP addresses into geometries with CARTO Builder.
Why do you need this?
-
 You have a dataset with a country name or IP address that you need to visualize.
 -
 You are a Builder user.
Types of Geocoding
Check out this article to learn about all the different ways you can geocode your data using CARTO.
To learn more about our different geocoders that we use in CARTO, check out this article.
See the Preparing and Formatting Data Guide for tips about prepping data before it is imported.
Objective
This guide describes how to apply the Countries and IP Addresses geocode analysis to transform data into geometries that can be visualized.
Preparing Data
For this guide, suppose you are a technology company that provides a digital service and you want identify where to expand marketing opportunities based on internet use. You also want to avoid any computing devices that are known as threats; meaning you want to block any IP Addresses that have been identified as spam.
Two datasets were manually created, and will be provided for this example.
-
The first dataset, Internet Users by Country, identifies how many people are online in different countries. This layer was created based on data modified from the Central Intelligence Agency’s publication of the World Factbook.
-
The second dataset, Blocked IP Addresses, was created based on the Raw IPs for the Firewall Block Lists, provided by Emergingthreats.net.
By default, the import guessing functionality automatically geocodes our raw country data; since Builder is able to recognize country names and ISO names!
For this example, let’s remove import guessing during the import process and geocode this data into geometries that can be visualized.
Remove Import Guessing
CARTO automatically includes guessing functionality during the import process, which is useful when files are missing required upload information, such as raw country data. Raw country data might be a table of information, but without any location coordinates. For example, a table of birth rates (by country rankings) that you created based on information provided from Wikipedia.
country | rate
Angola | 20%
Australia | 21%
...
-
From Your maps dashboard in CARTO, click NEW MAP.
-
Browse (or click and drag) the
template_blocked.cartofile, which is packaged from “Download resources” of this guide.Click on “Download resources” from this guide to download the zip file to your local machine. Extract the zip file to view the file(s) used for this guide.
-
Before connecting the dataset, deselect the Let CARTO automatically guess data types and content on import checkbox.
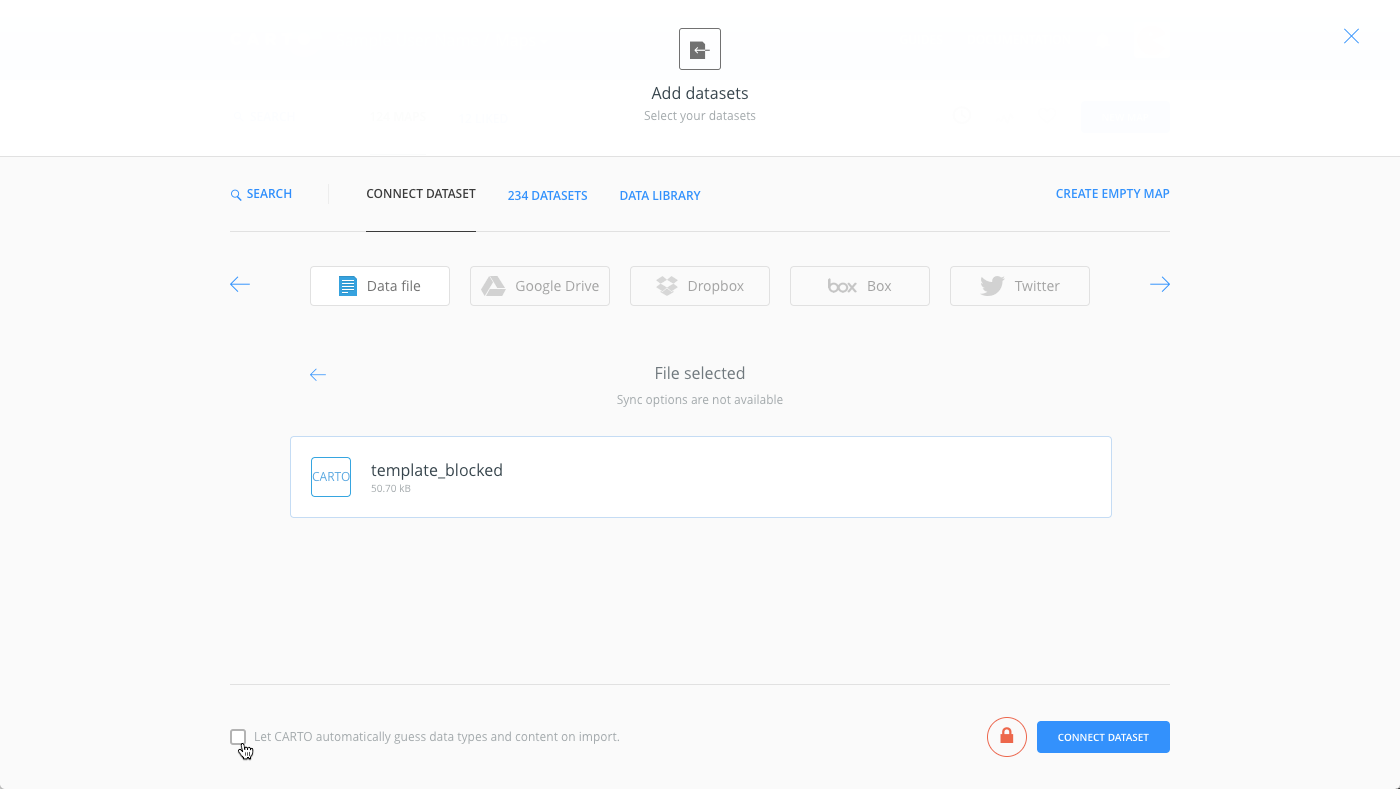
Why remove import guessing? Since this example contains datasets that were built from scratch, the_geom column contains no values and requires geocoding. When sharing .carto files however, Builder automatically geocode values during the import process. For the purposes of reproducing the behavior as if you created your own dataset, remove import guessing during the import process.
-
Click CONNECT DATASET.
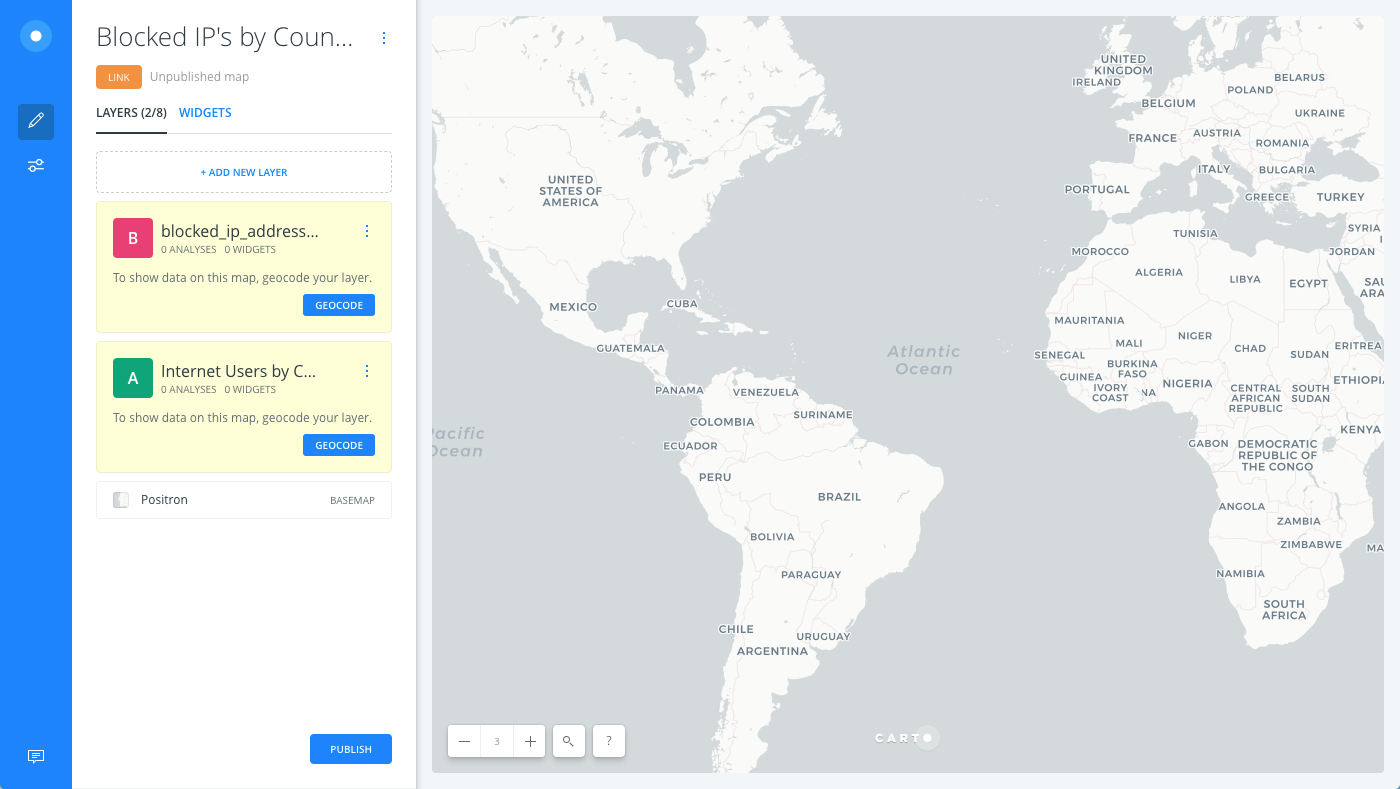
Builder opens with Internet Users by Country as the first map layer and Blocked IP Addresses as the second map layer. Both layers indicate that need to be geocoded.
-
Switch to the Data View for either map layer,
the_geomcolumn contains null values, which indicates that the type of geometry is not identifed.
The Data View and Map View appear as buttons on your map visualization when a map layer is selected. Click to switch between viewing your connected dataset as a table, or show the map view of your data.
Let’s transform our values into geometries by applying the Geocode analysis.
Geocode Country Values into Polygons
Geocode country values to visualize how data is transformed into country borders.
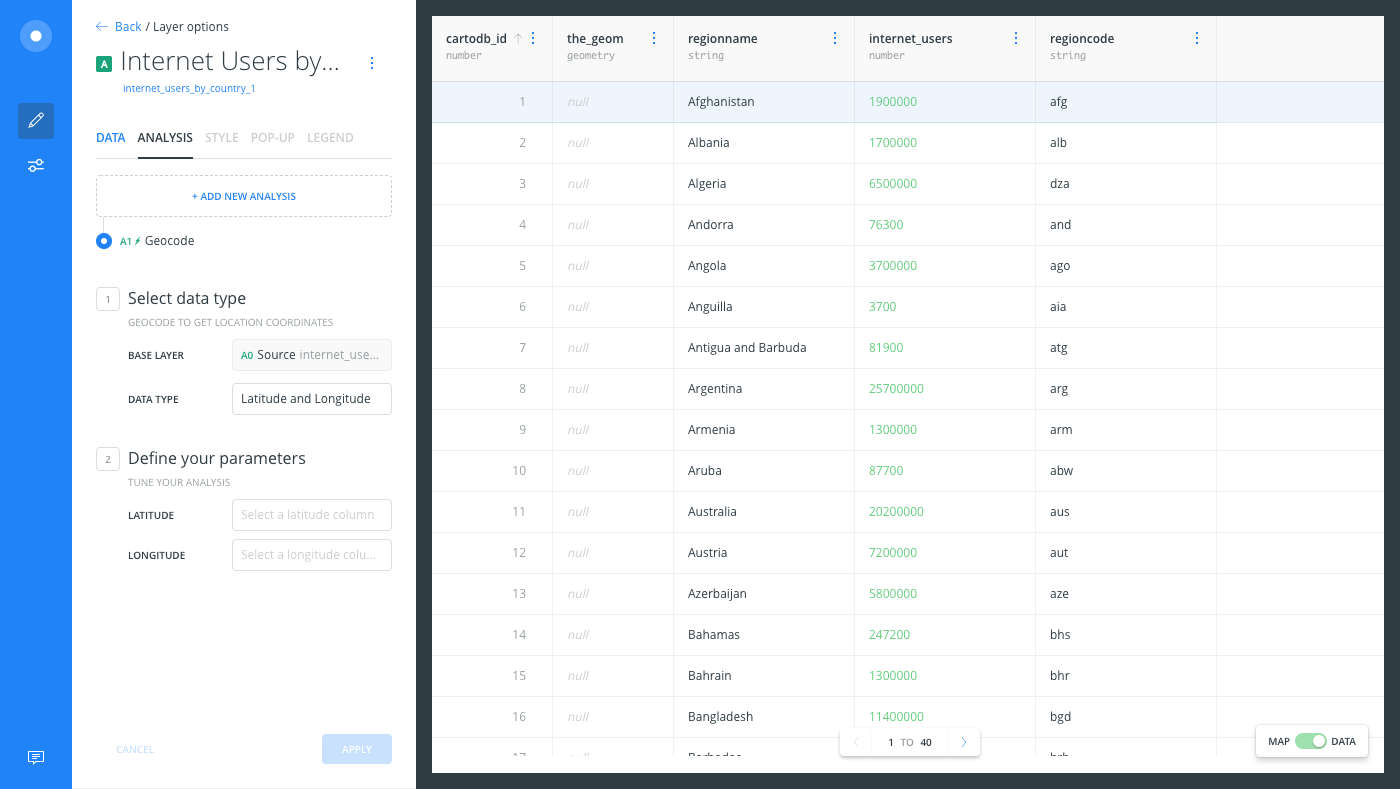
- From the Internet Users by Country map layer, click GEOCODE.
The ANALYSIS tab opens with the GEOCODE analysis already selected.
-
Apply the following parameters.
- Select Countries as the Geocode TYPE.
- For the COUNTRY option, select
regionname. (This column contains the values that will be used to create geometries). - Click APPLY.
If you switch the Data View, the_geom column indicates that polygon geometries have been created for your values!
Display IP Addresses as Point Geometries
-
From the LAYERS list in Builder, click the GEOCODE button on the Blocked IP Addresses layer.
-
Select IP Adressess as the Geocode TYPE.
-
Select the column name to be used for the IP Addresses option. For this example, select the
ip_addressesfrom the dataset. -
Click APPLY.
If you switch the Data View,
the_geomcolumn indicates that point geometries have been created for your values.Download the final .carto file, packaged from the “Download resources” of this guide, to view how missing geometries was transformed into countries and IP Addresses. The final map also includes an additional Link Second Layer analysis to filter the blocked IP Addresses by country and also includes some widgets.
Geocoder Functions with the API
If you are a developer and have access to the CARTO Engine’s to manage your data, view the Country Geocoder Functions and the IP Addresses Geocoder Functions that can be applied with the Data Services API.