Introduction to databases in CARTO
Learn how to query and work with SQL and PostGIS in CARTO with CARTO franchise.
CARTO database is Postgres on this section of the workshop we cover how to leverage Postgres and PostGIS, its geospatial extension, to understand and manage your data. Most of this content is actually not specific to CARTO and can be applied to any other Postgres installation.
Exercises
- Introduction to SQL
- Common SQL Operations
- Spatial SQL
- Advanced Postgres & PostGIS workshop
- Stored procedures and triggers examples
Set up
For this workshop, we will use CARTO as a convenient way to interact with the database, which will require no installation or configuration by you. You won’t even need an account; we’re using public demo datasets.
As a client for this workshop, we will use a web application that can interact with CARTO: Franchise. You can access to an instance of it, with the CARTO connector enabled, here: https://franchise.carto.io/.
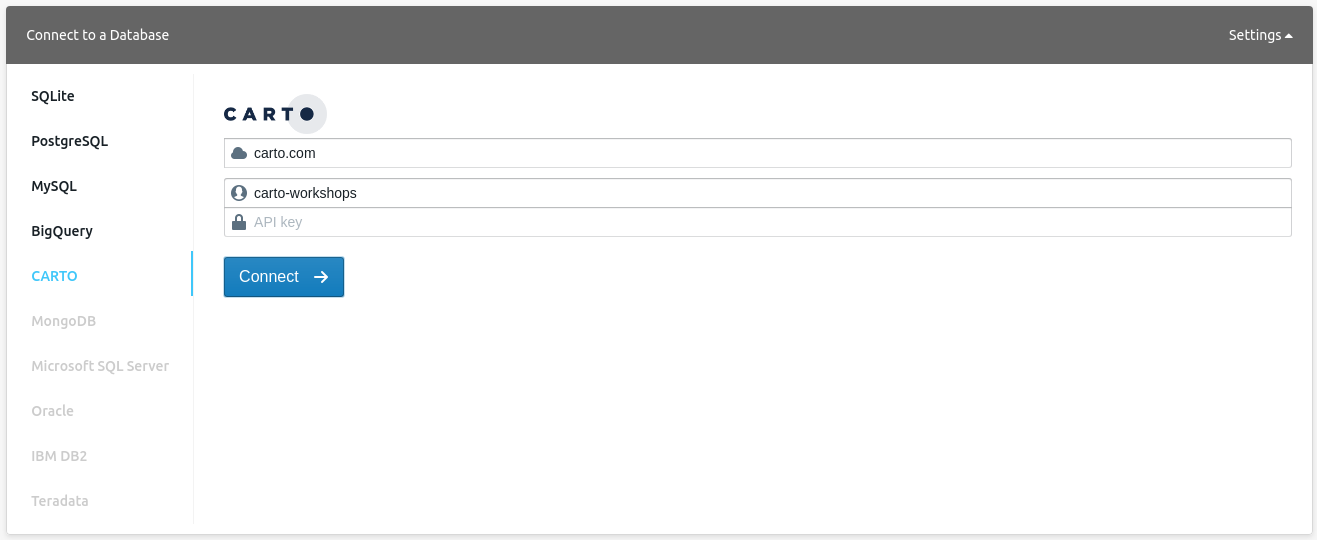
From the side menu, navigate to ‘CARTO’, then use the following parameters to connect:
- Host name:
carto.com - User name:
carto-workshops - API key: you can leave this empty

Once connected, you can run SELECT queries against any public dataset from that account.
Some tables you have available to you from this account are:
ne_10m_populated_places_simple: Natural Earth populated placesne_110m_admin_0_countries: Natural Earth country boundariesrailroad_data: Railroad accidents in the USAbarcelona_building_footprints: Barcelona blockslineas_madrid: Madrid metro lineslistings_madrid: Madrid Airbnb listings
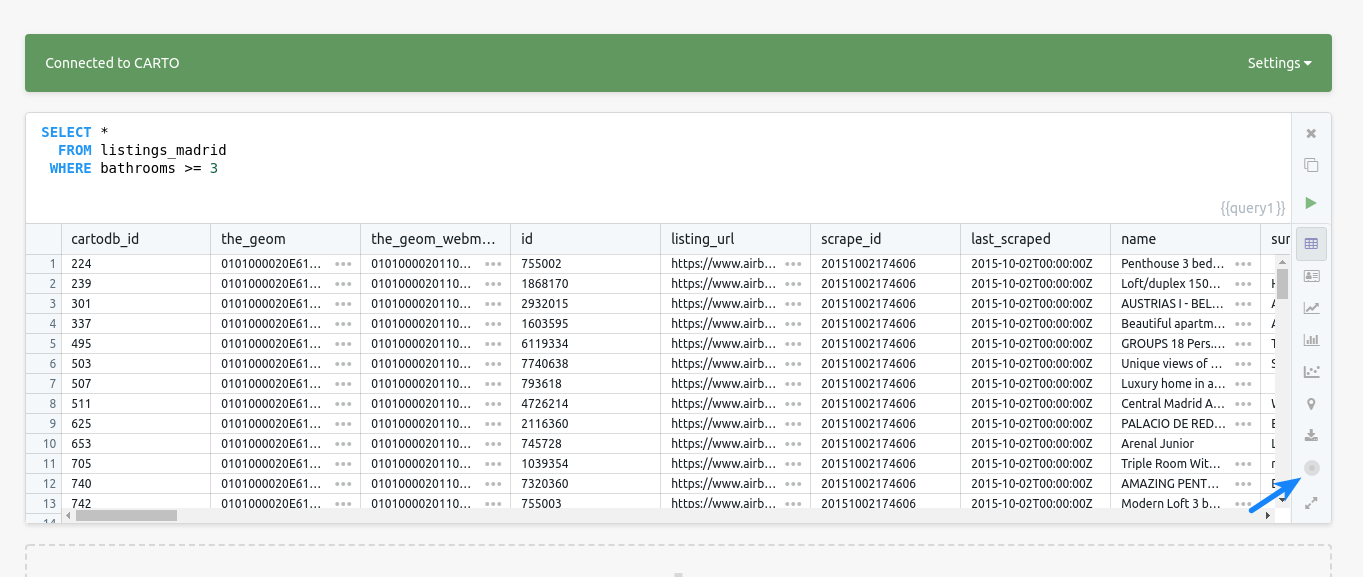
Try entering a simple query like the one below. To run the query, type Control+Enter on PCs, Command+Enter/Cmd+Return on macs, or press the green play button in the bottom right corner of the SQL panel.
select *
  from listings_madrid
 where bathrooms >= 3
The results of your query will be displayed in a typical table view, which will allow you to explore all returned fields and rows.

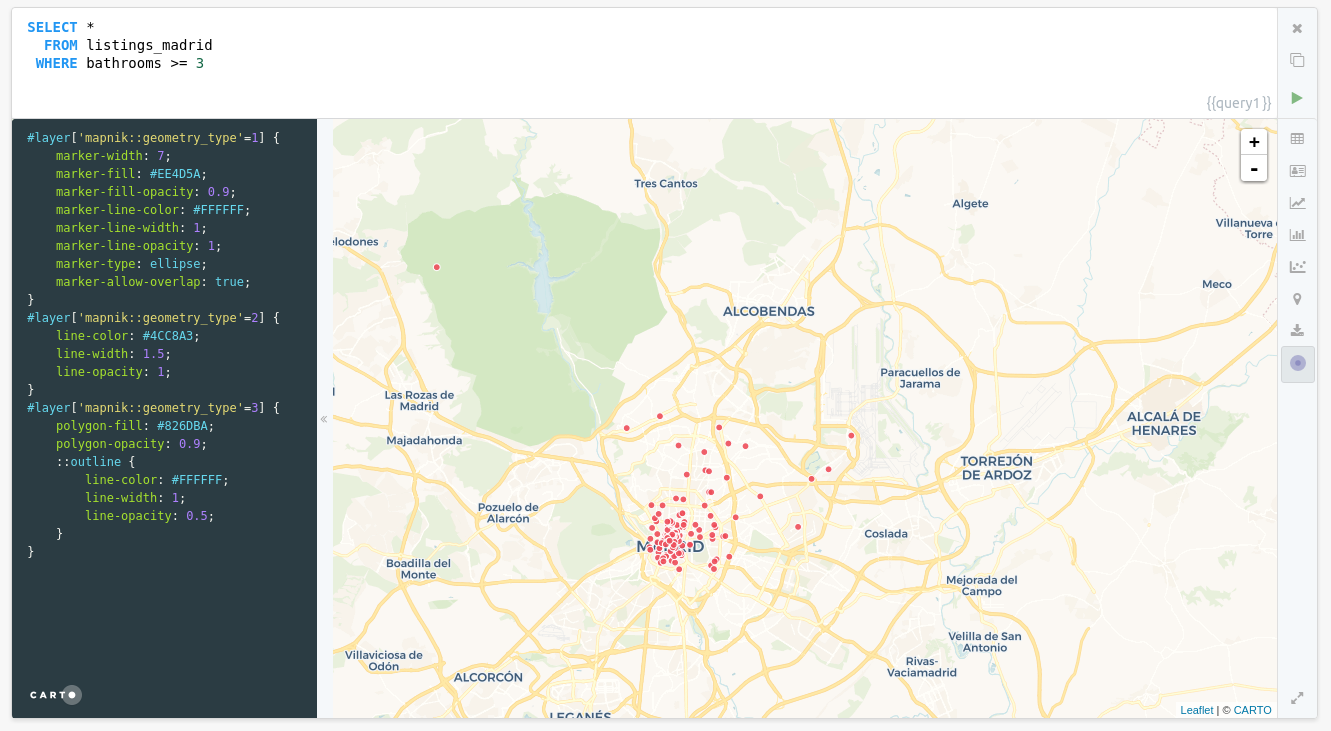
If you hit the small CARTO icon in the bottom right of the result panel, Franchise switches to a geographical result.

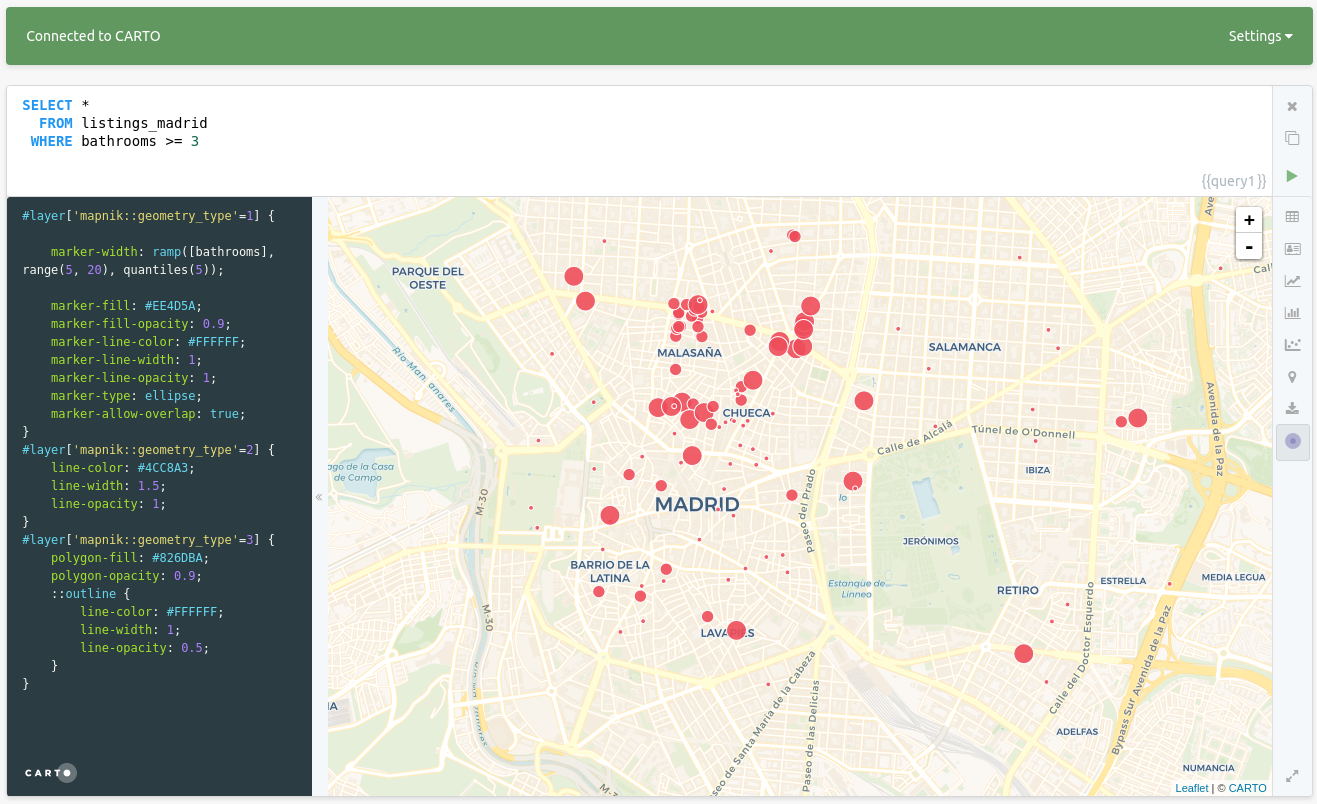
This map uses the CartoCSS language to define how data is rendered. By default, all three geometry types (points, lines, polygons) are rendered with default symbology, defined in the panel to the left. You can, however, alter the cartoCSS at any point. After making your edits, apply them by typing Control+Enter or Cmd+Enter. You can even leverage TurboCARTO to generate style ramps quickly. For example, if we wanted to style our points’ size by the number of bathrooms at each point, we can change the default marker-width from this:
marker-width: 7;
to this:
marker-width: ramp([bathrooms], range(5, 20), quantiles(5));

Both CartoCSS and TurboCARTO are out of the scope of this training, but you can find more training materials on the cartography section of this repository.
Resources
Other useful links:
- PostGIS Project and official docs
- WKT encoding
- Modern SQL
- Use the Index, Luke
- The 10 most powerful SQL queries
- Pattern matching expressions
- Fill the gaps between two geometries
- Join by proximity
- Jump across the Date Line
- EPSG codes databases:
- http://epsg.io/
- http://spatialreference.org/
- Free your maps from Web Mercator
- Stored procedures that return the Antipode’s point for an input geometry
Extra ball: Cartodbfy a table
CARTO needs some special columns, indexes, etc in order to work with tables and show them on the interface.
For this, there is a function that is executed upon import, but that you may need to call manually if you created a table with a CREATE TABLE query:
CREATE TABLE wb2 AS
SELECT w.*,
       count(pp.*) AS places,
       sum(pp.pop_max)  AS cities_pop
  FROM world_borders AS w
  JOIN ne_10m_populated_places_simple AS pp
    ON ST_Intersects(w.the_geom,pp.the_geom)
 GROUP BY w.cartodb_id
 ORDER BY cities_pop DESC
 LIMIT 10;
And then,
SELECT CDB_CartoDBFyTable('username','wb2');
Note that your username is needed as first parameter if you’re an organization user.