


How to use SQL Parameters for more efficient decision-making


There’s a pain point all data analysts and scientists have in common; adjustment time. That’s the time between when you finish running your analysis, and when your analysis is complete. Do they sound like the same thing? They aren’t.
Adjustment time happens after you present your analysis to your manager or client, and they ask for some small adjustments - or “what if” scenarios. What if you ran this site selection model again, but with a 15-minute walking catchment, rather than 10 minutes? What if you weighed the criteria of this revenue model differently? What if that street were closed - how would that affect our routing analysis?
This time can really add up, having enormous ramifications for a business and impacting whether teams can meet project deadlines and budgets.
If this is something your organization is struggling with, you might want to consider utilizing SQL parameters.
SQL parameters are placeholders which you can use in a SQL query in lieu of a value or variable. What makes them special is they’re defined by the end user. This means that your user can analyze and filter data in a controlled way. For instance, you could use parameters to allow the user to set the size of an isoline or the weighting of different variables for a spatial score.
Check this out in action in the map below (open in full screen here). This map is a result of Cannibalization Analysis, assessing where a new CPG merchant is likely to “cannibalize” revenue from existing points of sale. In this example, parameters allow the end-user to filter which potential merchants are shown on the map. In turn, the parameter is also used to determine the style of the existing points of sale, changing color depending on if they are or are not impacted. Neat, right?

💡 Since we announced SQL parameters in May 2023, there have been a few notable updates! With SQL parameters, you can now…
- Use numeric fields as parameters, in addition to dates and strings. Numeric fields can also be used as single or paired values, i.e. the user can select an individual number, or use a pair of numbers to define a specific range.
- The number of values a user can select from are now capped to 1,000.
- The parameters UI now allows you to select/clear all inputted values.
Let’s check this out with an example!
In this example, we’ll be examining Citi Bike Trips across Manhattan to extract valuable insights about usage patterns. This data is available for ease of use in the CARTO Data Warehouse which all users have access to - so make sure you get set up with a FREE 14-day trial so you can try this out yourself!
You can explore the Citi Bike stations in the map below - or in full screen here!

💡 Want to recreate this map? Open up CARTO Workflows and run the Group By component on the Citi Bike Trips table (carto-demo-data.demo_tables.manhattan_citibike_trips), grouping by either the start/end station id, and then using the any_value aggregate type on the start/end station geometry respectively. Easy!
Let’s say we’re an analyst at a transport consultancy tasked with helping Citi Bike improve their customer experience whilst optimizing their resources.
We’ve been asked to create a dashboard in CARTO Builder from which our project team and clients can use to understand the spatial and temporal distribution of Citi Bike trips, crucial for optimizing bike availability, planning maintenance schedules and determining pricing structures. Other possible uses for this dashboard may include:
- Optimized Resource Allocation: Utilize peak usage time insights to allocate staff, maintenance, and resources effectively during high-demand periods.
- Operational Efficiency: Distribute bikes strategically based on availability insights, reducing bike shortages and optimizing usage.
- Enhanced Customer Experience: Ensure bike availability by analyzing start and end stations, enhancing user satisfaction.
- Strategic Decision-Making: Use data-driven insights to shape longer-term strategies, leading to improved overall performance and competitiveness.
- Strategic Marketing: Leverage knowledge of popular routes for location-based marketing and targeted promotions.
To achieve this, we might create a visualization like the map below (open full screen here). In this, the end-user can filter Citi Bike trips by those which start or end in particular neighborhoods, or that occur on specific dates.
So how did we create this?

This dashboard utilizes three parameters:
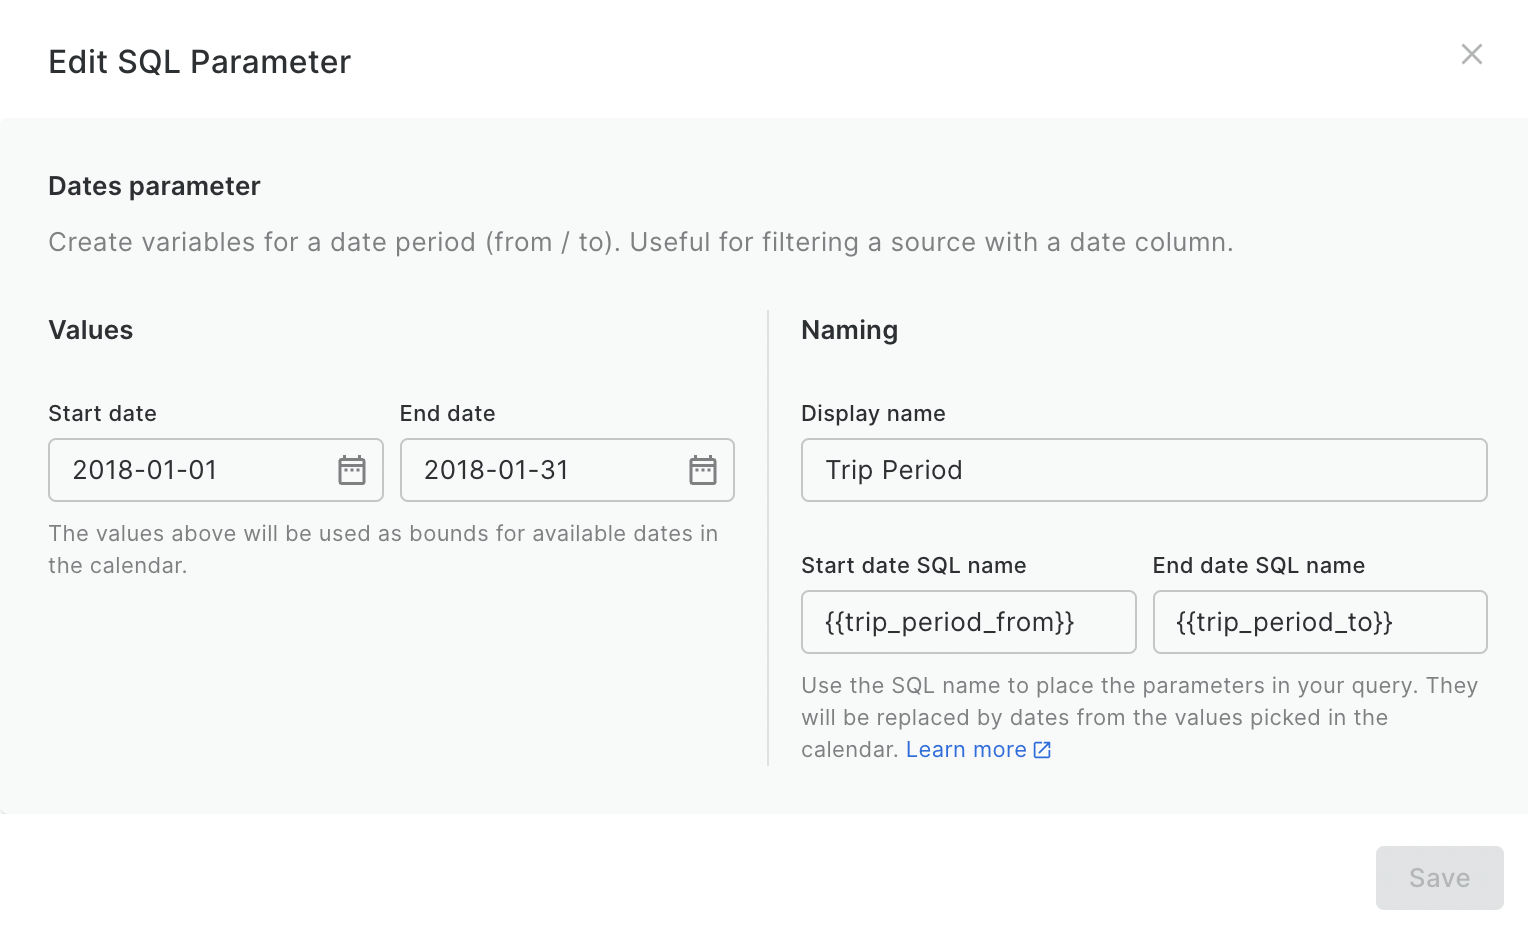
- Trip period
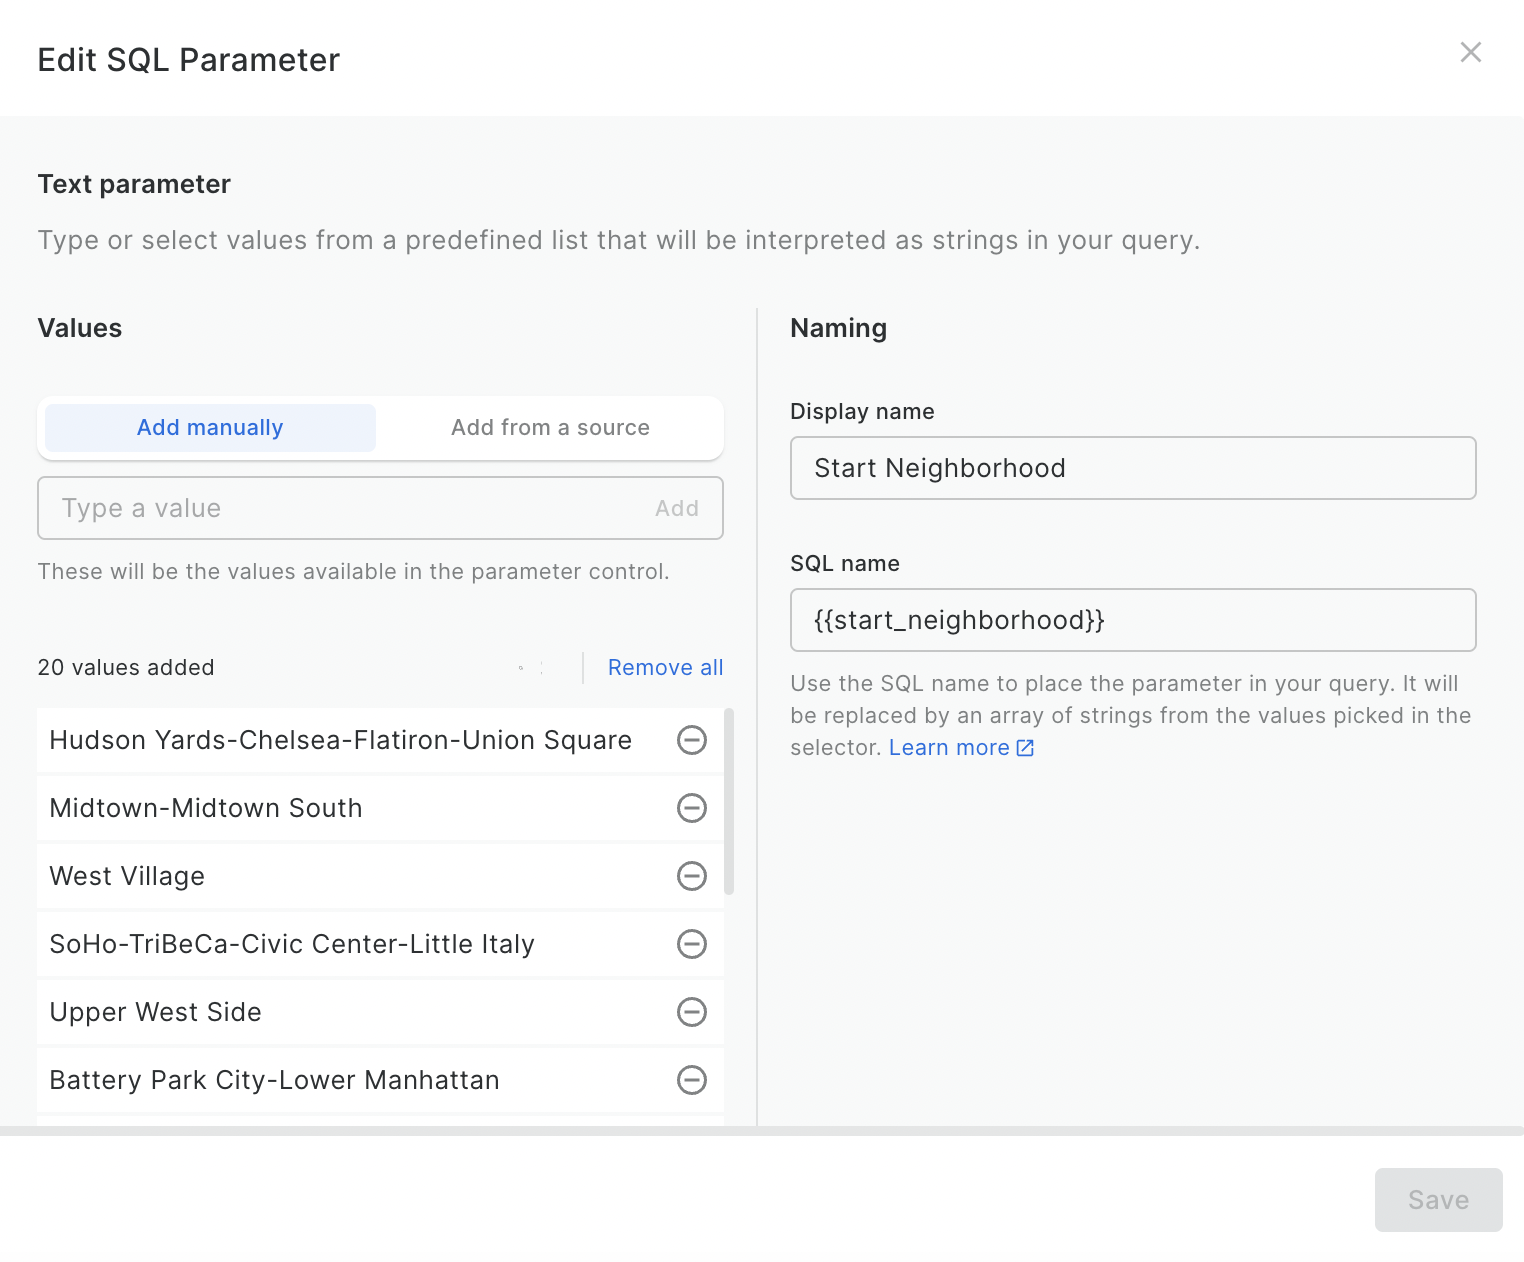
- Start neighborhood
- End neighborhood
Each of these was created as follows:
- In the sources panel, click Create a SQL Parameter.
- Select the type of parameter you require. The options are date, numeric and string.
- In the next window, choose a display name. This will generate a placeholder to use in your SQL query, such as {{start_date}}.
- In the same window, select the values which the user will be able to choose from to be used in this parameter. You can enter them manually, or automatically generate them from a data source.
Check out the example below!
You’ll now see a panel called Parameters on the right-hand side of the screen, which is where your users can interact with these. When you share your map, you’ll need to enable SQL Parameters Controls for this to work.
With the parameters set up, we need to integrate these into our SQL query. If your data is loaded into Builder as a table, you can select Source > Options (the three dots by the source name) and select “Query this table” to turn this into a query.
You can see an example of how this works below, which is our query for the layer Trip Start. In this example, we use the WHERE function to filter all trips to just those which meet the criteria defined by our end-user, based on the parameters we have just set up. We aggregate all remaining features based on the start station, using the COUNT() aggregator to count the number of trips which meet the criteria.
We would then repeat this for the Trip End layer, just changing the geometry field from the start_geom to ANY_VALUE(end_geom) AS geom.
Looking to go one step further with your analysis? Try the following:
- Popular Routes Examination, valuable for enhancing bike lane infrastructure and ensuring the availability of bikes in high-demand areas. Using the Create Routes function (check out this tutorial), you could create a layer with the optimal cycling routes between the trip start and end geometries - and repeat the process of using parameters to only display the routes between specified districts.
- Bike Availability Analysis: by assessing the balance between the number of trips which start and end at specific stations, users can make informed decisions about redistributing bikes. You could do this by adding a field which calculates the difference between the number of trips which start and end at each station, using the {{trip_period_from}} and {{trip_period_to}} parameters to allow users to filter to a required time period.
Check this out in action below! (Or open in full screen here)

SQL parameters open up a world of possibilities for dynamic data analysis, allowing you to adapt your queries and visualizations to the specific needs of your users. This reduces adjustment time, and makes data-driven decision-making more accessible and efficient.
Want to learn more about how this could work with your data? Request a demo from one of our geospatial experts today!


.png)

.png)

