How to create Google Street View pop-ups with CARTO


Did you know it’s now been over 15 years since Google Street View was launched? It’s been a truly revolutionary technology, allowing users to immerse themselves in places around the world including streets buildings - even mountaintops. And it’s not just for checking out potential holiday destinations - Google Street View has immense value to businesses. For Spatial Data Scientists it’s a brilliant tool for bringing your analysis to life. Being able to see and explore a focal location from your analysis makes it so much more impactful for your users.
If you've read our recent post “What's New in CARTO - Q2 2022” you may have seen that we’ve been making changes to our pop-up functionality. We’ve been making them far more customizable so that you can customize more of the information they display and how they display it. One of the most exciting elements of this is the ability to add images.
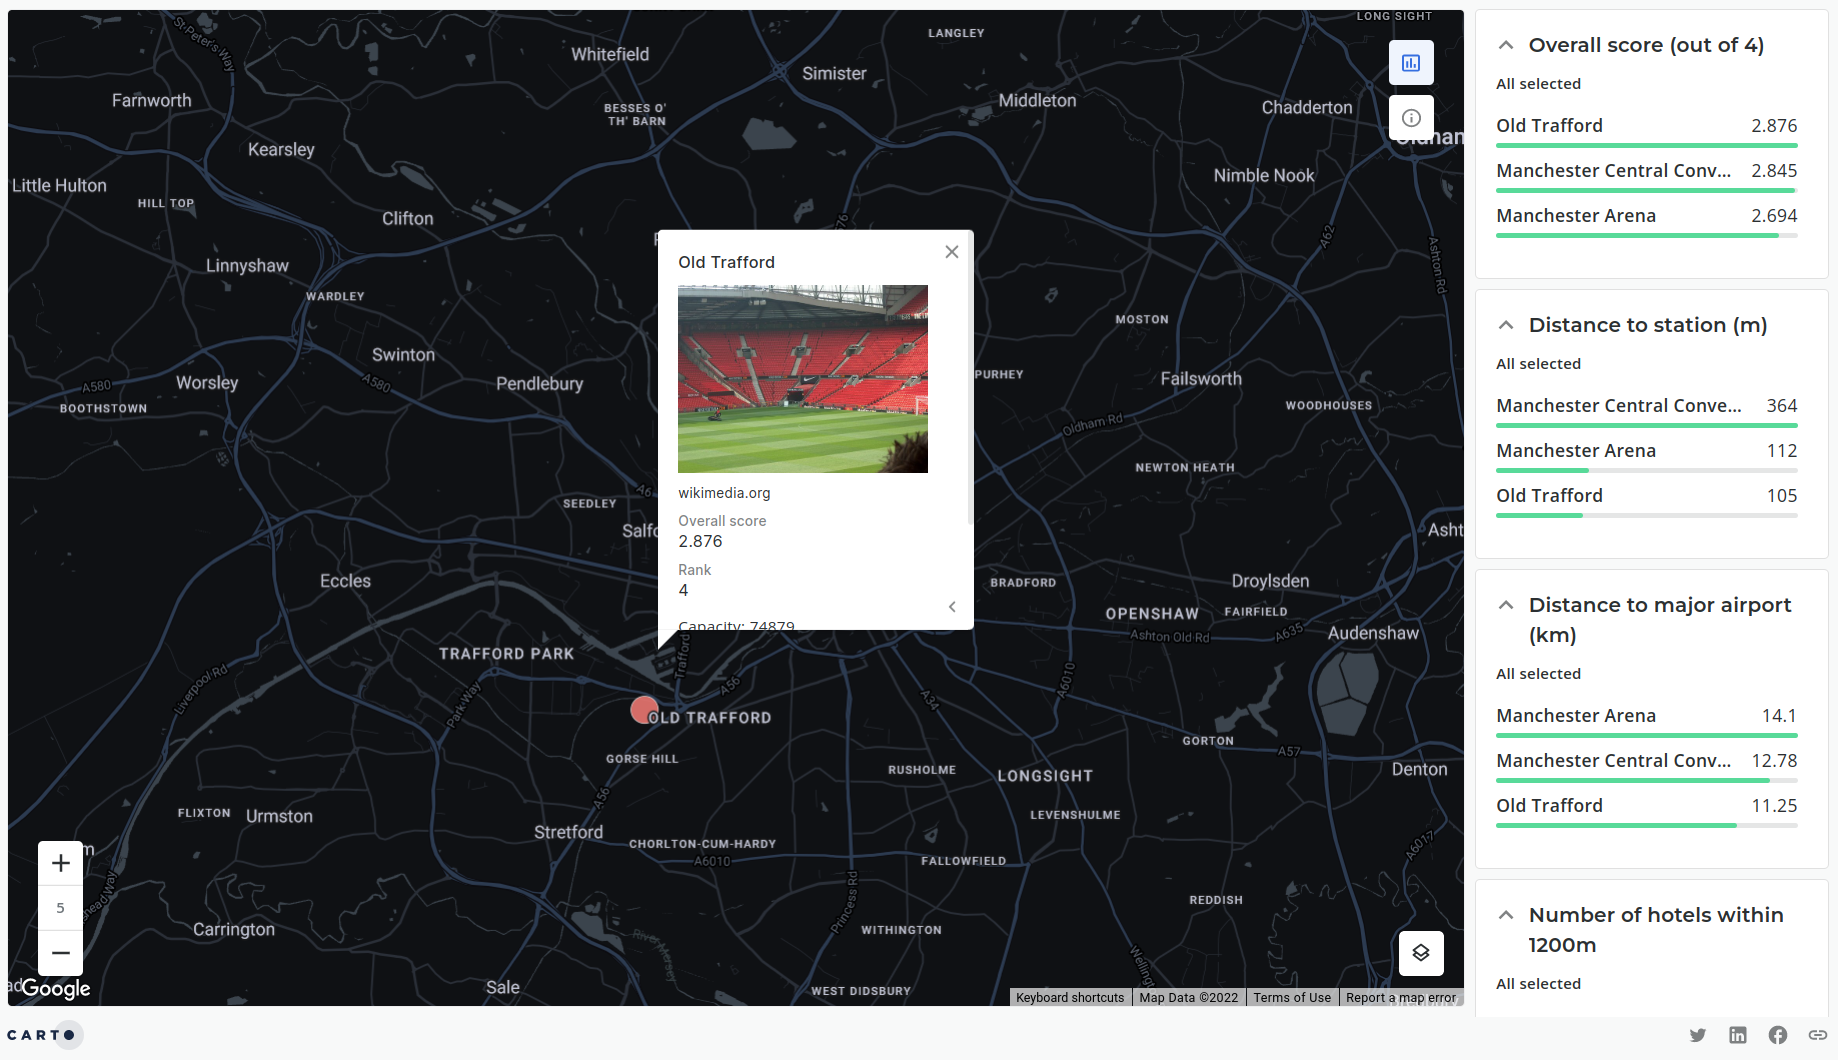
Check out this example from our recent exploration of venue suitability analysis for the Eurovision Song Contest!
In this post, we’re going to show you how you can embed Google Street View images of features on your map into your pop-ups! This can be incredibly powerful bringing your analysis to life and empowering your users to see locations as if they were looking at them in person.
Let’s do this!
Before we start…
You’ll need access to CARTO! If you don’t already have an account, why not sign up for our 14-day free trial?
You’ll also need a dataset to visualize! If you don’t have one of your own, subscribe to one of the 11 000 datasets on our Spatial Data Catalog! We’d recommend opting for something that represents a physical structure, as opposed to something more abstract like a census tract! Here are some suggestions for some free datasets to try:
- Natural Earth Airports or Ports
- OpenStreetMap Points of Interest data, accessed either from our Spatial Data Catalog or directly from Google’s BigQuery public dataset
- UK Retail Centre Boundaries - check out our recent blog to learn more about this dataset here
- Subscribe to a sample of one of our premium Points of Interest datasets
Step one: Get set up with a Google Account
To be able to access any of the Google Maps APIs, first you’ll need a Google account. Once set up head over to https://console.cloud.google.com. If you don’t already have a project set up follow the instructions to set up a new project; give it a name and set up billing (this is a requirement for using the Google Maps APIs - we’ll explain why in a moment).
Congratulations - you’re now a developer! Now let’s develop something.
Step two: Enable the Google Maps API
Go to the Navigation Menu on the left-hand side of the screen and navigate to APIs & Services > Library. Definitely come back here and explore - there’s so many exciting APIs to try out! For now search for Street View and select the Street View Static API. Click “Enable” and you’re ready!
Note: you may need to ask your account administrator to enable the “serviceusage.services.enable” permission on your Google account to be able to complete this step.
While we’re here let’s take a moment to understand the fees associated with this by opening the pricing tab. You’ll see the Google Maps API comes with 200 USD free credits for your API key per month - that’s the equivalent of about 28 500 map loads. After that you’ll be charged 7 USD/1 000 requests up to 100 000 requests and 5.60 USD/1 000 requests above that. For this reason it’s important to restrict your API key so it can only be used in certain circumstances. You can learn more about the Google Maps API pricing model here.
Please note that this API is provided managed, and charged for by an external provider (Google), and CARTO is not responsible for its performance, maintenance, or any charges incurred with respect to its use.
Step three: Access your API key
Once enabled you should now see a section of your console navigation menu dedicated to the Google Maps API. This is where you can monitor your API usage and get support as well as access your API - which we’ll do right now! Go to “Credentials” and open “Show key.”
Ta-da! Ok not the most exciting reveal. But now we’re getting to the juicy stuff…
Step four: Get set up in CARTO Builder
CARTO Builder is our cloud-native analytics and visualization platform, which you can access from your workspace under “Maps.” Create a new map, or open one you’ve created already.
Load your dataset into your map as a custom SQL query. To be able to use the Google Street View API we need variables with the longitude and latitude of each feature (if your dataset already has these columns you can load this directly as a table and skip ahead to step four). You can add these into your query as follows:
SELECT * ST_X(geom) AS longitude, ST_Y(geom) AS latitude FROM project.dataset.table

If your features are polygons or lines then you’ll need to convert your geometry to points first - you’ll most likely want the central points (centroids) of each feature for this. For example, for longitude this would read: ...ST_X(ST_CENTROID(geom)) as longitude... .
Now we’re ready to create our Google Street View pop-ups!
Step five: Configure your pop-ups
Go to the interactions pane in Builder; you’ll see pop-ups are turned off by default. Enable them for your layer. There are two options; field view mode (where you select which fields you wish to appear in the pop-up) or HTML mode which gives you far more customization options. This is where we’ll be working. However if you’re a “work smarter not harder” kind of person we’d advise selecting the fields you want in your pop-up in field view mode before switching to HTML mode.
<div class="CDB-Popup CDB-Popup--highlightFirst">
  <dl>
    <div>
      <dt>Location name</dt>
      <dd>{ {location_name} }</dd>
    </div>
    <div>
      <dt>Sub-category:{ {sub_category} }</dt>
    </div>
        <div>
      <img height="200" src="https://maps.googleapis.com/maps/api/streetview?size=400x400&location={ {latitude} },{ {longitude} }&fov=90&heading=70&pitch=0&key=myapikey&">
    </div>
  </dl>
</div>
When you switch to HTML mode, you should see something like the above. The text held within the tags are the field names (these are just standard text, so you can change them to be more legible to the user like we’ve done) whilst information specific to each feature is displayed by wrapping the name of the variables in { {brackets_like_this} }.
Now let’s add our Street View image! First, we need to construct our URL. The syntax for this is below, with the sections you’ll need to change in bold.
"https://maps.googleapis.com/maps/api/streetview?size=400x400&location={ {latitude} } { {longitude} }&fov=90&heading=70&pitch=0&key=YourAPIKey&"
- 400x400 is the image size in pixels - you can also adjust this in the HTML code to make it an ideal fit for your pop-up.
- { {latitude} } and { {longitude} } are the latitude and longitude fields we created previously; rename these if you called them something else. This will direct the API to return a Street View image which is closest to these coordinates.
- FOV stands for field of view and is measured in degrees. The maximum value allowed here is 120°, but we’d recommend sticking close to the default of 90°. This is approximately the human field of vision and so will give your user the most authentic view.
- Heading is the direction of the compass, with 0° indicating north and then moving clockwise (so due east would be 90°, etc).
- Pitch is the vertical tilt of the camera. A value of 0 is the default and replicates the viewer looking straight ahead. -90° will have the camera looking directly at the ground, and 90° will look straight into the sky. In most cases, 0 is the most appropriate.
- Your API key is what we’ve just created! Navigate back to your Google Console > Google Maps Platform > Credentials > Show API Key.
Now all that’s left to do is incorporate this into your pop-up!
- Add a new <div> tag pair before your final.
- Add an <img> tag in between these and type “src = yourURL;” (with the quote marks and the semi-colon)
- Click Apply and ENJOY
Check out the example below where we’ve also included a height specification for the image.
<div class="CDB-Popup CDB-Popup--highlightFirst">
  <dl>
    <div>
      <dt>Location name</dt>
      <dd>{ {location_name} }</dd>
    </div>
    <div>
      <dt>Sub-category:{ {sub_category} }</dt>
    </div>
        <div>
      <img height="200" src="https://maps.googleapis.com/maps/api/streetview?size=400x400&location={ {latitude} },{ {longitude} }&fov=90&heading=70&pitch=0&key=myapikey&">
    </div>
  </dl>
</div>
👇
You should now be able to see Street View images of all of your locations - how cool is that!? Why not try out further customizing your pop-ups maybe embedding some of the other features from the Google Maps API. Make sure to tag us at @CARTO so we can see the epic things you come up with!